GLP ArenaLED1 Touring handleiding
Handleiding
Je bekijkt pagina 14 van 33
www.glp.de GLP ArenaLED1 Touring
14 GLP ArenaLED1 Touring Safety and User Manual
4. Preparation for use
Warning! Read ‘Safety‘ starting on page 4 before installing the fixture.
Orientation and location
The fixture may be installed in one of the following ways:
Fastened to a surface at any angle with a bolt or other fastener passed through
the mounting yoke.
Fastened to a rigging truss or similar structure at any angle by means of a
standard GLP omega bracket and rigging clamp (or other clamp fixed to the
omega bracket).
Make sure that the front of the fixture will be at least 0.2 m / 8 in. away from
combustible materials (wood, paper, textiles, etc.) when the fixture is installed.
Make sure that there will be a minimum of 0.5 m / 1.6 ft. between the fixture and any
surface to be illuminated.
Securing the fixture with a safety cable
If you install the fixture in a location where it can cause injury or damage if it falls,
secure it with a safety cable that is approved as a secondary attachment for the
weight of the fixture.
To secure the fixture with a safety cable:
Loop a safety cable around a secure anchoring point such as a truss or fixed
structure. Take up as much slack as possible in the safety cable (by looping it
more than once around the truss, for example).
See D in Fixture overview on page 13. Fasten the safety cable to the attachment
point on the back of the fixture. Check that the safety cable will secure the
fixture if the primary attachment fails.
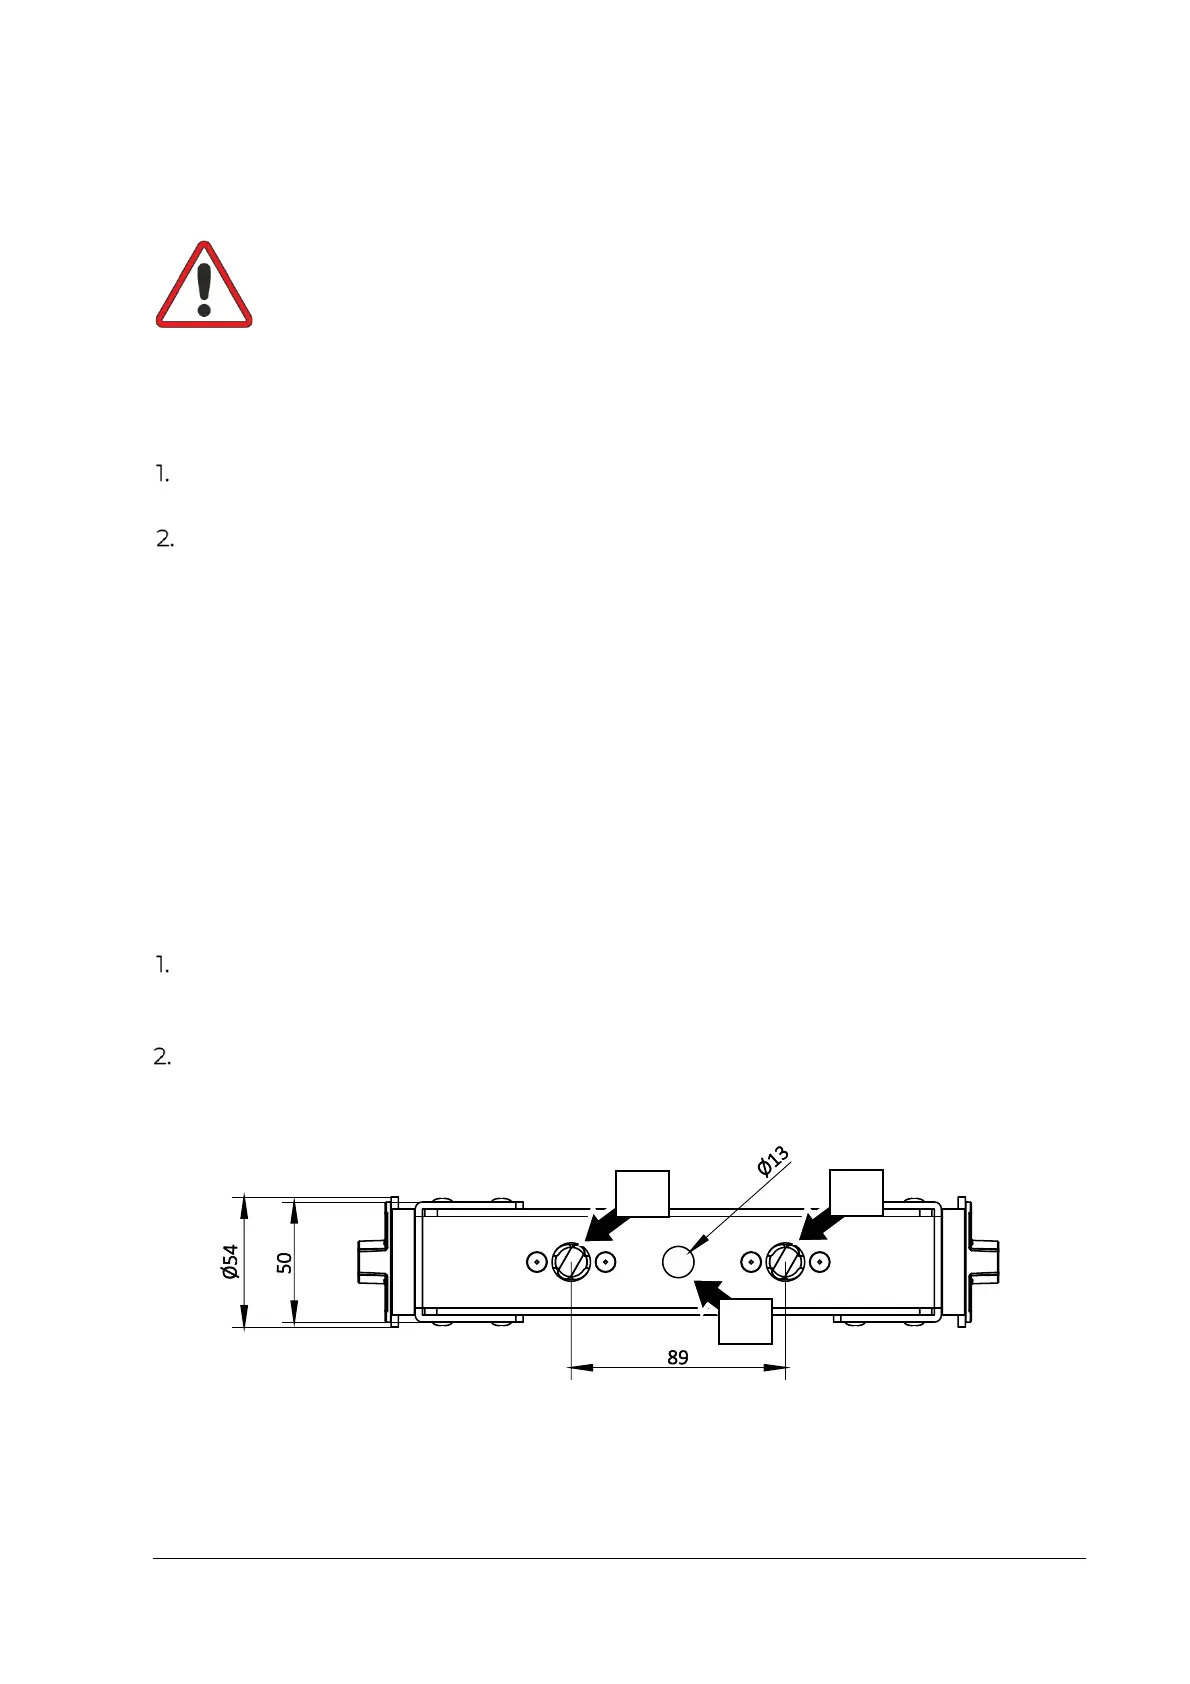
Figure 3. Attachment points in Mounting yoke
J
J
I
Bekijk gratis de handleiding van GLP ArenaLED1 Touring, stel vragen en lees de antwoorden op veelvoorkomende problemen, of gebruik onze assistent om sneller informatie in de handleiding te vinden of uitleg te krijgen over specifieke functies.
Productinformatie
| Merk | GLP |
| Model | ArenaLED1 Touring |
| Categorie | Verlichting |
| Taal | Nederlands |
| Grootte | 1825 MB |


