Furuno SCX-20 handleiding
Handleiding
Je bekijkt pagina 15 van 86
1. INSTALLATION
1-5
• DO NOT apply the supplied adhesive to the four vent holes near the name plate.
1.3.2 Required tools
The following tools should be prepared in advance for this installation.
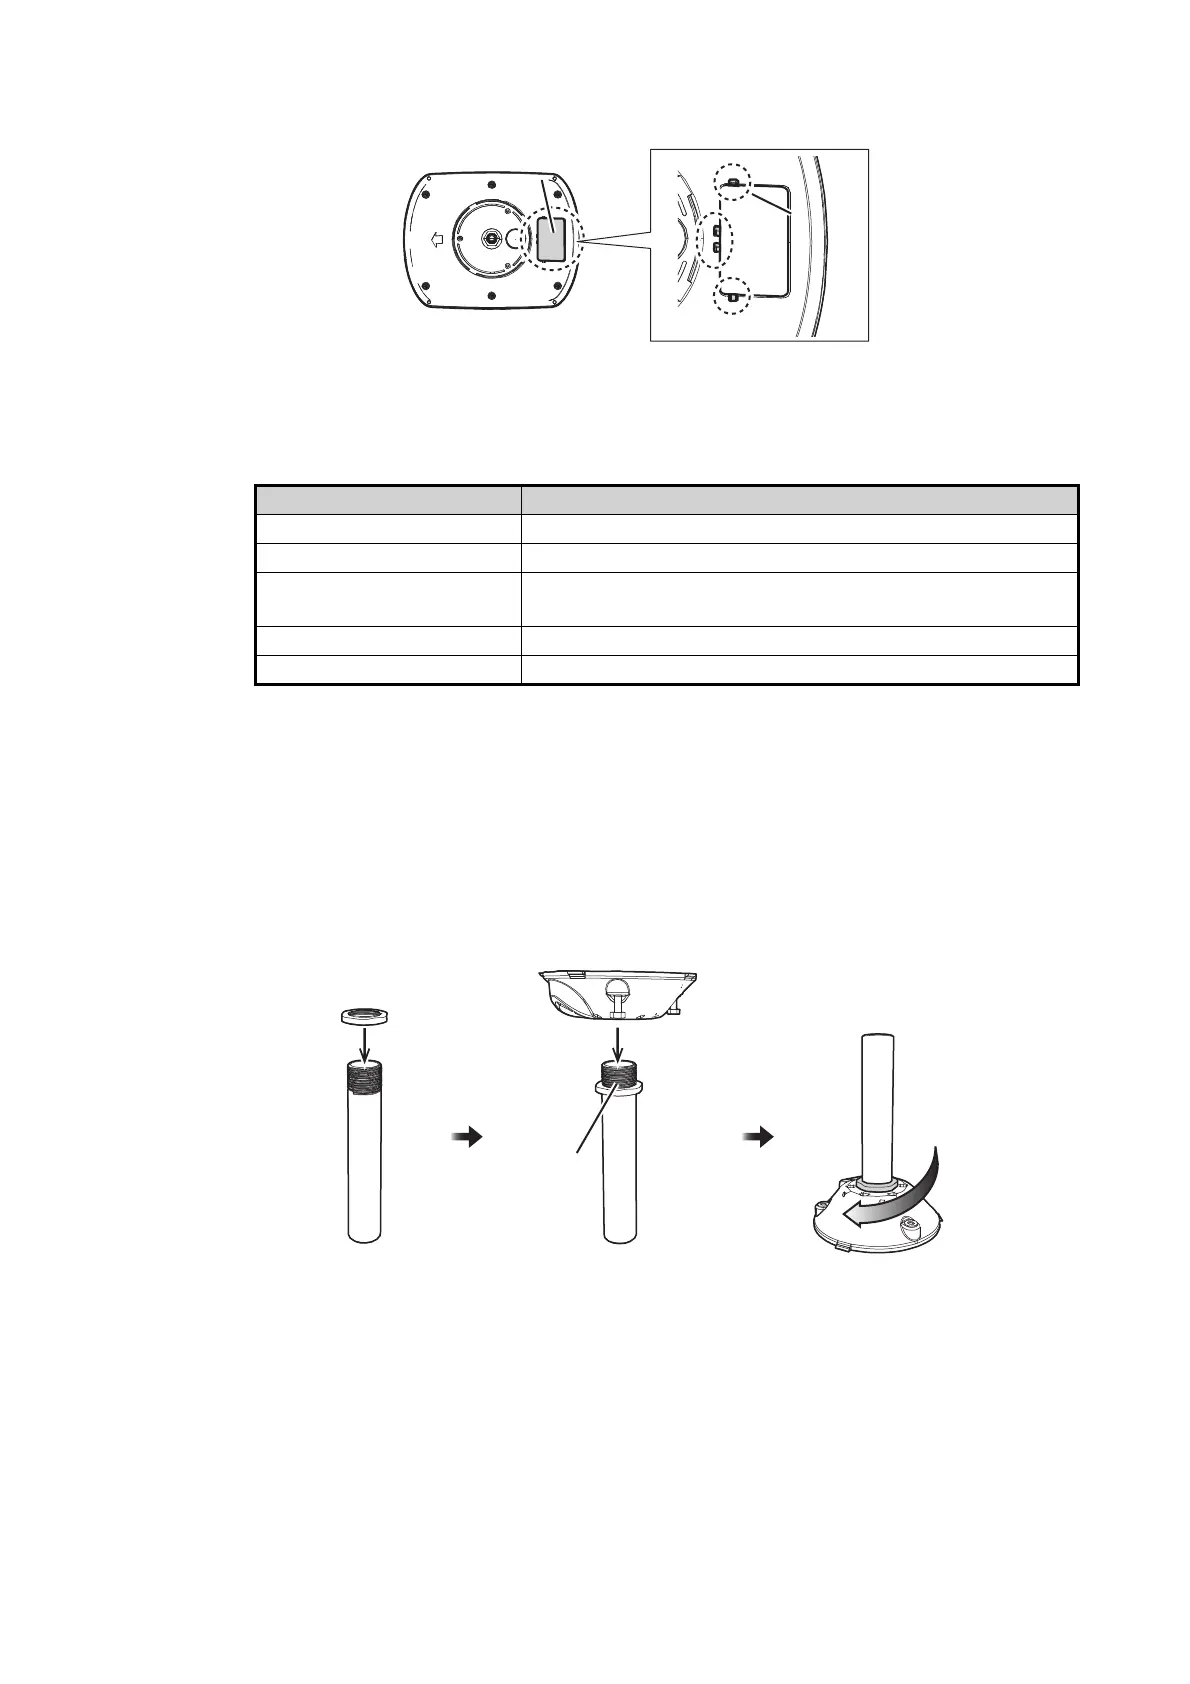
1.3.3 How to assemble the pole mount kit
1. Thread the supplied lock nut onto the supplied pipe then tighten to the end of
thread as shown in the figure below.
2. Apply the adhesive around the threads of the pipe then attach the pole mount tex-
ture to the pipe.
3. Turn the assembly upside down, hold the pipe steady and tighten the lock nut
again with a wrench. The torque must be 15 N•m.
4. Wipe off the excess adhesive.
Note: Do not cover the five drain holes (shown in the figure below) with the adhe-
sive.
Name Remarks
Phillips-head Screwdriver #2
Slotted Head Screwdriver For clamp bolts.
Wrench • For fixing the lock nut (opposite side dist. 32 mm)
• For fixing pole mount texture (opposite side dis. 8 mm))
Cable tie Two pieces (at least), for fixing the antenna cable.
Putty For securing the cable entrance of the pipe.
Bottom view of the antenna unit
Vent hole (four places)
Note:
Do not apply the
adhesive here.
Vent hole (four places)
Note:
Do not apply the
adhesive here.
Name plateName plate
Pipe
Lock
N
ut
Pole Mount
Texture
Pole Mount
Texture
Apply adhesive to threads.
Apply adhesive to threads.
Hold the pipe in place
and re-tighten the nut
with a wrench.
Hold the pipe in place
and re-tighten the nut
with a wrench.
Bekijk gratis de handleiding van Furuno SCX-20, stel vragen en lees de antwoorden op veelvoorkomende problemen, of gebruik onze assistent om sneller informatie in de handleiding te vinden of uitleg te krijgen over specifieke functies.
Productinformatie
| Merk | Furuno |
| Model | SCX-20 |
| Categorie | Niet gecategoriseerd |
| Taal | Nederlands |
| Grootte | 11676 MB |


