Furuno AR-100M handleiding
Handleiding
Je bekijkt pagina 56 van 122
2. INSTALLATION AND INITIAL SETTINGS
2-12
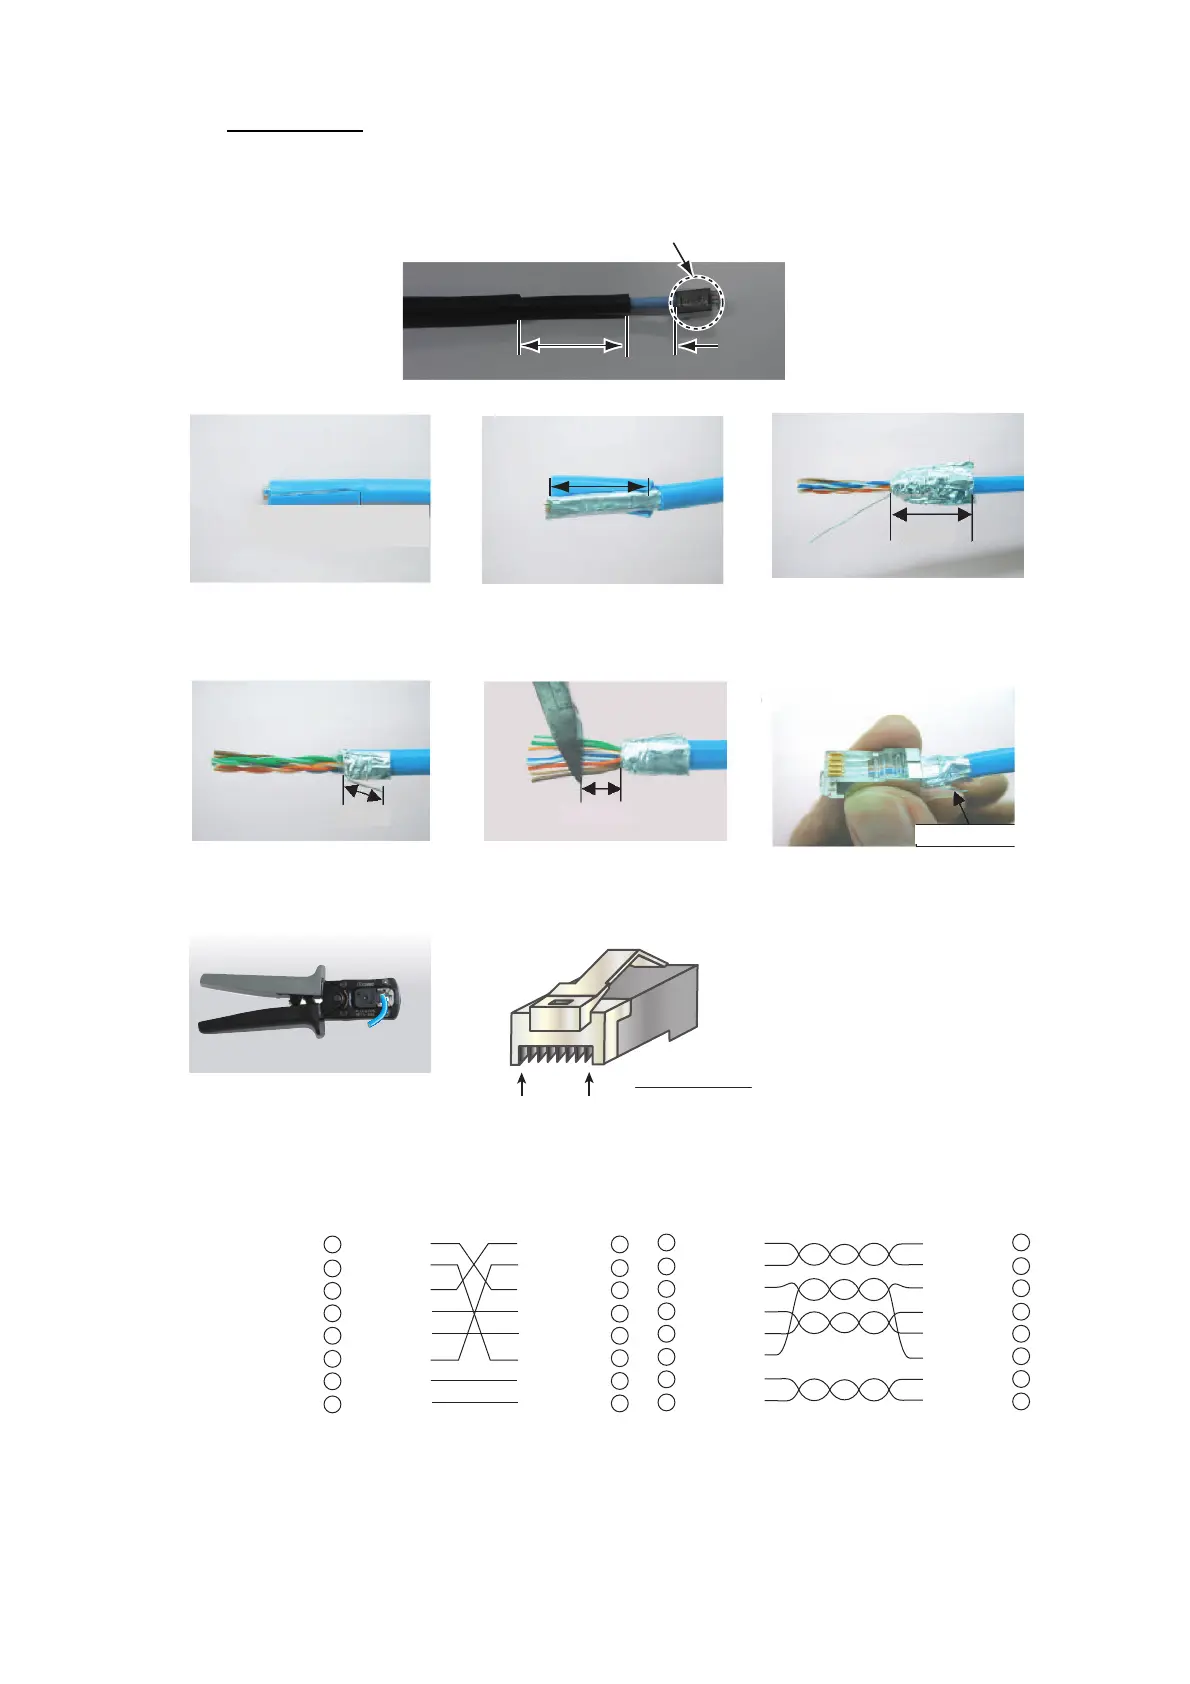
Fabrications
• LAN cable
50 mm50 mm50 mm 30 mm30 mm30 mm
Attach the modular plug as
shown in the following figure.
Attach the modular plug as
shown in the following figure.
Attach the modular plug as
shown in the following figure.
1 WHT/GRN
2 GRN
3 WHT/ORG
4 BLU
5 WHT/BLU
6 ORG
7 WHT/BRN
8 BRN
WHT/ORG 1
ORG 2
WHT/GRN 3
BLU 4
WHT/BLU 5
GRN 6
WHT/BRN 7
BRN 8
1 WHT/ORG
2 ORG
3 WHT/GRN
4 BLU
5 WHT/BLU
6 GRN
7 WHT/BRN
8 BRN
WHT/ORG 1
ORG 2
WHT/GRN 3
BLU 4
WHT/BLU 5
GRN 6
WHT/BRN 7
BRN 8
[Cross cable]
[Straight cable]
Using special crimping tool
MPT5-8AS (PANDUIT CORP.),
crimp the modular plug.
Finally check the plug visually.
Expose inner vinyl sheath.
Remove the inner vinyl sheath
by approx 25 mm. Be careful
not to damage inner shield
and cores.
Fold back the shield, wrap it
onto the inner vinyl sheath
and cut it, leaving 9 mm.
12
3
25 mm
approx. 9 mm
4
5
6
approx. 9 mm
approx. 11 mm
Drain wire
Fold back drain wire and
cut it, leaving 9 mm.
Straighten and flatten the
cores in order and cut them,
leaving 11 mm.
Insert the cable into the modular
plug so that the folded part of
the shield enters into the plug
housing. The drain wire should
be located on the tab side of
the jack.
7
1
8
Modular plug
Bekijk gratis de handleiding van Furuno AR-100M, stel vragen en lees de antwoorden op veelvoorkomende problemen, of gebruik onze assistent om sneller informatie in de handleiding te vinden of uitleg te krijgen over specifieke functies.
Productinformatie
| Merk | Furuno |
| Model | AR-100M |
| Categorie | Niet gecategoriseerd |
| Taal | Nederlands |
| Grootte | 28951 MB |


