Fluke ii915 handleiding
Handleiding
Je bekijkt pagina 9 van 24
5
Acoustic Imager
Before You Start
The battery is tested in accordance with and complies to:
• UN Manual of Tests and Criteria Part III Subsection 38.3 (ST/
SG/AC.10/11/Rev.5) – also known as the UN T19.T8 tests
• REACH
• UL2054
• IEC 62133
• ROHS
The battery has an indicator with four LEDs (25 %, 50 %, 75 %, and
100 % charge) and a test button. To check the battery charge, push
. The LEDs light to show the battery charge level. If all four LEDs
are on, the battery charge is at 100 % of available capacity.
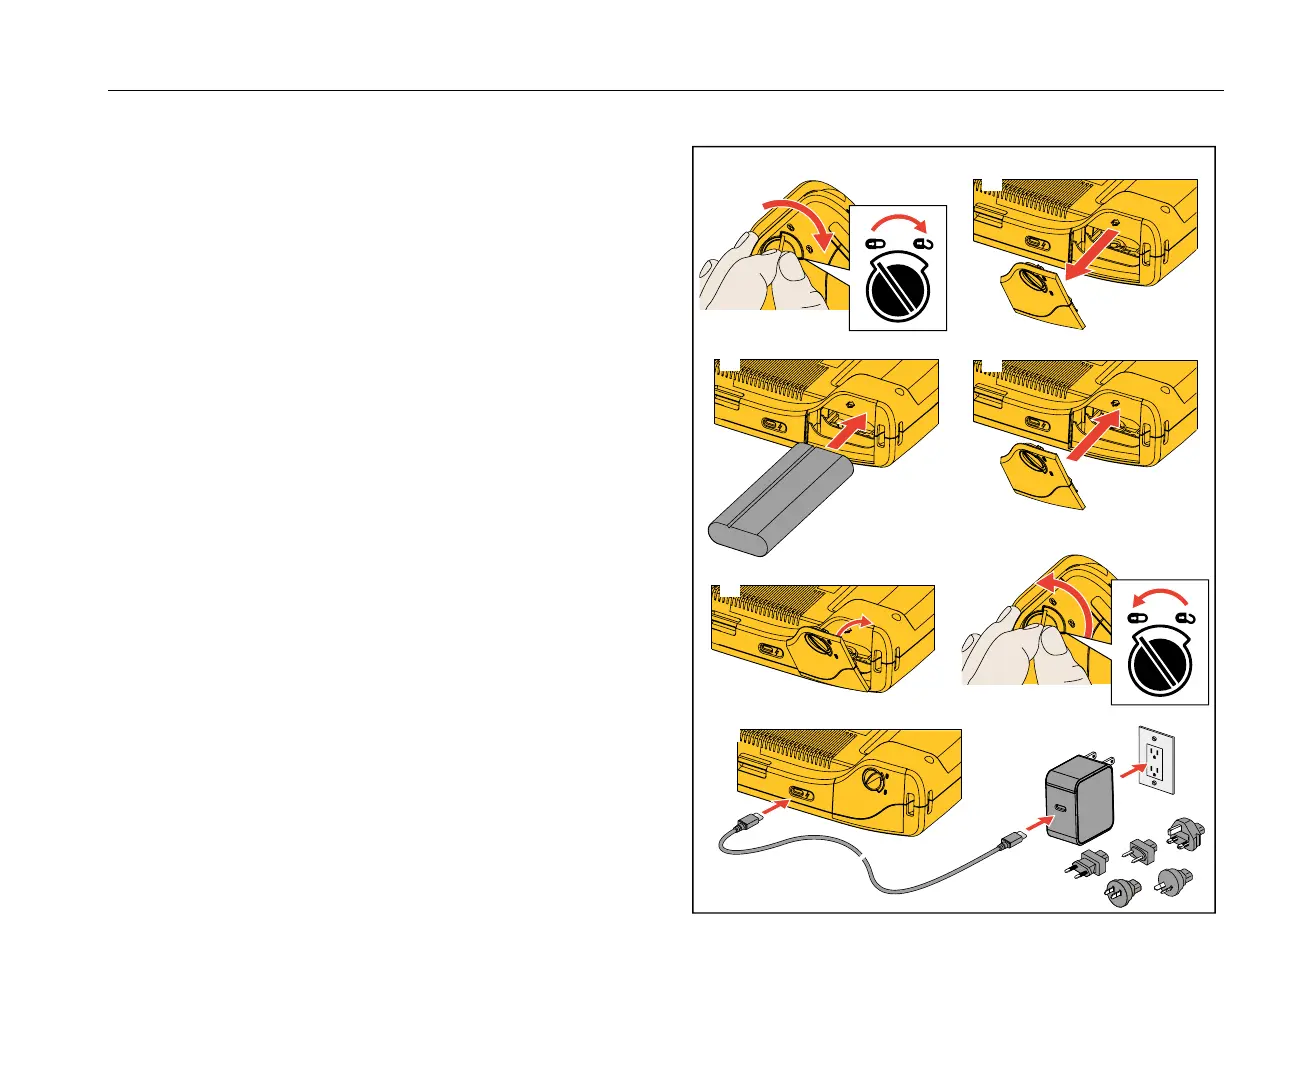
To install the battery:
1. Open the battery door. See Figure 1.
2. Insert the battery with the contact side rst.
3. Replace the battery door. Make sure that the battery tab does
not interfere with the lock and the door is rmly closed.
To charge the battery:
Connect the USB-C Charger to the ac wall outlet and connect the
USB-C cable to the USB-C charging connector next to the battery
compartment.
Figure 1. Battery
Bekijk gratis de handleiding van Fluke ii915, stel vragen en lees de antwoorden op veelvoorkomende problemen, of gebruik onze assistent om sneller informatie in de handleiding te vinden of uitleg te krijgen over specifieke functies.
Productinformatie
| Merk | Fluke |
| Model | ii915 |
| Categorie | Niet gecategoriseerd |
| Taal | Nederlands |
| Grootte | 3045 MB |


