Extron RCP 401 handleiding
Handleiding
Je bekijkt pagina 4 van 6
4
RCP 401 EU and RCP 401 MK • Setup Guide
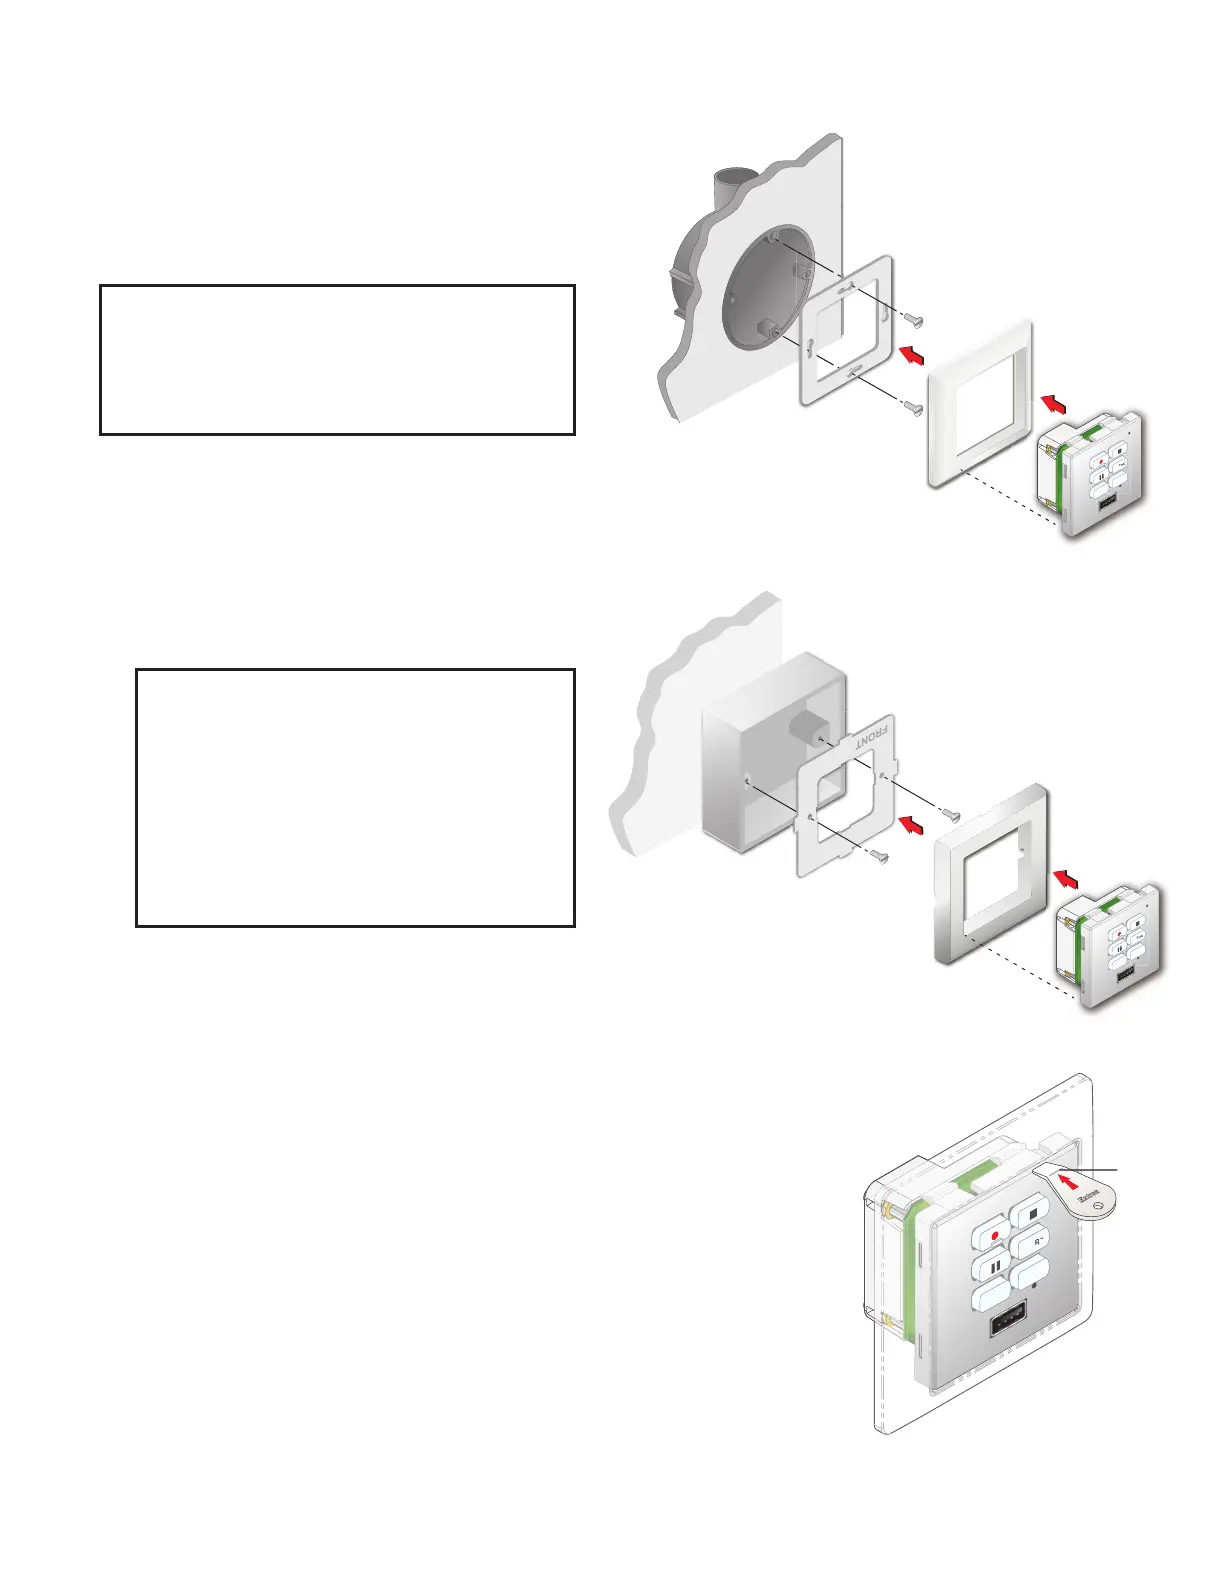
Step 3: Mount the Remote Control Plate
These button plates can be installed directly into the wall using
a standard 1-gang European junction box (RCP 401 EU) or MK
wall frame for United Kingdom junction boxes (RCP 401 MK).
The RCP 401 EU can also be mounted in a cable raceway (see
page 5).
NOTES:
• The electrical wall box must be purchased
separately.
• Install the electrical wall box by following the
instructions provided by the manufacturer.
• Use the metal bracket provided with RCP 401 unit.
The RCP 401 EU (see gure 4) and RCP 401 MK (see gure 5)
are mounted as follows:
1. Decide where the panel will be located. Take into
consideration the position of wall studs and windows that
could obstruct cable runs.
2. Install the electrical wall box (
1
) by following the
instructions provided by the manufacturer.
3. Attach the provided metal mounting bracket (
2
) using the
two provided screws.
NOTES:
• The metal brackets provided with the EU
and MK models are different and are not
interchangeable.
• Ensure the bracket is in the correct orientation
(with the side marked “Front” facing away from
the wall).
• The EU model is attached with screws at the
top and bottom.
• The MK model is attached with screws on both
the sides.
4. Disconnect power from all devices at the source and run
cables through the hole in the wall. Pass them through the
metal mounting bracket and wallplate and connect them to
the rear panel captive screw connectors (see RCP 401 Rear
Panel Features on page 2).
5. Insert the RCP 401 into the wallplate (
3
) and press the
entire assembly into the metal mounting bracket (
2
). The
RCP 401 is secured to the metal bracket by two catches
(one on each side) and holds the wallplate in place.
Removing the RCP 401
To remove the RCP 401 EU or MK from the wall, follow these
steps:
Wa
ll Box
Wallplate
RCP 401 Flex55
Metal
Mounting Bracket
e
x
55
MARK
RK
MARK
LAYOUT
Extron
Extron
Extron
Extron
SWAP
1
1
1
2
2
2
3
3
3
Figure 4. Mounting the RCP 401 EU
RCP 401 Flex55
Wall Box
Metal
Mounting Bracket
Wallplate
e
x55
MARK
RK
MAR
LAYOUT
Extron
Extron
Extron
Extron
SWAP
1
1
1
2
2
2
3
3
3
Figure 5. Mounting the RCP 401 MK
1. Disconnect the RCP 401 from the power source.
2. Use the Extron removal tool to release the catches on either side of the control plate (see
gure 6).
You may need to release both catches individually.
When the control plate is released, the wallplate comes away at the same time.
3. Remove the power cable (gure2,
A
on page 2) and the USB cable (
B
). If
necessary, cut the zip tie securing the USB cable to the cable anchor (
C
).
4. If required, undo the two screws securing the metal mounting bracket to the wall box
(gure 4,
2
).
Figure 6. Removing the RCP 401
4
5
6
MARK
R
K
MAR
LAYOUT
ExtronExtron
ExtronExtron
SWAP
Insert
to line.
Bekijk gratis de handleiding van Extron RCP 401, stel vragen en lees de antwoorden op veelvoorkomende problemen, of gebruik onze assistent om sneller informatie in de handleiding te vinden of uitleg te krijgen over specifieke functies.
Productinformatie
| Merk | Extron |
| Model | RCP 401 |
| Categorie | Niet gecategoriseerd |
| Taal | Nederlands |
| Grootte | 1447 MB |


