Extron NBP 108 D handleiding
Handleiding
Je bekijkt pagina 37 van 73
Network Button Panels • Hardware Features and Installation — Wall-mountable Models 27
3. Attach the wallplate to the NBP
• For decorator-style models: Insert the included screws through the circular holes in the wallplate and
the tabs on the NBP (see figure 30 and figure 31 on page 25). Hand tighten the screws using a flat
bladed screwdriver until snug.
• For US gang models: Align the faceplate openings with the buttons, knob, and LEDs, and place the
faceplate against the unit (see figure 32 and figure 33 on the previous page). The magnetic catches
fasten the faceplate onto the front of the unit.
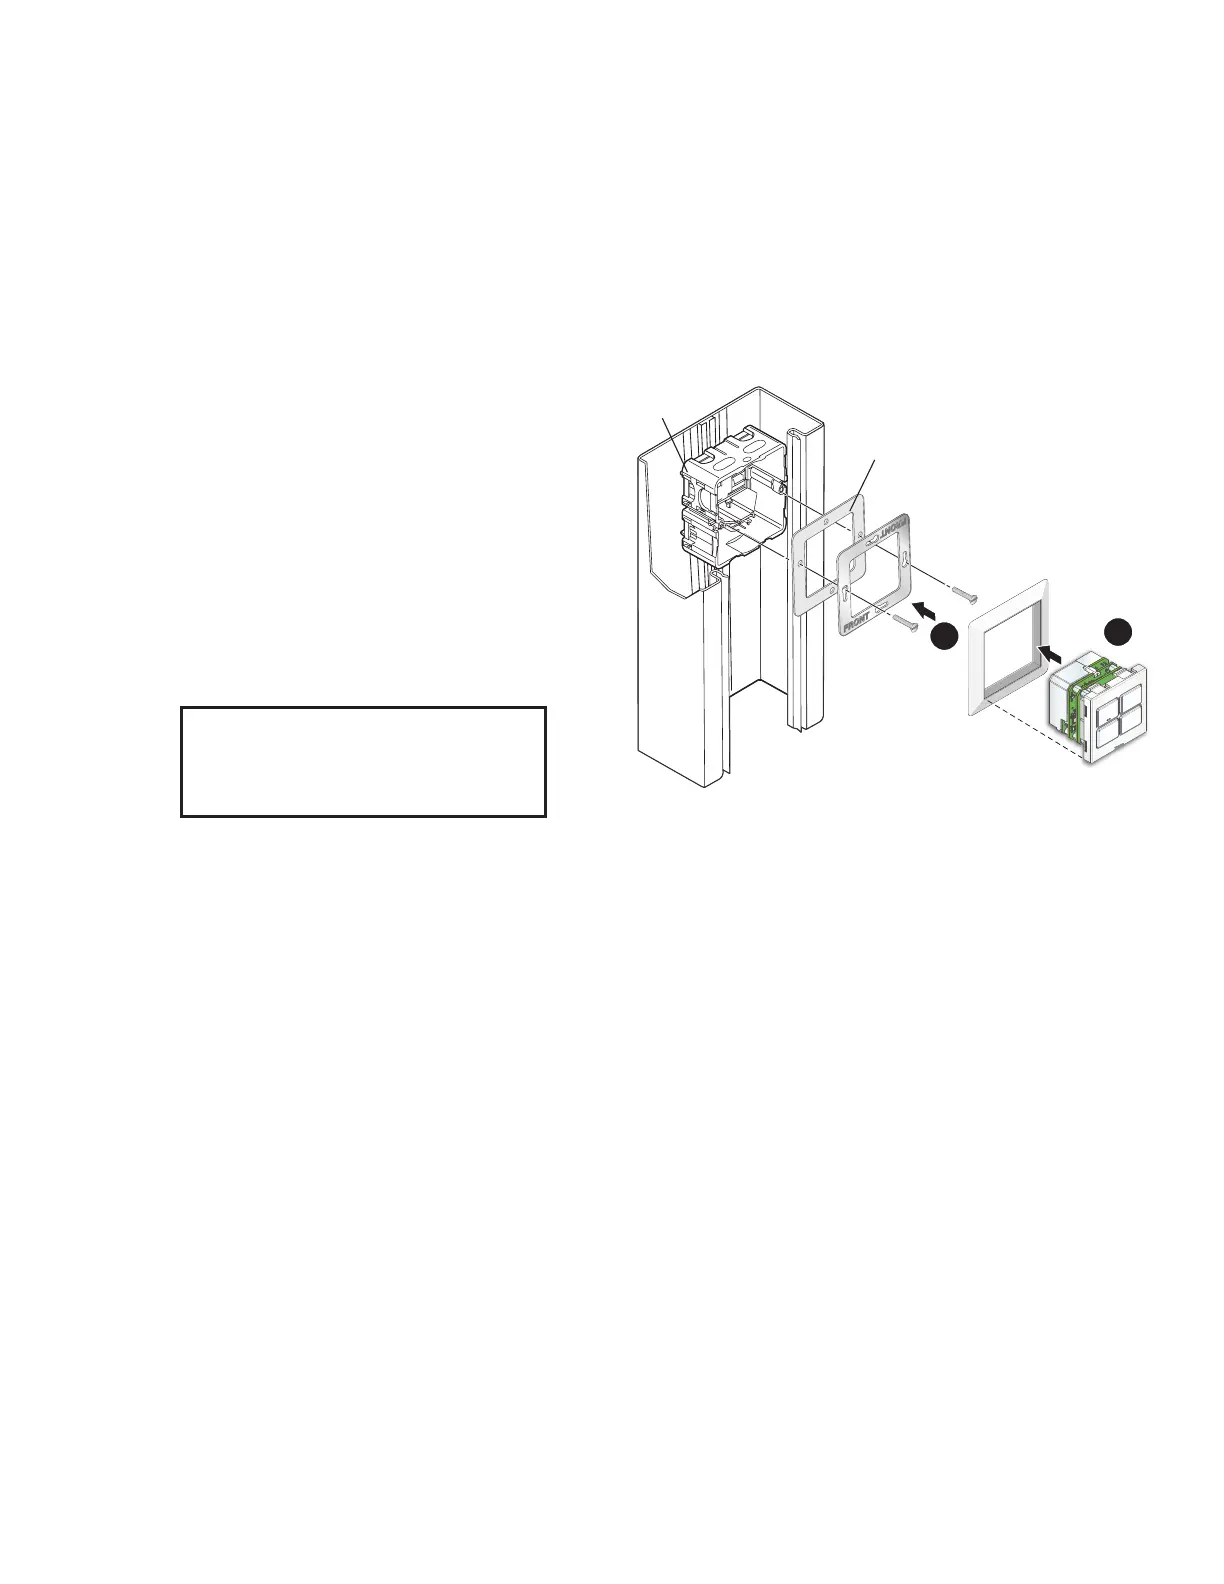
EU Models
Mount the EU models as follows:
1. Align the NBP EU wallplate to the
mounting bracket (metal), which you
attached to the mounting surface during
site preparation (see gure 34,
1
).
2. Insert the cabled NBP EU (
2
) into the
wallplate. Press the entire assembly into
the metal bracket until the tabs on either
side of the unit snap into place. The
NBP EU is now secured to the metal
bracket by two catches (one on each
side) that hold the wallplate in place.
NOTE: To remove the unit from the
wallplate after installation, see
Removing the NBP EU from the
Mounting Surface on page 60.
Rev. E: Deleted
model names.
Cable Raceway
Spacer
Metal Mounting
Bracket
Wallplate
Junction Box
2
1
SOURCE
1
SOURCE
2
SOURCE
3
MUTE
NBP 104 EU
Figure 34. Mounting the EU Models
34
Rev. G: Added
EU mounting
material.
Bekijk gratis de handleiding van Extron NBP 108 D, stel vragen en lees de antwoorden op veelvoorkomende problemen, of gebruik onze assistent om sneller informatie in de handleiding te vinden of uitleg te krijgen over specifieke functies.
Productinformatie
| Merk | Extron |
| Model | NBP 108 D |
| Categorie | Niet gecategoriseerd |
| Taal | Nederlands |
| Grootte | 12926 MB |


