Extron MLC Plus 84 EU handleiding
Handleiding
Je bekijkt pagina 25 van 58
MLC Plus 84 Series • Hardware Features and Installation 17
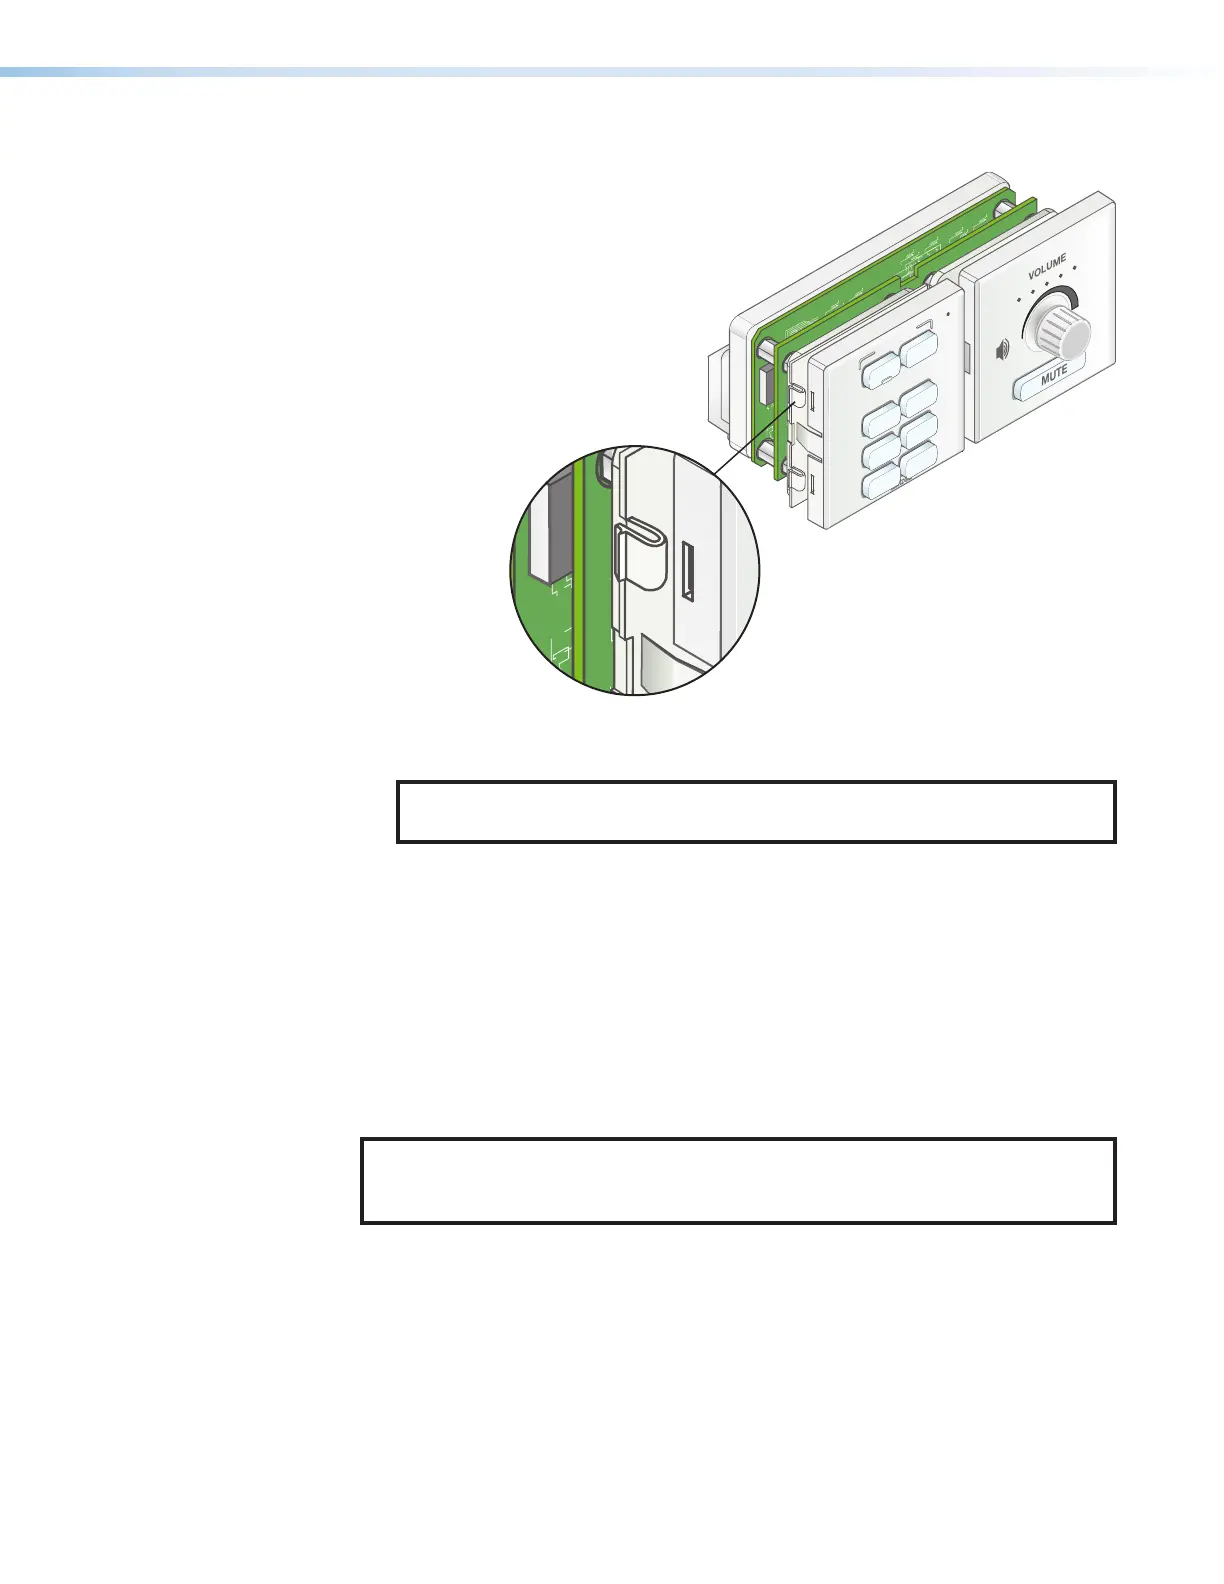
4. Reattach the faceplate to the controller as follows:
a. Align the two EU or MK mounting tabs on the sides
of the faceplate with the slots on the sides of
MLCPlus84EU or MK. Align the eight
faceplate mounting tabs (shown in
the inset in figure17) on the
MLCPlus84 with the
corresponding slots in
the sides of the
faceplates.
b. Gently but firmly press the faceplate against the MLCPlus84 until the tabs are all
inserted into the slots and the ridge on each tab snaps into place in the faceplate.
NOTE: It is important to make sure that ALL eight tabs are securely
snapped into place.
c. If reattaching the volume control faceplate:
1. Turn the shaft of the knob until the set screw is visible through the notch.
2. Lower the knob onto the shaft to the desired or lowest position, leaving room
so the knob is not rubbing on the faceplate.
3. Use the small Allen wrench to tighten the set screw to secure the knob.
Installation Step 4: Cable All Devices
1. Cable devices to the controller (see Rear and Side Panel Features and Cabling on
page18). Use the wiring diagrams in this section as a guide.
NOTE: Most examples on the following pages show the MLCPlus84D. However,
connector wiring and port functions are identical for all models. The EU and MK
models are identical to each other except for mounting hardware.
2. Connect power cords and power on all the devices.
VOLUME
MUTE
DISPLAY
OFF
ON
PC
DOC
CAM
LAPTOP
1
LAPTOP
2
HDMI
VGA
Figure 17. Aligning and Reattaching
the Faceplates
Bekijk gratis de handleiding van Extron MLC Plus 84 EU, stel vragen en lees de antwoorden op veelvoorkomende problemen, of gebruik onze assistent om sneller informatie in de handleiding te vinden of uitleg te krijgen over specifieke functies.
Productinformatie
| Merk | Extron |
| Model | MLC Plus 84 EU |
| Categorie | Niet gecategoriseerd |
| Taal | Nederlands |
| Grootte | 9928 MB |


