Extron ACP 106 D handleiding
Handleiding
Je bekijkt pagina 2 van 8
2
ACP 106 D • Setup Guide (Continued)
Step 2: Prepare the Installation Site
ATTENTION:
• Installation and service must be performed by authorized personnel only.
• L’installation et l’entretien doivent être effectués par le personnel autorisé uniquement.
• Extron recommends installing the ACP 106 D into a grounded, UL Listed electrical junction box.
• Extron recommande d’installer le ACP 106 D dans un boîtier d’encastrement électrique mis à la terre, listé UL.
• If the ACP 106 D will be installed into fine furniture, it is best to hire a licensed, bonded craftsperson to cut the access
hole and perform the physical installation so the surface will not be damaged.
• S’il est prévu d’installer le ACP 106 D dans du beau mobilier, il est préférable de faire appel à un artisan autorisé et
qualifié pour couper le trou d’accès et réaliser l’installation de telle façon que la surface ne soit pas endommagée.
• Follow all national and local building and electrical codes that apply to the installation site.
• Respectez tous les codes électriques et du bâtiment, nationaux et locaux, qui s’appliquent au site de l’installation.
NOTE: For the installation to meet UL requirements and to comply with National Electrical Code (NEC), the ACP 106 D must
be installed in a UL Listed junction box. The end user or installer must furnish the junction box. It is not included with the
ACP106 D.
Americans with Disabilities ACT (ADA) Compliance
When planning where to install these devices, consider factors affecting accessibility of the button panel such as height
from the oor, distance from obstructions, and how far a user must reach to press the buttons. For guidelines, see sections
307 (“Protruding Objects”) and 308 (“Reach Ranges”) of the 2010 ADA Standards for Accessible Design available at
http://www.ada.gov/regs2010/2010ADAStandards/2010ADAStandards.pdf.
Site Preparation
Extron offers an assortment of mud rings, optional ULListed in-wall junction boxes, external wall boxes (EWBs), and surface or
tabletop mounting boxes for use with the ACP button panels. The ACP 106 D is a US 1-gang size device.
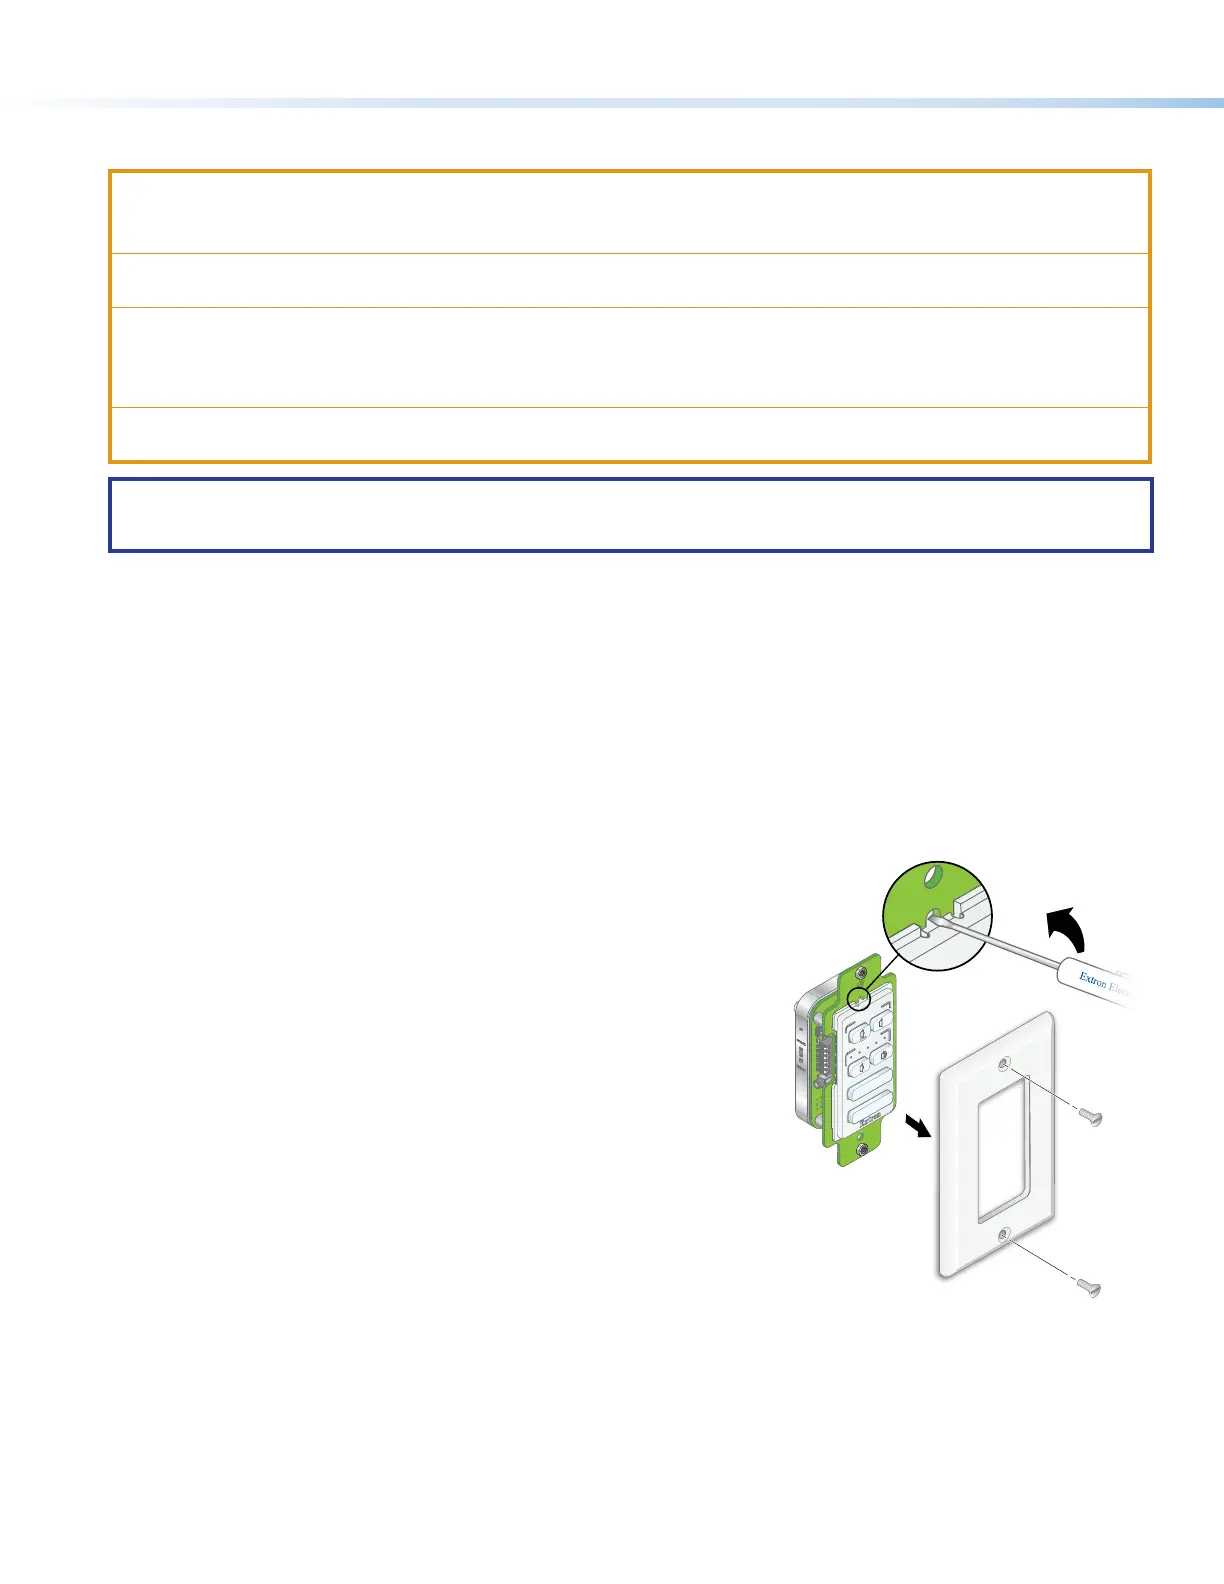
Step 3: Removing the Plastic Faceplate, Button Panel, and Changing the Buttons
The plastic faceplate and buttons can be replaced. Additional buttons ship with the
device and others can be ordered from www.extron.com.
To change the buttons:
1. Remove the two screws holding the plastic faceplate to the metal mounting
plate and separate the faceplate from the button plate (see
1
in the gure to
the right).
2. Insert a small at-bladed screw driver into the notch at the top of the button
plate. Release the catch holding the button plate to the metal mounting plate
(
2
).
3. Repeat step 2 to release the catch at the bottom of the plate.
4. Tilt the top of the button plate forward as it is removed to prevent the buttons
from falling out.
Extron
VOLUME
MUTE
X
MIC
PROGRAM
ACP 106 D
Face plate
1
2
Bekijk gratis de handleiding van Extron ACP 106 D, stel vragen en lees de antwoorden op veelvoorkomende problemen, of gebruik onze assistent om sneller informatie in de handleiding te vinden of uitleg te krijgen over specifieke functies.
Productinformatie
| Merk | Extron |
| Model | ACP 106 D |
| Categorie | Niet gecategoriseerd |
| Taal | Nederlands |
| Grootte | 1609 MB |


