Estella 348PEM9D116 handleiding
Handleiding
Je bekijkt pagina 14 van 16
www.EstellaEquipment.com14
USER MANUAL
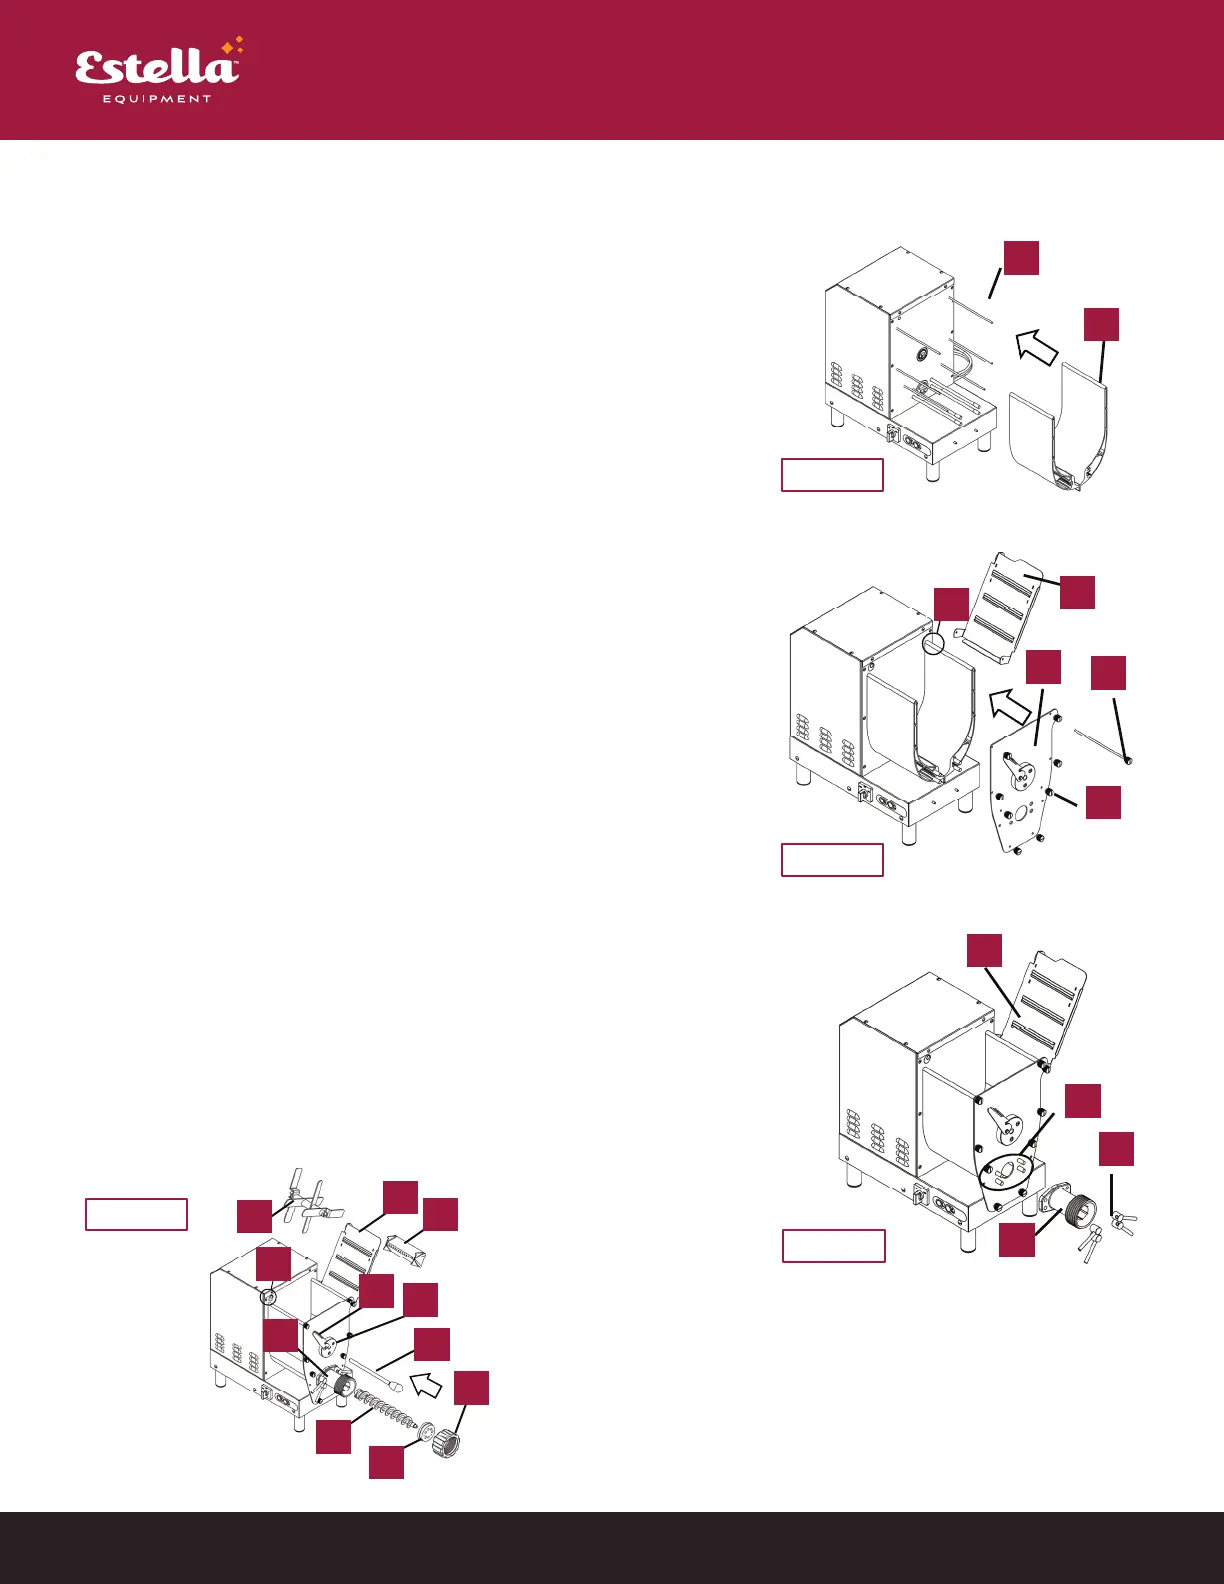
Follow these operations to reassemble the bowl correctly:
REASSEMBLING THE BOWL (FIG. 14)
After having centered the bowl (15) correctly with the 9 pins (16),
use two hands to push it into position until it is fully in contact with
the casing.
REASSEMBLING THE BOWL FRONT PANEL (FIG. 14 & 15)
To reassemble the front panel (14) after having centered it
correctly with the 9 pins (16), hold it still with one hand and push it
towards the bowl (15) until it stops; then fasten it by tightening the
8 knobs (13).
REASSEMBLING THE LID (FIG. 15)
To reassemble the lid (2), insert the knob (12) in the 2 holes on the
side flaps of the lid. Position the lid on axis with the threaded hole
(A) on the casing. Tighten the knob (12) until the lid is completely
fastened.
REASSEMBLING THE COUPLINGS (FIG. 15 & 16)
To reassemble the coupling (11), align it to the 4 M8 bars (17), then
push it until it stops against the front panel (14) and fasten the
whole by tightening the 4 bolts (10) while holding the coupling
with one hand and making sure that the parts are correctly
aligned.
Insert
the screw (9) inside the coupling (11) by pushing completely
inside and making sure that the rear part of the screw is correctly
coupled with the drive pin inside the bowl. Insert the die (8) in
the pin on the screw and tighten the ring nut (7) by rotating it
clockwise.
REASSEMBLING THE BOWL
REASSEMBLING THE SCREW (FIG. 17)
.
15
16
12
2
13
14
A
10
11
17
14
16
15
2
12
13
14
17
10
11
14
A
FIG. 14
FIG. 15
FIG. 16
1
2
3
4
5
11
7
8
9
18
B
5
2
1
3
18
4
7
11
9
8
B
FIG. 17
Bekijk gratis de handleiding van Estella 348PEM9D116, stel vragen en lees de antwoorden op veelvoorkomende problemen, of gebruik onze assistent om sneller informatie in de handleiding te vinden of uitleg te krijgen over specifieke functies.
Productinformatie
| Merk | Estella |
| Model | 348PEM9D116 |
| Categorie | Niet gecategoriseerd |
| Taal | Nederlands |
| Grootte | 2688 MB |

