Escort Redline 360c Ci handleiding
Handleiding
Je bekijkt pagina 10 van 18
Installation
Installation
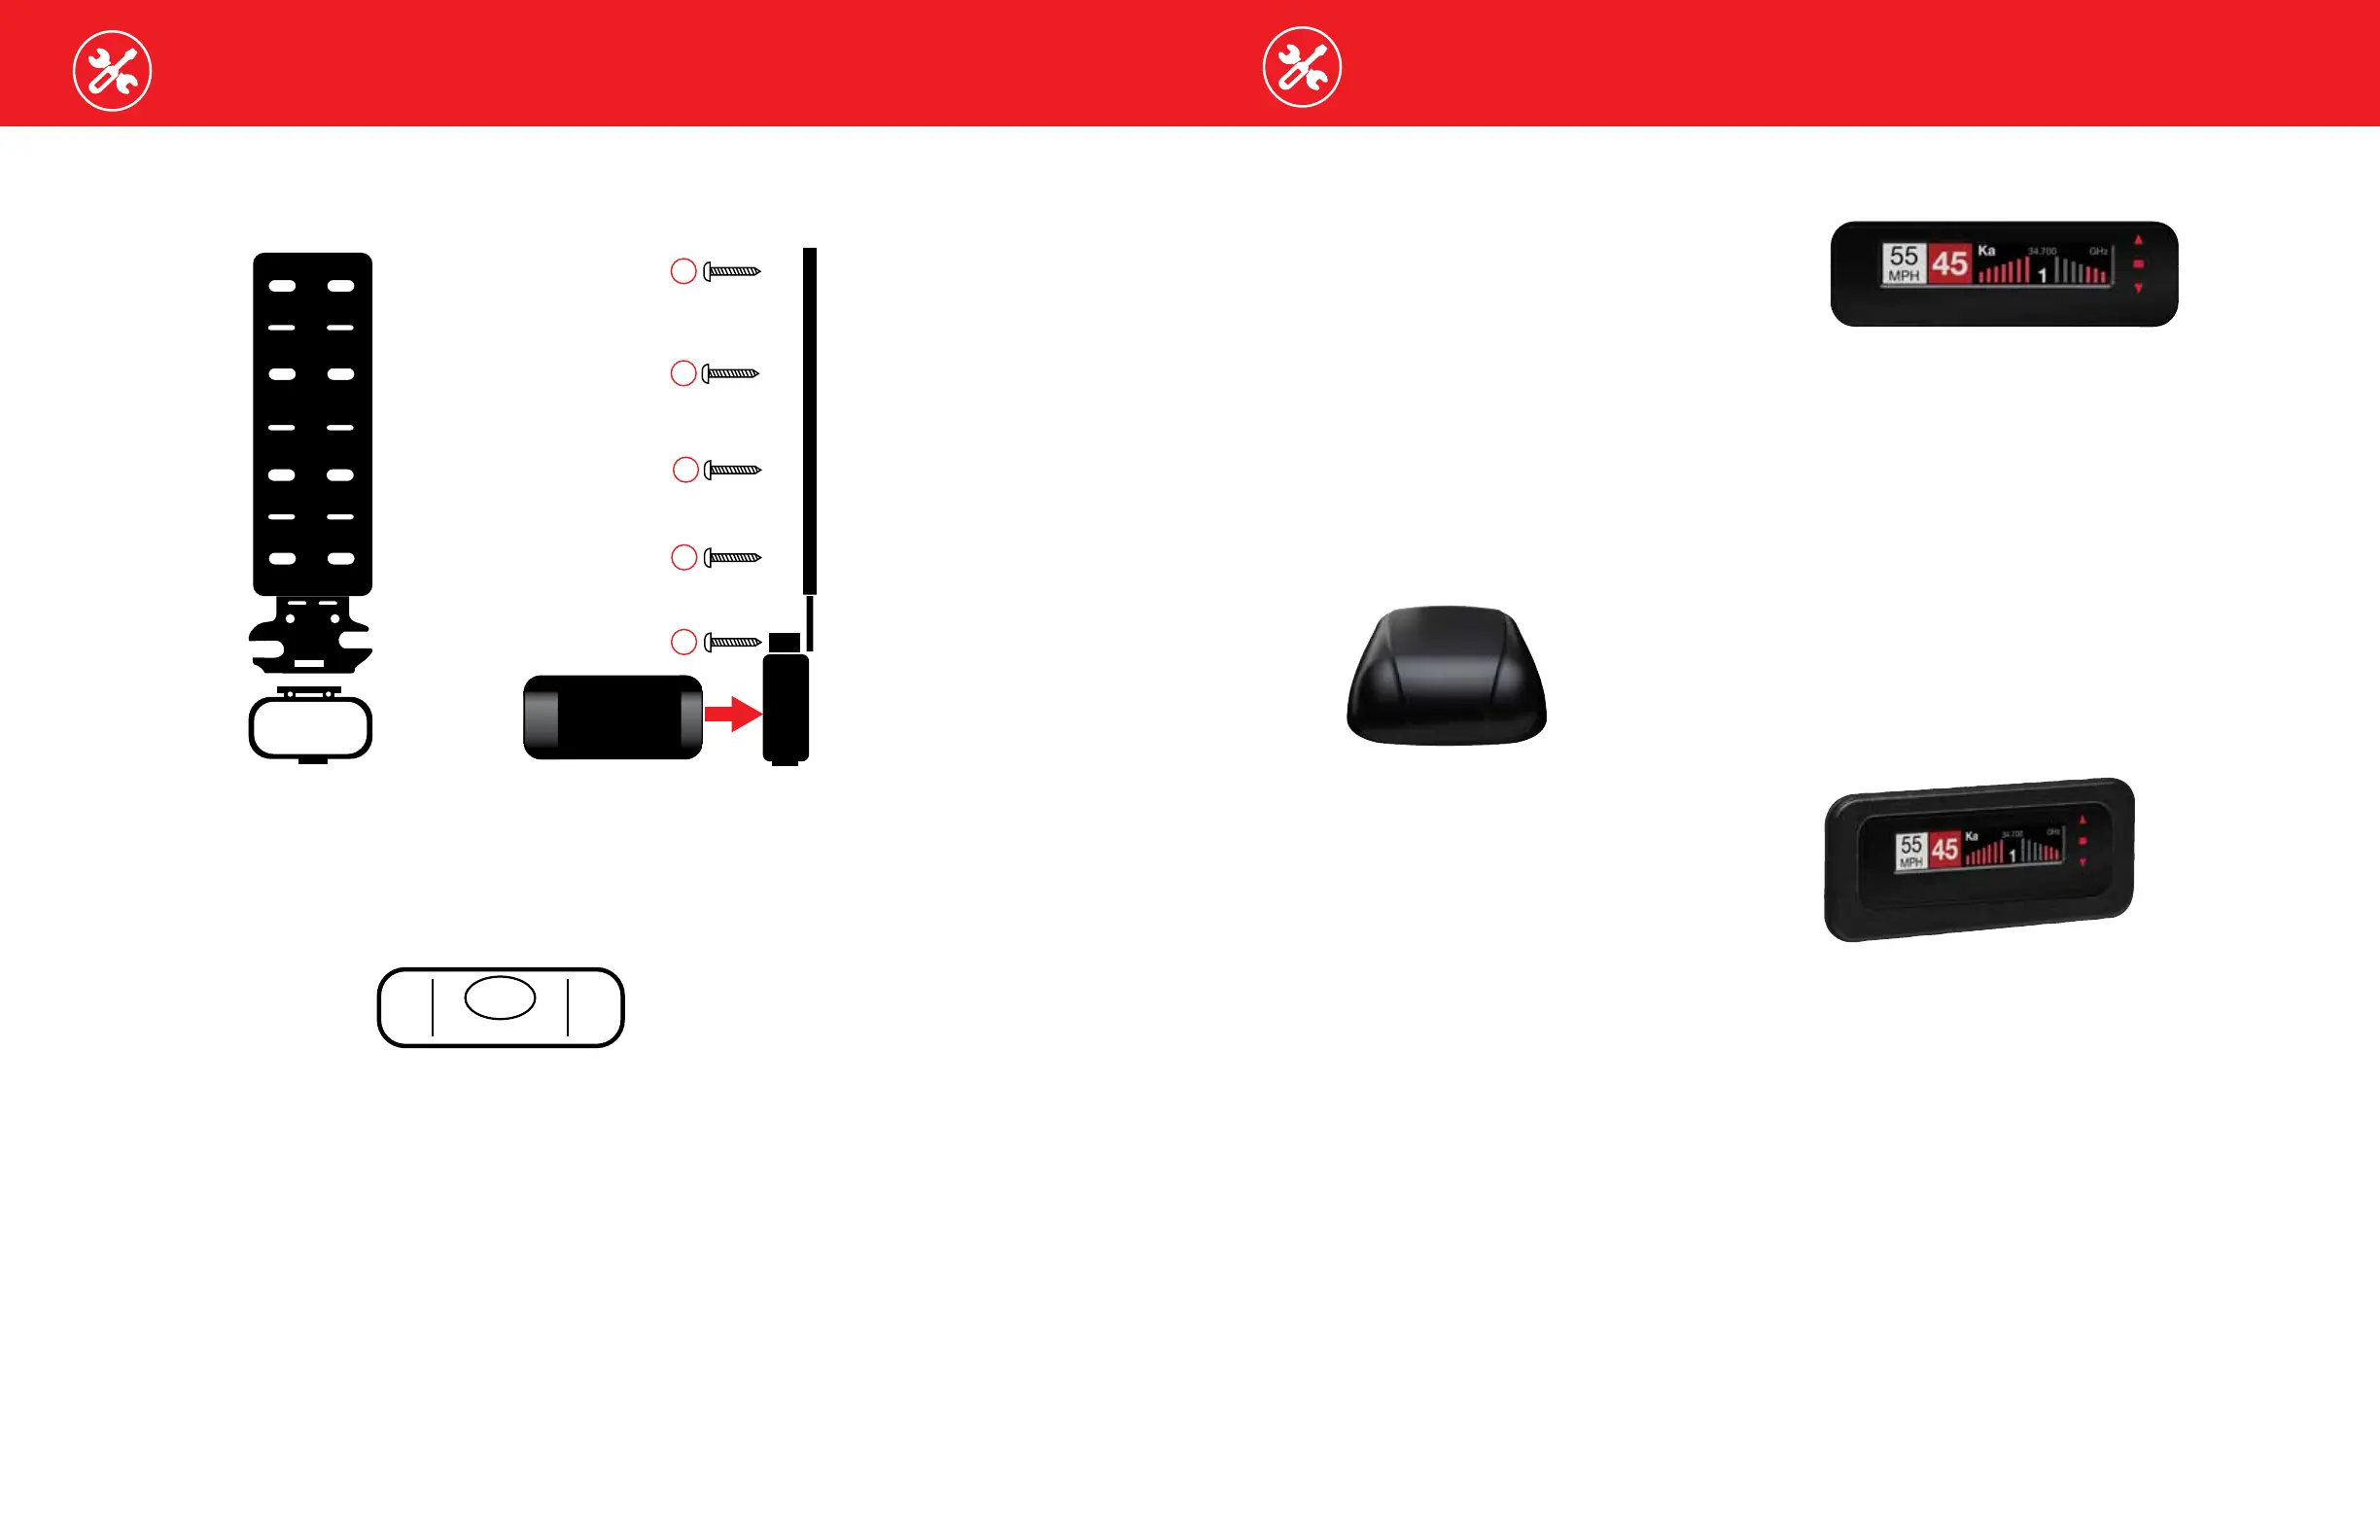
1 Snap mounting bracket onto sensor and install the included bolts but do not tighten them.
If the bolts do not thread into the sensor then you have the bracket on backwards.
2 Check front alignment and mount the sensor to a solid surface of the vehicle.
3 Use the supplied bubble level to ensure the sensor is parallel to the road and tighten the
sensor’s mounting bracket bolts.
4 Repeat for additional sensor(s).
IMPORTANT! The Shifter VX sensors are shipped in “receive only” mode. Shifting must be enabled in
the bands settings. See the Preferences section of the Owner’s Manual.
Rear Laser Shifter VX Sensors (optional on Redline Ci-c)
Follow instructions above to install rear sensors. See illustrations on pages 12 and 13 for positioning.
2
2
2
2
2
2
2
2
2
2
2
2
2
2
2
18 19
Securing Connectors with Shrink Tube
Once you’ve installed all components properly and
tested to ensure all parts are working properly, use
cable ties to fasten sensor cables to a solid surface,
keeping them away from heat and any moving
parts. It is advisable to use the supplied heatshrink
tubes to protect connectors against water, moisture,
dust, etc.
IMPORTANT! The Shifter VX sensors are shipped
in “receive only” mode. Shifting must be enabled in
the bands settings. See the Preferences section of
the Owner’s Manual.
GPS Antenna (Yellow Shrink)
1
Determine the best location for the GPS
antenna. The GPS Antenna requires a clear view
of the sky. The magnetic base can be used on
most vehicles to mount to the roof of the car
or the trunk lid. It can also be mounted to the
dashboard or rear deck using double-sided tape.
2 Mount the GPS Antenna, being sure that roof
racks or other obstructions do not block its view
of the GPS satellites.
3 Locate a suitable entry point into the vehicle.
Refer to the Installation Tips section for locating
a suitable entry point.
4 Route the cable through the entry point and
secure along its path. If mounting near the front
or rear window, it is usually possible to tuck the
cable under the gasket surrounding the glass.
5 Once inside the vehicle’s interior, route the cable
to the Interface and plug into the connector
labeled “GPS.”
6 Secure and conceal the cable under interior trim
panels.
Display Module (Orange Shrink)
1 Determine the best location for the Display
Module. If installed by a professional, the
customer should be consulted. An optimal
location is clearly visible from the driver’s
position and does not take a driver’s eyes o the
road for more than a moment.
2 Clean the mounting surface thoroughly.
3 Mount the Display using the pre-applied
adhesive.
4 Route the cable to the Interface and plug into
the connector labeled “Display Module.”
5 Secure and conceal the cable under trim panels.
Display Bezel Mounting
1
The supplied display bezel can be used to mount
the Display permanently in the dash or console.
2 Determine the best location for the Display
Module. If installed by a professional, the
customer should be consulted. A at, plastic
surface with no obstructions behind it is best for
this type of mounting.
3 Cover the mounting surface with masking tape
to prevent accidental scratches.
4 Using the supplied hole template, mark the
location.
5 Ensure there are no hidden cables, brackets,
or other components behind the location, and
that there is adequate clearance behind the
panel. The display will protrude into the dash or
console by 1/2".
Bekijk gratis de handleiding van Escort Redline 360c Ci, stel vragen en lees de antwoorden op veelvoorkomende problemen, of gebruik onze assistent om sneller informatie in de handleiding te vinden of uitleg te krijgen over specifieke functies.
Productinformatie
| Merk | Escort |
| Model | Redline 360c Ci |
| Categorie | Niet gecategoriseerd |
| Taal | Nederlands |
| Grootte | 7927 MB |


