ErgoAV ERMMM6-01B handleiding
Handleiding
Je bekijkt pagina 8 van 16
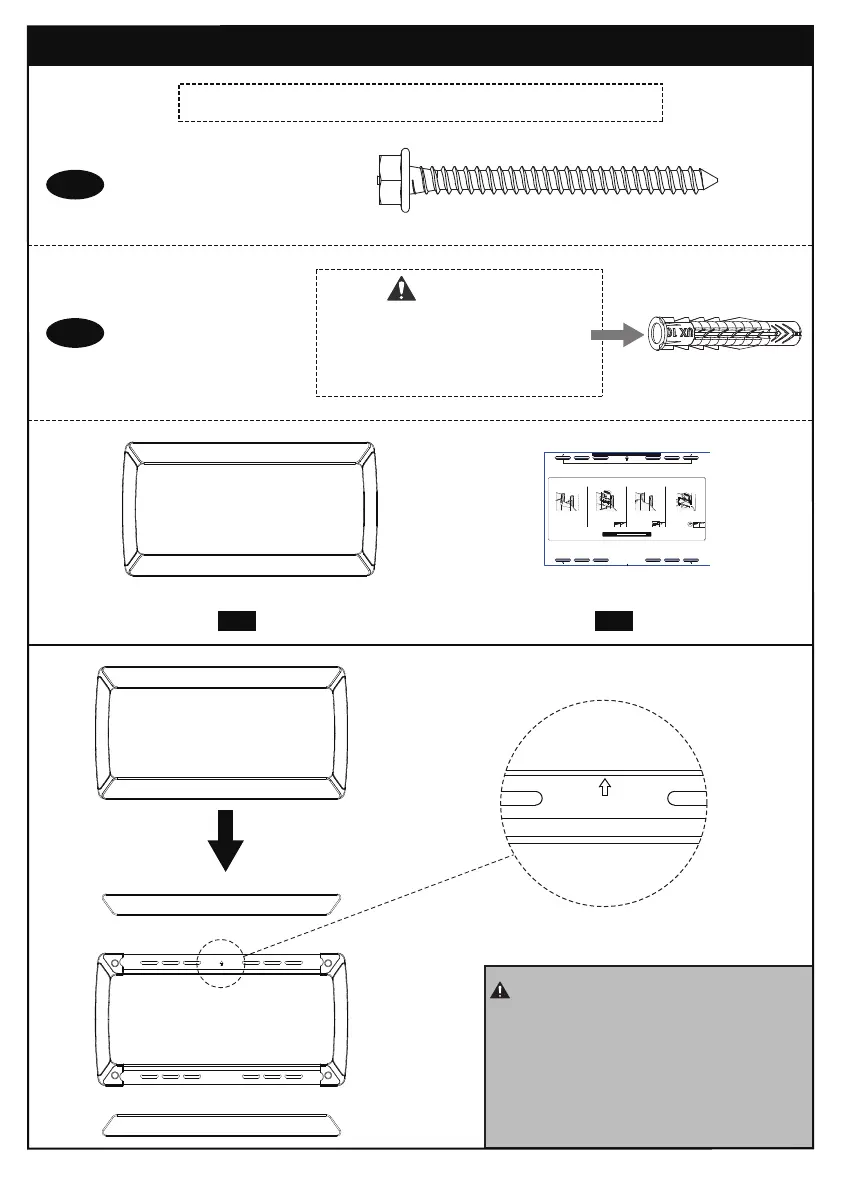
NOTE:
1. Before hanging the Wall Plate [02] on
the wall, you need to remove the upper
and lower covers. Install the cover after
the Wall Plate [02] is installed.
2. Pay attention to the upper and lower
positions of the wall panels, and reverse
installation is prohibited.
Wall Anchor
10 x 60mm
x 4
A2
This Wall Anchor [A2] is
for use in concrete walls
only. DO NOT use them in
drywall or wood studs.
CAUTION!
Supplied Parts and Hardware for Step 2
NOTE: The Lag Screw [A1] shown is actual size.
Lag Screw
5/16" x 2 3/4"
x 4
A1
Wall Plate
02 x 1
Wall Plate Template
03 x 1
02 03 04 05 06 07 08 09 10 11 12 13 14
Level
(Not Included)
1/2" (13mm)
Socket Wrench
(Not Included)
Complete Step 1 in owner's manual before mounting wall plate.
4.
Install the Wall Plate [02] using Lag Screws
[A1]. Tighten the Lag Screws [A1] is pulled
firmly against the Wall Plate [02]. DO NOT
over-tighten the Lag Screws [A1].
16in (406mm)
OR
Use a stud finder (not included) to locate
wood studs or use an awl (not included)
to verify the edges. Mark the edge and
center location s.
1.
2.
Position the Wall Plate Template [03] at
your desired height and line up the holes
with your stud center line. Level the Wall
Plate Template [03] and mark the holes.
Level
(Not Included)
Pencil
(Not Included)
3.
Drill pilot holes using a 7/32" (5.5mm)
diameter drill bit. Make sure the depth
is not less than 2 3/4" (70mm).
A1
02
Electric Drill
(Not Included)
2 3/4" (70mm)
7/32
"
(5.5 mm)
Questions or Need Help
ErgoAV Customer Care Phone: (877) 419-7832 support@ergoav.com
16" (406.4mm)
03
Bekijk gratis de handleiding van ErgoAV ERMMM6-01B, stel vragen en lees de antwoorden op veelvoorkomende problemen, of gebruik onze assistent om sneller informatie in de handleiding te vinden of uitleg te krijgen over specifieke functies.
Productinformatie
| Merk | ErgoAV |
| Model | ERMMM6-01B |
| Categorie | Niet gecategoriseerd |
| Taal | Nederlands |
| Grootte | 2396 MB |


