Elna eXtend 264 handleiding
Handleiding
Je bekijkt pagina 20 van 84
14
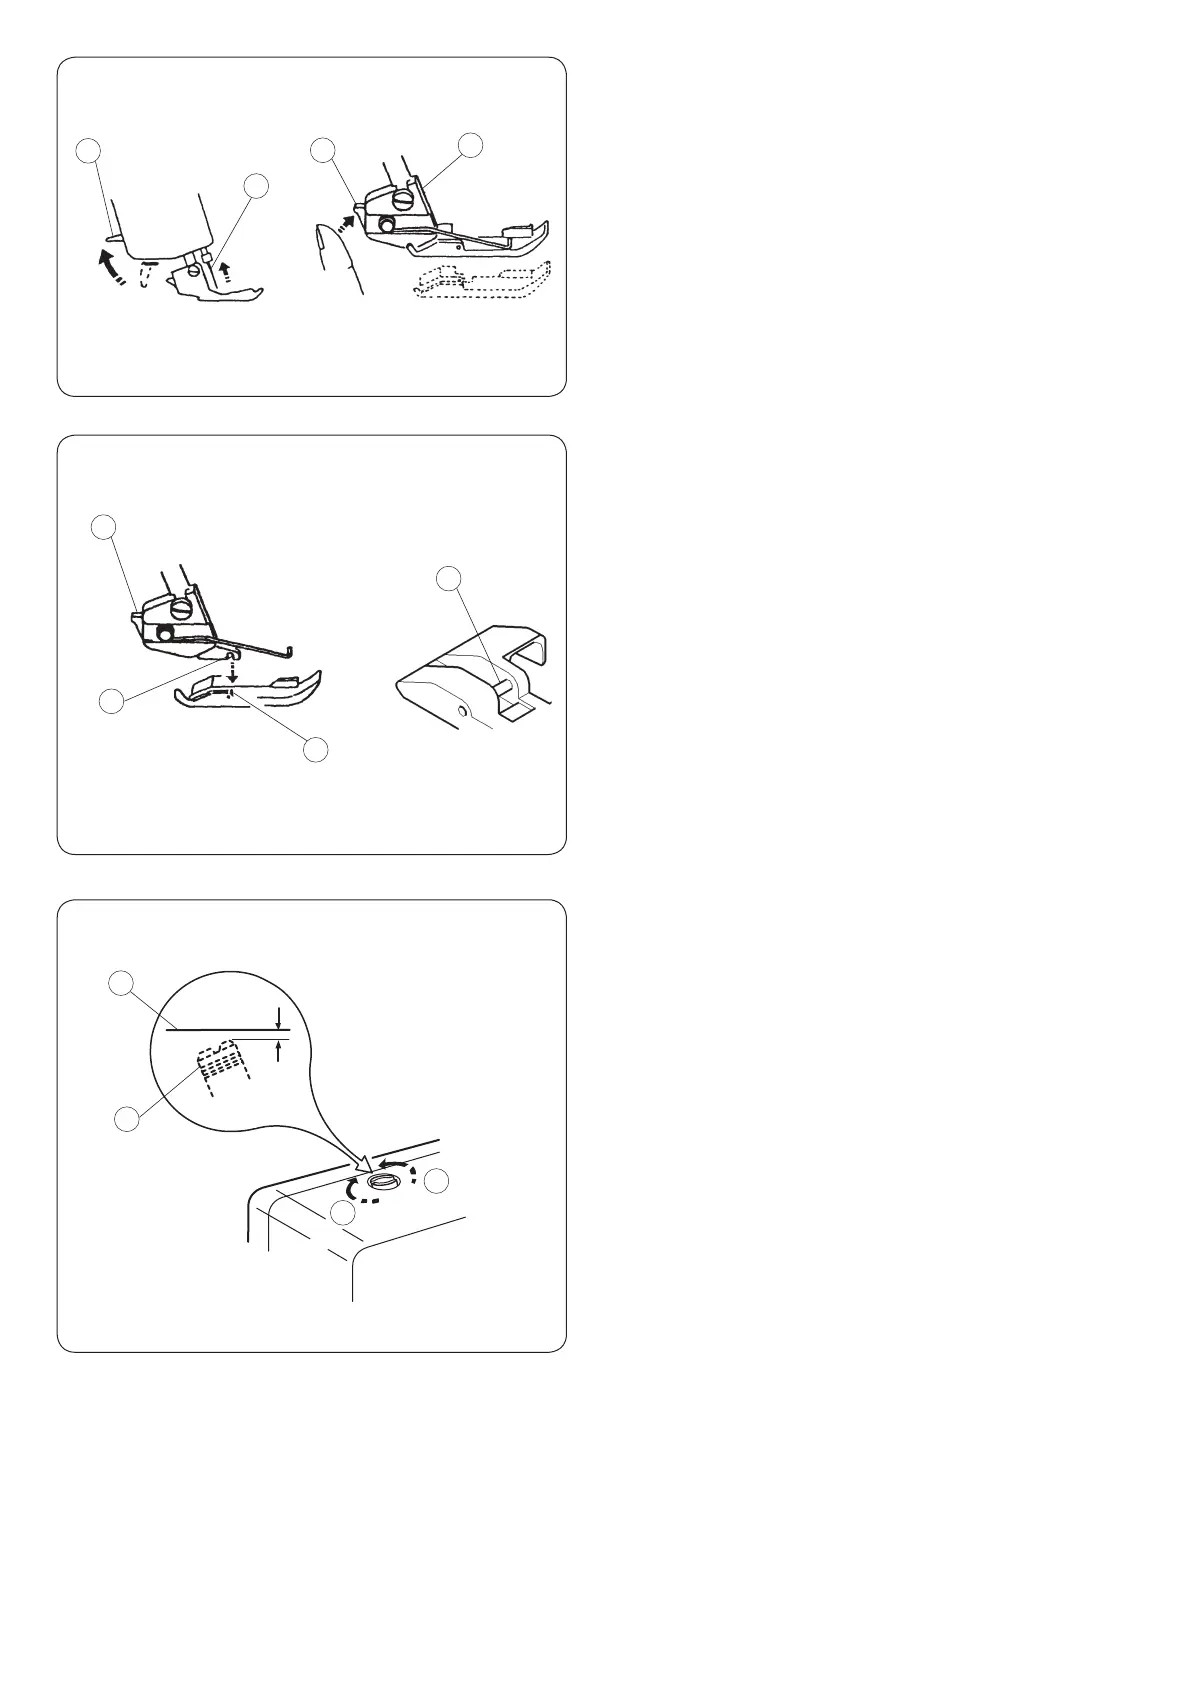
Removing the Presser Foot
z
Turn off the power switch and unplug the machine.
x
Raise the needle and the presser foot.
c
Press the lever located on the back of the foot holder.
The presser foot will drop off.
q
Needle
w
Presser foot lifter
e
Foot holder
r
Lever
9
$GMXVWPHQWRI)RRW3UHVVXUH
,WLVQRWQHFHVVDU\WRDGMXVWWKHSUHVVHUIRRW·V
SUHVVXUHIRUQRUPDOVHZLQJ
:KHQ\RXVHZKHDY\RUOLJKWZHLJKWIDEULFVWXUQWKH
DGMXVWLQJVFUHZ
²² FORFNZLVHIRUKHDY\ZHLJKWIDEULF
²² FRXQWHUFORFNZLVHIRUOLJKWZHLJKWIDEULF
)RUQRUPDOVHZLQJVHWWKHDGMXVWLQJVFUHZVR
WKDWLWVLWVPPEHORZWKHWRSRIWKHPDFKLQH
7RGHFUHDVH
7RLQFUHDVH
$GMXVWLQJVFUHZ
7RSRIWKHPDFKLQH
9LTV]PUN[OL7YLZZLY-VV[
1. Turn off the power switch and unplug the
machine.
2. Raise the needle and the presser foot.
3. Press the lever located on the back of the foot
holder. The presser foot will drop off.
Needle
Presser foot lifter
Foot holder
Lever
([[HJOPUN[OL7YLZZLY-VV[
1. Turn off the power switch and unplug the
machine.
2. Place the presser foot so that the pin on the foot
lies just under the groove of the foot holder.
3. Lower the foot holder to lock the foot into place.
4. Raise the presser foot lifter to check that the
presser foot is secure.
Groove
Pin
Lever
1 mm
Attaching the Presser Foot
z
Turn off the power switch and unplug the machine.
x
Place the presser foot so that the pin on the foot lies
just under the groove of the foot holder.
c
Lowerthefootholdertolockthefootintoplace.
v
Raise the presser foot lifter to check that the presser
foot is secure.
q
Groove
w
Pin
e
Lever
Adjustment of Foot Pressure
It is not necessary to adjust the presser foot’s pressure for
normal sewing.
When you sew heavy or lightweight fabrics, turn the adjusting
screw:
–clockwiseforheavyweightfabric.
–counterclockwiseforlightweightfabric.
* For normal sewing, set the adjusting screw so that it sits
1mm below the top of the machine.
q
To decrease
w
To increase
e
Adjusting screw
r
Top of the machine
Bekijk gratis de handleiding van Elna eXtend 264, stel vragen en lees de antwoorden op veelvoorkomende problemen, of gebruik onze assistent om sneller informatie in de handleiding te vinden of uitleg te krijgen over specifieke functies.
Productinformatie
| Merk | Elna |
| Model | eXtend 264 |
| Categorie | Naaimachine |
| Taal | Nederlands |
| Grootte | 10427 MB |


