Handleiding
Je bekijkt pagina 8 van 23
Page 8 of 23
INSTALLATION
The heater must be installed at least 60cm from the floor.
IMPORTANT: Before drilling, ensure that no wires or pipes are behind the wall to prevent damage.
If unsure, professional advice should be sought.
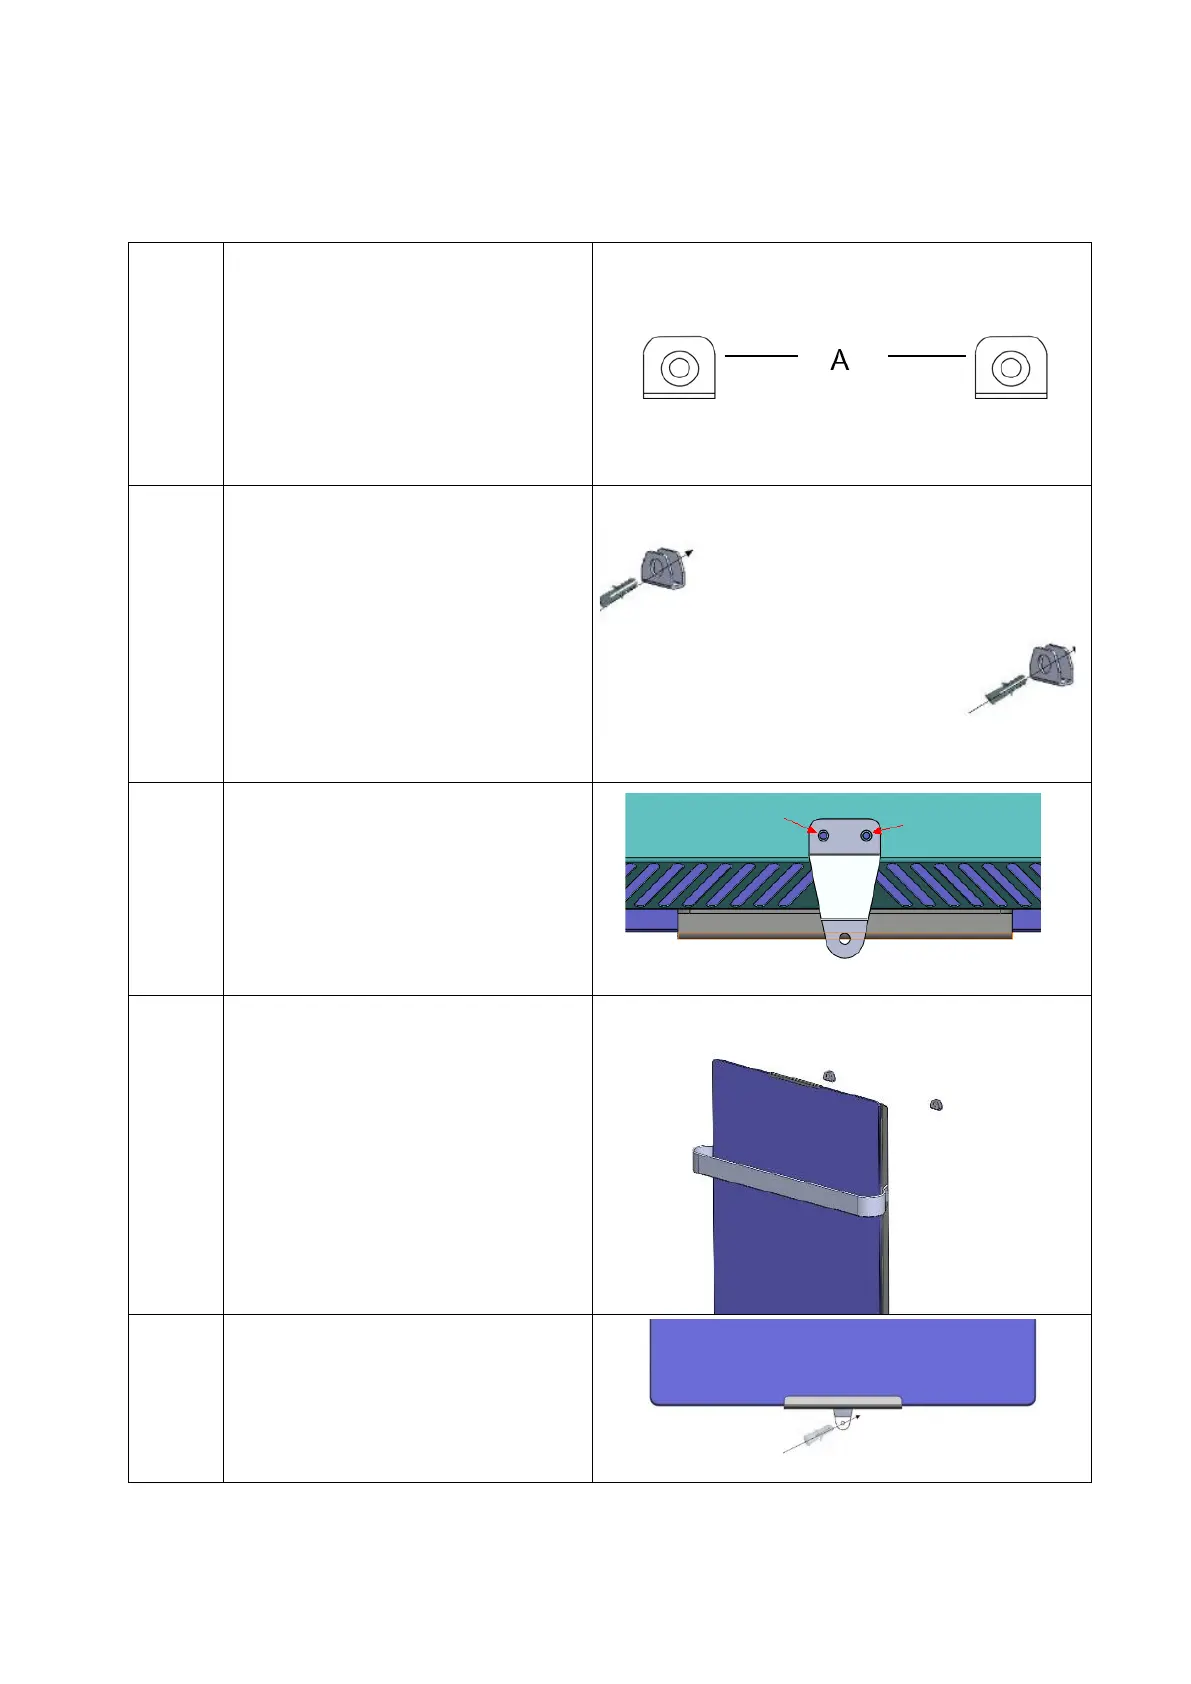
Step 1
Measure the distance between the
hooks on the back of the heater. Make
a note of the measurement, and mark
two points on the wall that distance
apart at the desired height, using a
spirit level to ensure that the unit will
be straight following installation.
Step 2
Drill two holes into the wall at the
marked positions and insert the wall
plugs provided. Place the upper
brackets onto the wall, ensuring that
the side with the smaller sized hole is
flush against the wall, and that the
open end is facing upwards. Secure
the brackets to the wall using the
screws (C). Ensure that the brackets
are firmly fixed before commencing
onto the next step.
Step 3
On the bottom of the unit, secure the
lower bracket using the 2 screws (B).
Step 4
Carefully hang the heater onto the
two upper brackets, and mark where
the final screw hole for the lower
bracket meets the wall.
Gently remove the appliance from the
wall and drill a hole in the position
marked. Insert a wall plug before
placing the heater back on the hanging
brackets.
Step 6
Once the heater is in position, screw
the support bracket to the wall using
the final screw (C).
Bekijk gratis de handleiding van ElectriQ VG2TR-1.2BW, stel vragen en lees de antwoorden op veelvoorkomende problemen, of gebruik onze assistent om sneller informatie in de handleiding te vinden of uitleg te krijgen over specifieke functies.
Productinformatie
| Merk | ElectriQ |
| Model | VG2TR-1.2BW |
| Categorie | Heater |
| Taal | Nederlands |
| Grootte | 2153 MB |


