Elation Power Spot 250 handleiding
Handleiding
Je bekijkt pagina 14 van 48
Power Spot 250™
©Elation Professionals® Los Angeles, Ca. - wwww.ElationLighting.com - Page 14
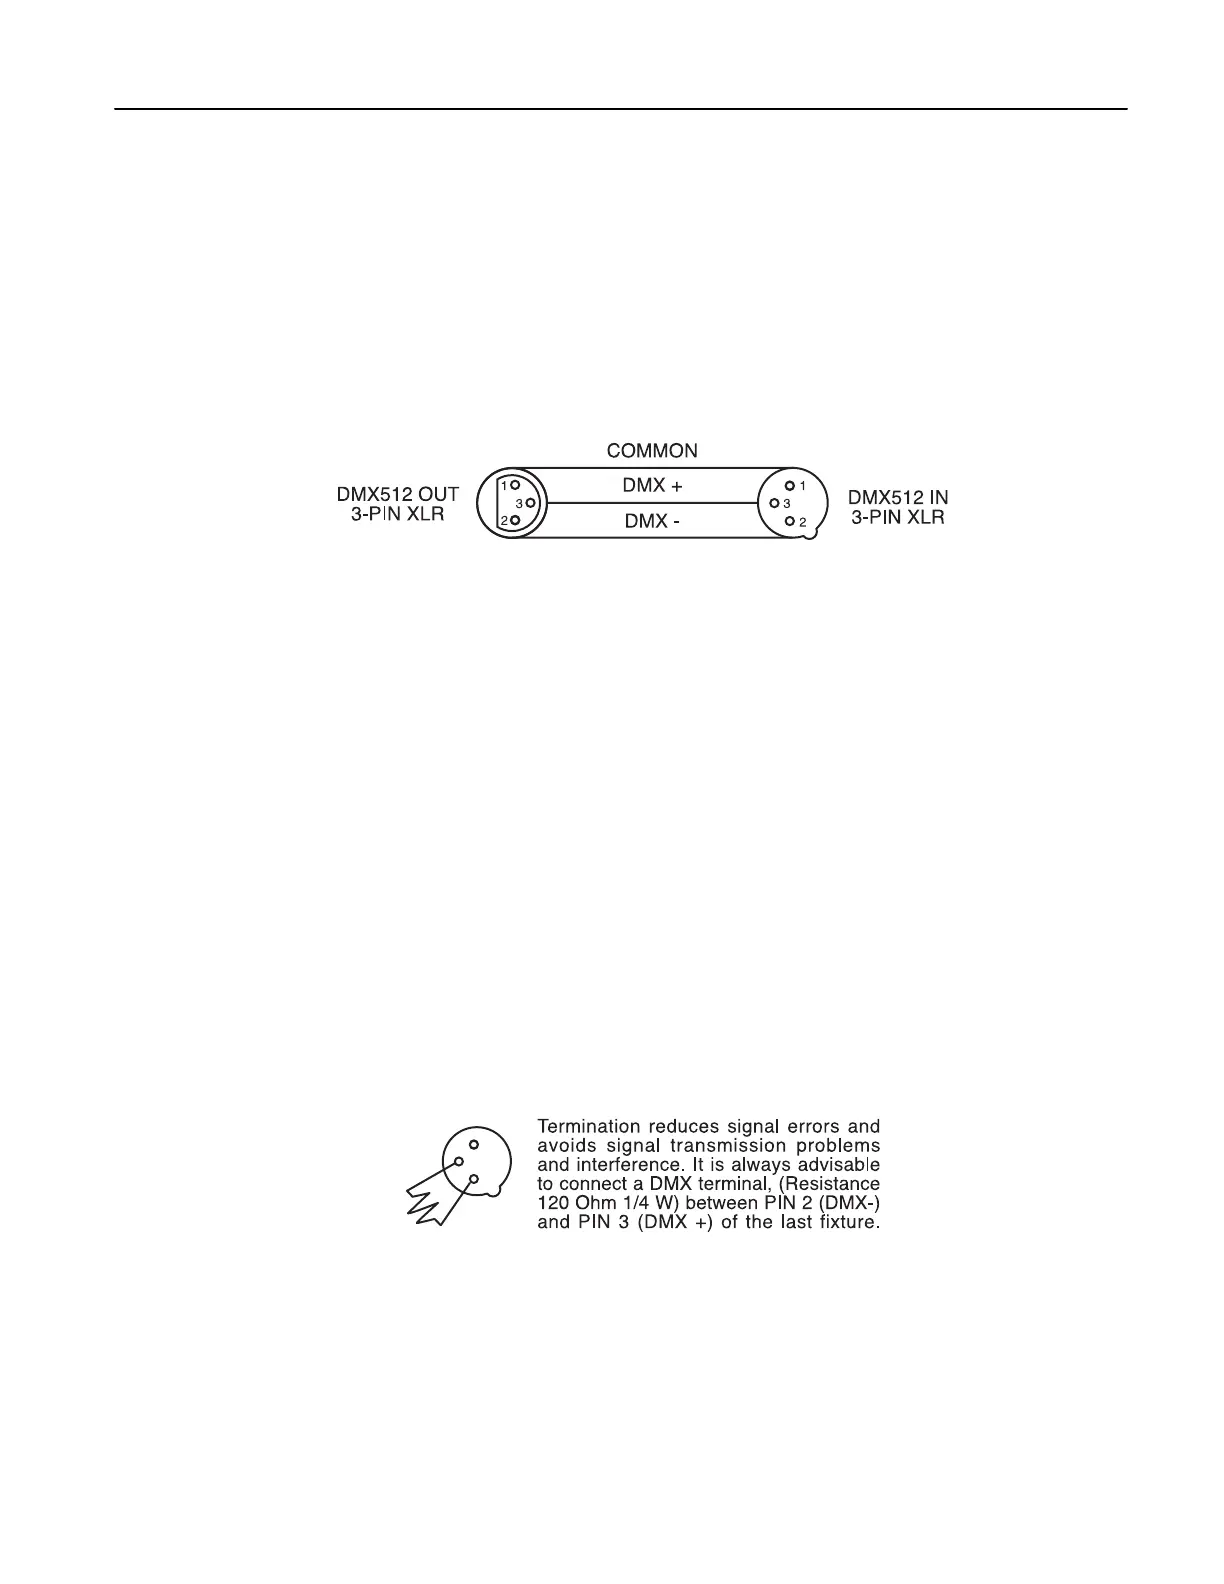
using the controls on the side panel of the fixture. Your fixture and your DMX
controller require a standard 3-pin XLR connector for data input and data output
(Figure Below). If you are making your own cables, be sure to use standard two
conductor shielded cable (This cable may be purchased at almost all professional
sound and lighting stores). Your cables should be made with a male and female
XLR connector on either end of the cable. Also remember that DMX cable must be
daisy chained and can not be split.
2.6 Notice: Be sure to follow the above figure when making your own cables. Do not
use the ground lug on the XLR connector. Do not connect the cable’s shield
conductor to the ground lug or allow the shield conductor to come in contact with the
XLR’s outer casing. Grounding the shield could cause a short circuit and erratic
behavior.
2.7 Special Note: Line Termination. When longer runs of cable are used, you
may need to use a terminator on the last fixture to avoid erratic behavior. A terminator
is a 90-120 ohm 1/4 watt resistor which is connected between pins 2 and 3 of a
male XLR connector (DATA + and DATA -). This fixture is inserted in the female XLR
connector of the last fixture in your daisy chain to terminate the line. Using a cable
terminator (ADJ part number Z-DMX/T) will decrease the possibilities of erratic
behavior.
1
2
3
Bekijk gratis de handleiding van Elation Power Spot 250, stel vragen en lees de antwoorden op veelvoorkomende problemen, of gebruik onze assistent om sneller informatie in de handleiding te vinden of uitleg te krijgen over specifieke functies.
Productinformatie
| Merk | Elation |
| Model | Power Spot 250 |
| Categorie | Verlichting |
| Taal | Nederlands |
| Grootte | 4681 MB |


