DoorBird D3100E handleiding
Handleiding
Je bekijkt pagina 8 van 76
LAN / PoE+
PWR LED
Max 24V 1A
R1 R1 R2 R2 GND D1 D0 E1 E1 -VDC+
Wiegand 0V 0A 48-57
CB1 CB2
COM1
Display
Micro SIM
USB-C
Cell
Antenna
LAN / PoE+
PWR LED
Max 24V 1A
R1 R1 R2 R2 GND D1 D0 E1 E1 -VDC+
Wiegand 0V 0A 48-57
CB1 CB2
COM1
Display
Micro SIM
USB-C
Cell
Antenna
8
7
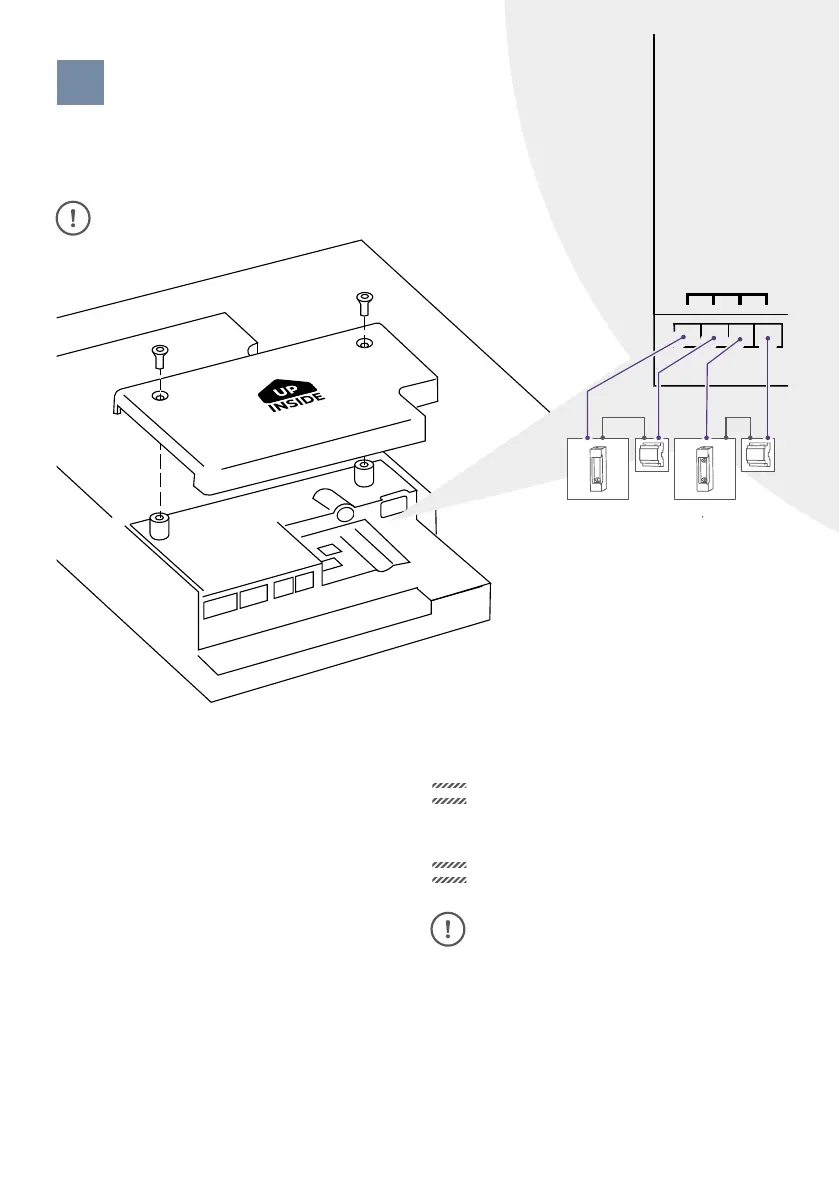
CONNECTING THE DEVICE
To connect the cables to the device, you must first
remove the cover of the connection socket using the
enclosed screwdriver.
Screw the protective cover back on after connecting the
cables to protect the device from moisture.
It is possible to connect the cables and wires to the
device conveniently and safely via labelled connection
ports. You can connect all necessary cables and wires
to the device now. Please remove any cables and wires
from the connection ports of the device that you do
not need. Remove about 5 mm of insulation material
at the end of the wires that you would like to connect
to the green screw connection terminal of the device.
NOTICE
Please take care when connecting the cables and wires.
Connecting the cables and wires the wrong way may
damage the device. Wires without insolation material must not
protrude out of the green screw connection terminal, it may
lead to electrical short and damage the device.
NOTICE
The yellow, green, and red cables that lead out from the
side of the Main Electrical Unit must only be used to
connect components certified by Bird Home Automation.
Handle the front panel with care. The surface of the front
panel could be scratched or otherwise damaged if
handled without care.
Bekijk gratis de handleiding van DoorBird D3100E, stel vragen en lees de antwoorden op veelvoorkomende problemen, of gebruik onze assistent om sneller informatie in de handleiding te vinden of uitleg te krijgen over specifieke functies.
Productinformatie
| Merk | DoorBird |
| Model | D3100E |
| Categorie | Niet gecategoriseerd |
| Taal | Nederlands |
| Grootte | 8309 MB |


