Handleiding
Je bekijkt pagina 17 van 26
Page 16 of 25
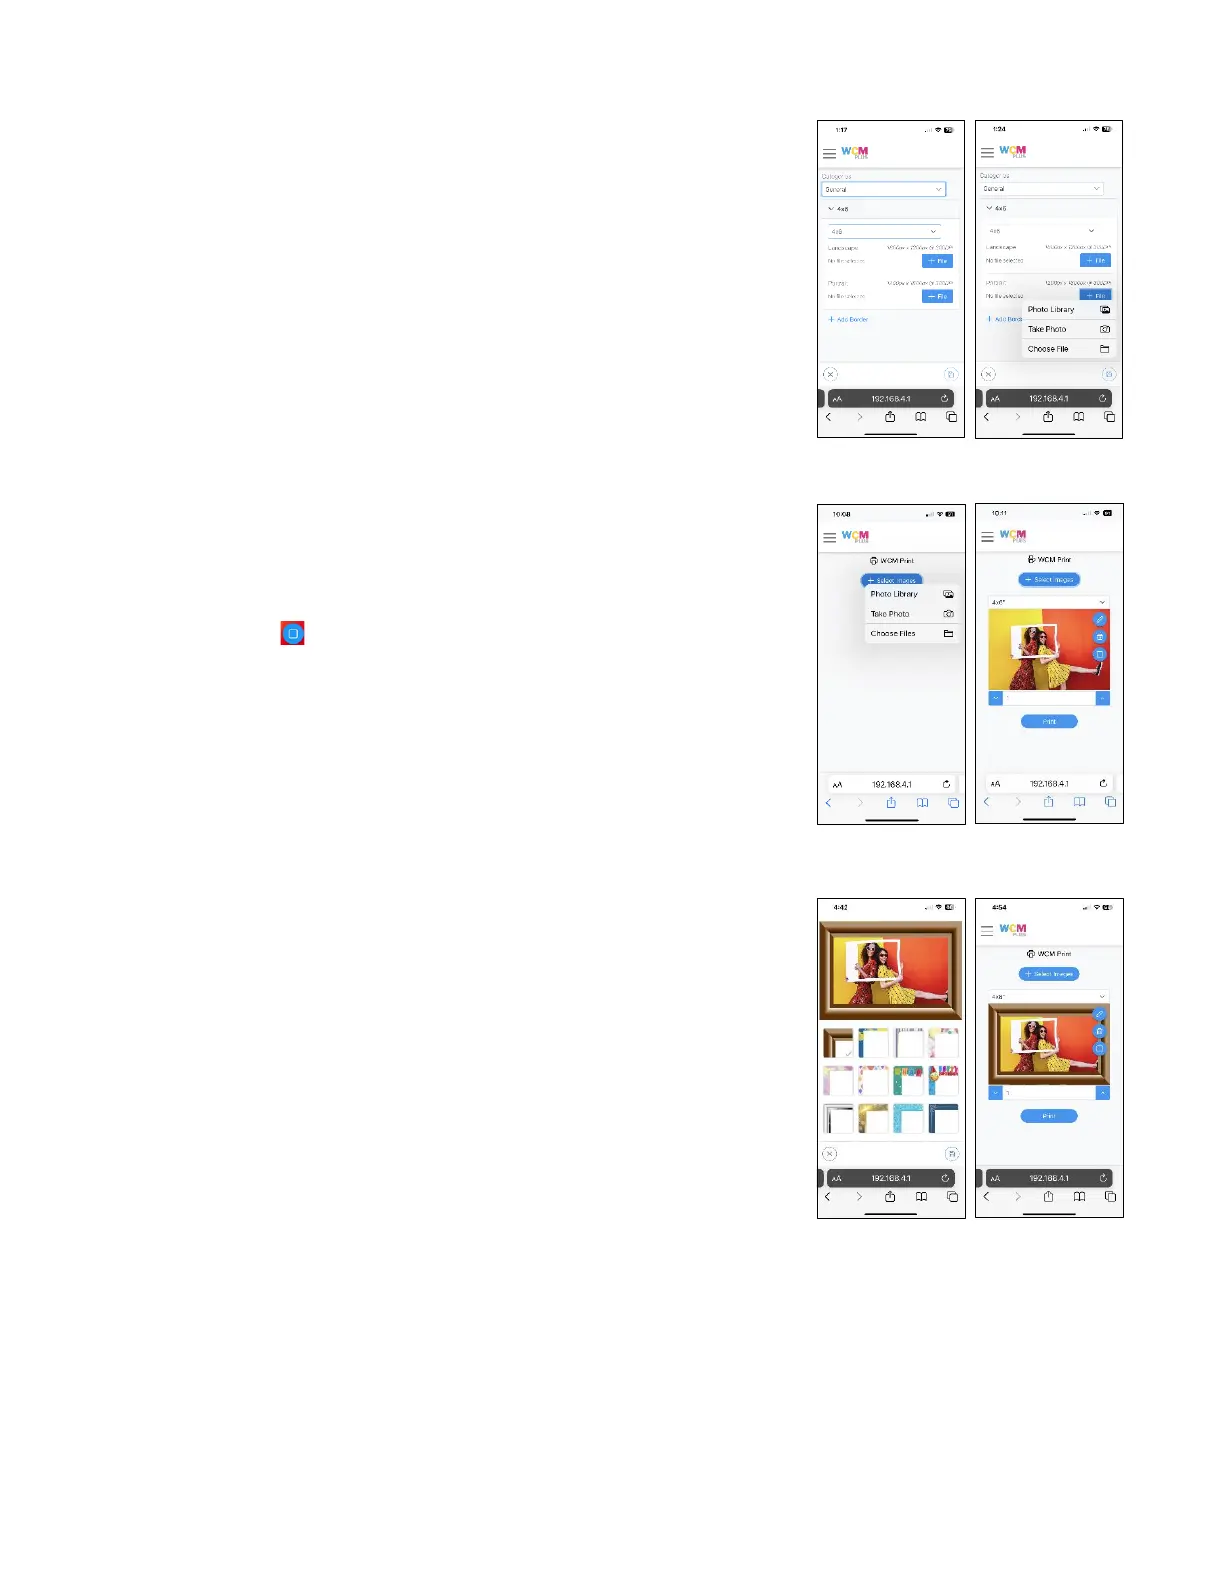
To add a border, choose the category you wish to use followed by the print
size the border will be applied to. In the Landscape section, tap + File to
select the custom border that was created for the landscape orientation.
Follow the same process for the Portrait section but select the file that was
created for the portrait orientation.
Once the borders have been added, tap or click the Save icon on the lower
right of the screen.
Once the border has been saved it can be applied two ways. Either by using
the Edit feature in WCM Print or by choosing Select Border in the System
Settings/Borders menu.
Applying borders using WCM Print:
Open WCM Print under Printers Menu
Tap + Select Images and choose pictures from the photo gallery, the camera,
or from files.
Tap the Border icon to see the available borders.
Select the border of choice and tap the Save icon in the lower right of the
screen.
The picture with the border will be previewed. Tap Print to send the image to
the printer.
Bekijk gratis de handleiding van DNP WCM Plus, stel vragen en lees de antwoorden op veelvoorkomende problemen, of gebruik onze assistent om sneller informatie in de handleiding te vinden of uitleg te krijgen over specifieke functies.
Productinformatie
| Merk | DNP |
| Model | WCM Plus |
| Categorie | Printer |
| Taal | Nederlands |
| Grootte | 5893 MB |
