Handleiding
Je bekijkt pagina 24 van 52
13 Piping installation
Installation and operation manual
24
LREN8~12A + LRNUN5A
CO₂ ZEAS outdoor unit and capacity up unit
4P704141-1F – 2024.12
13.2 Using stop valves and service
ports
WARNING
When stop valves are closed during service, the pressure
of the closed circuit will increase due to high ambient
temperature. Make sure the pressure is kept below the
design pressure.
13.2.1 To handle the stop valve
Take the following guidelines into account:
▪ The gas and liquid stop valves are factory open.
▪ Make sure to keep all stop valves open during operation.
▪ Do NOT apply excessive force to the stop valve. Doing so may
break the valve body.
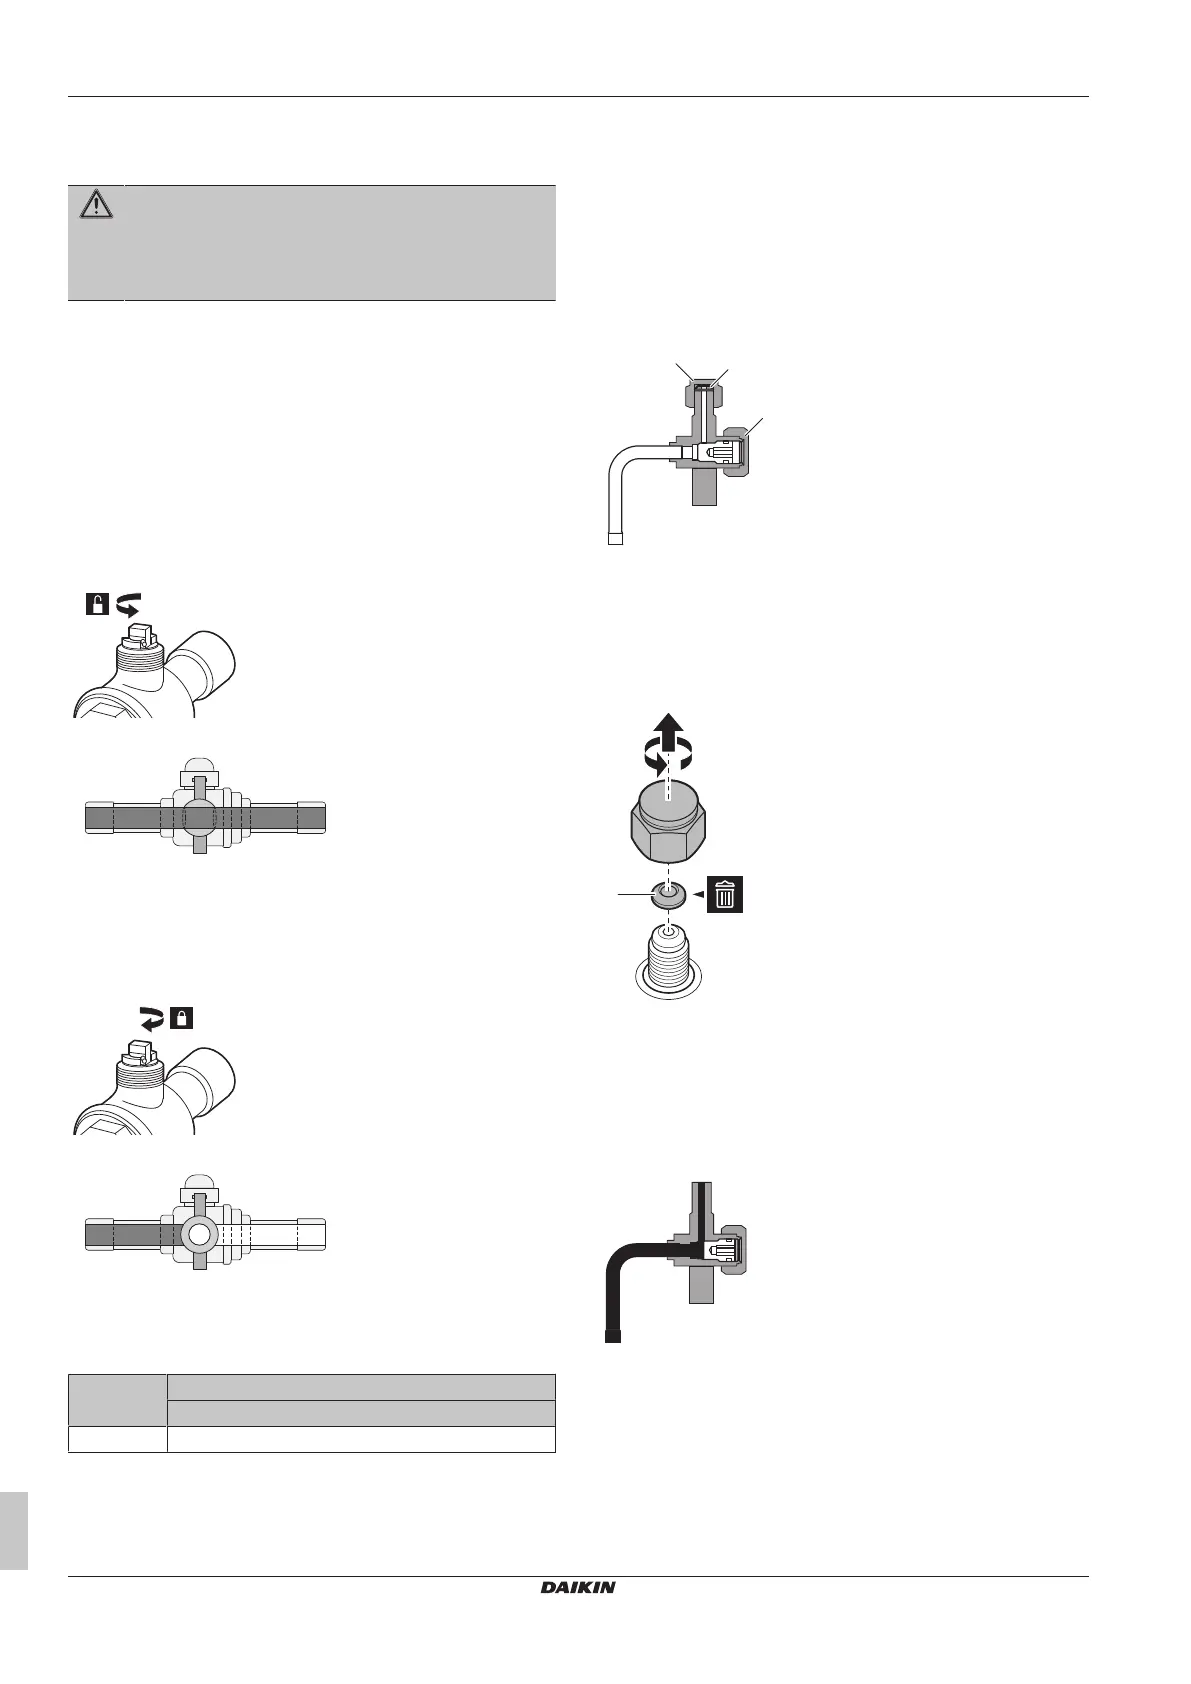
To open the stop valve
1 Remove the valve cap.
2 Turn counterclockwise to open the valve.
90°
Result: The valve is fully open:
a b
a To outdoor unit
b To indoor unit
To close the stop valve
1 Turn clockwise to close the valve.
2 Screw the valve cap onto the valve.
90°
Result: The valve is fully closed:
a b
a To outdoor unit
b To indoor unit
13.2.2 Tightening torques
Stop valve
size (mm)
Tightening torque (N•m) (turn clockwise to close)
Shaft – valve cap
Ø22.2 50~55
13.2.3 To handle the service port
▪ Always use a charge hose equipped with a valve depressor pin,
since the service port is a Schrader type valve.
▪ All service ports are of the backseat type and do not have a valve
core.
▪ After handling the service port, make sure to tighten the service
port cap and the valve cap securely.
▪ Check for refrigerant leaks after tightening the service port cap
and the valve cap.
Parts of the service port
The figure below shows the name of each part required in handling
service ports.
a
b
c
a Service port cap
b Copper packing
c Valve cap
To open the service port
1 Remove the service port cap with 2 spanners and remove the
copper packing.
a
a Copper packing
2 Connect the charge port to the service port.
3 Remove the valve cap with 2 spanners.
4 Insert a hexagonal wrench (4mm).
5 Rotate the hexagonal wrench counterclockwise until the end.
Result: The service port is fully open.
To close the service port
1 Insert a hexagonal wrench (4mm).
2 Rotate the hexagonal wrench clockwise until the end.
3 Tighten the valve cap with 2 spanners. Apply screw lock agent
or silicon sealant when tightening.
4 Add a new copper packing.
Bekijk gratis de handleiding van Daikin LRNUN5AY1, stel vragen en lees de antwoorden op veelvoorkomende problemen, of gebruik onze assistent om sneller informatie in de handleiding te vinden of uitleg te krijgen over specifieke functies.
Productinformatie
| Merk | Daikin |
| Model | LRNUN5AY1 |
| Categorie | Koelkast |
| Taal | Nederlands |
| Grootte | 8986 MB |


