CRUX ACPAD-81Y handleiding
Handleiding
Je bekijkt pagina 5 van 12
Crux Interfacing Solutions • 21541 Nordhoff Street, Unit C, Chatsworth, CA 91311
phone: (818) 609-9299 • fax: (818) 996-8188 • www.cruxinterfacing.com
rev.0819195 of 12
R
INTERFACING SOLUTIONS
ACPAD-81Y
Smart-Play Integration with Multi Camera Inputs & USB Player
for AUDI Vehicles with MMI MIB/MIB2 Systems
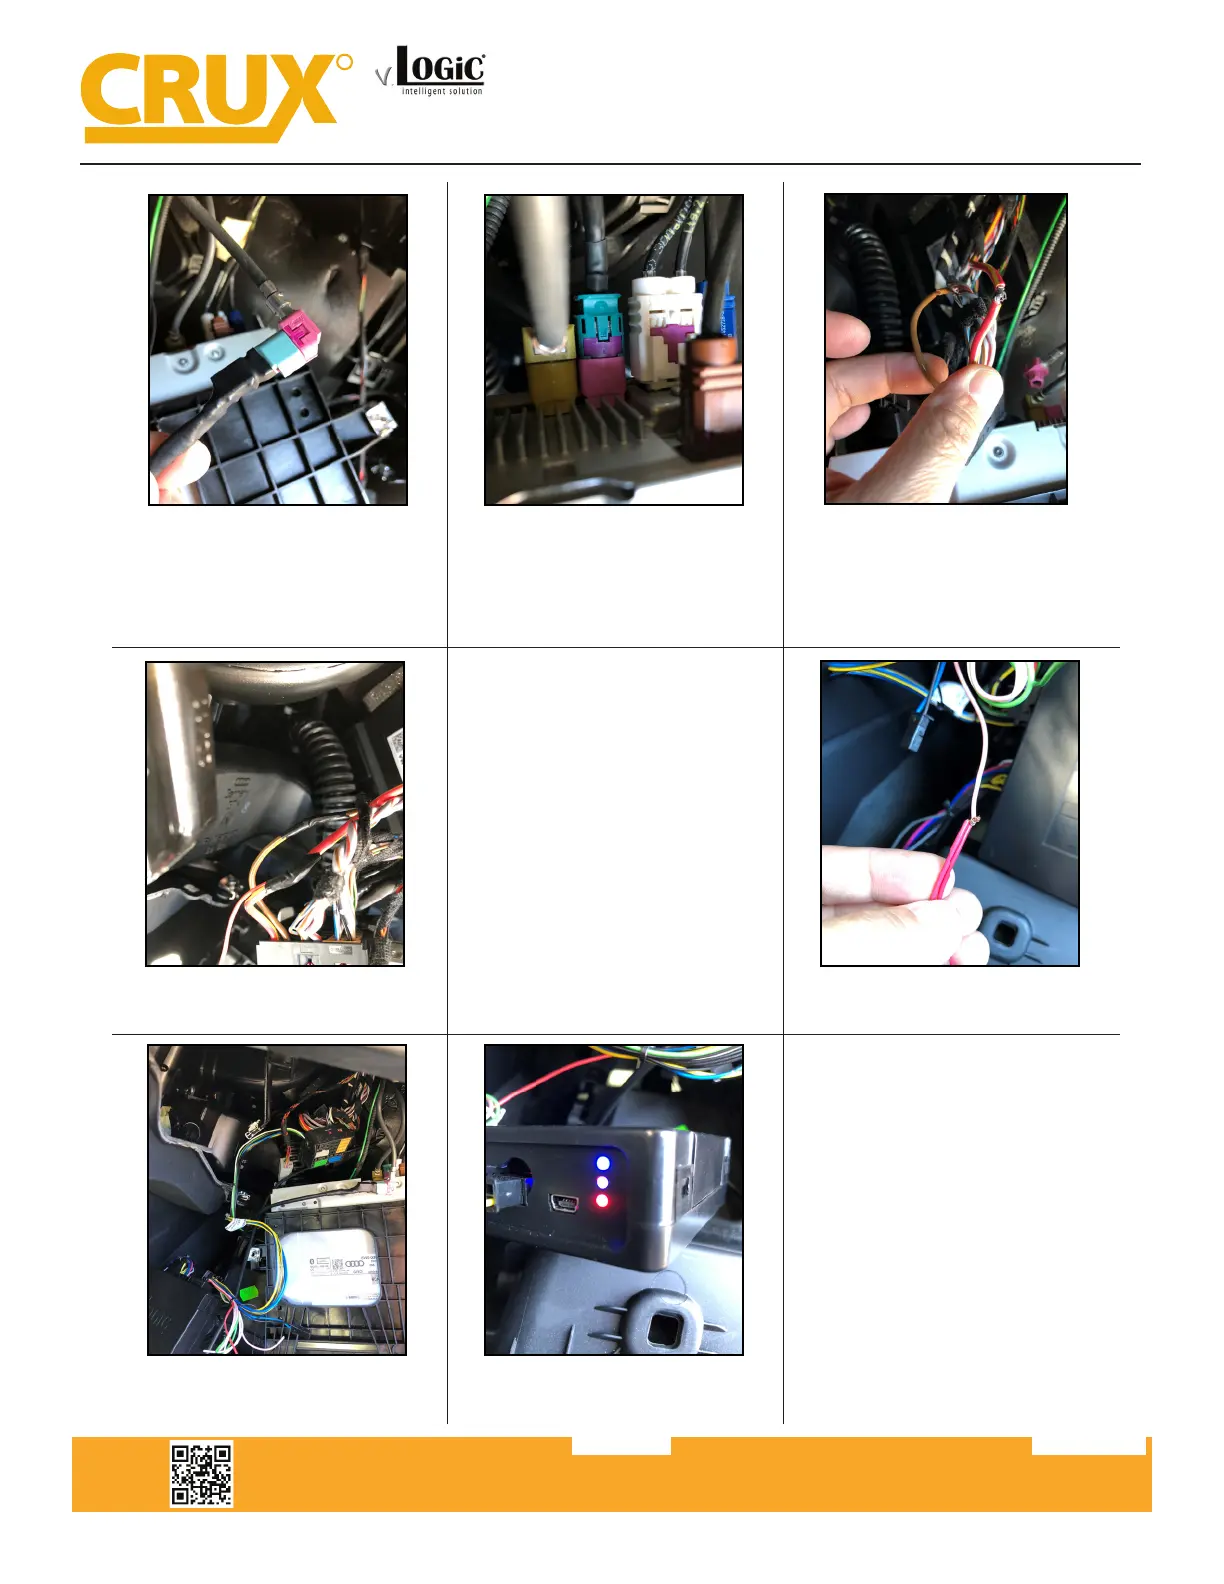
10. Plug the Pink LVDS cable to the
LVDS 1 cable. Plug the other end of the
LVDS 1 cable to the module LVDS OUT.
11. Plug one end of the LVDS 2 cable to
the Pink LVDS port on the media player.
Plug the other end of the LVDS 2 cable
to the module LVDS IN.
12. Tap the Yellow and Black wires of
the ACPAD-81Y harness to power &
ground on the Quadlock connector:
Yellow to RED/YELLOW
Black to BROWN
14. Install the cameras that will be
used in the install. Run the camera
cables towards the radio. The RCAs and
camera power wires will be connected
to the ACPAD-81Y harness.
Video Inputs Power Wire
Reverse Camera Pink
Front Camera Pink
13. Tape the connecons well to avoid
short circuits.
15. Connect the camera power wires to
the PINK power output 1 wire.
18. Proceed to the OSD sengs on the
next page.
19. Test the cameras installed and
Smart-Play. Put gear in reverse and
check for rear camera image on screen.
Go to Smart-Play mode and test for
funconality. Once the cameras and
Smart-Play validaon is complete,
mount the ACPAD-81Y and Smart-Play
modules, reinstall the media player in
the glove compartment.
16. Plug in connectors to the ACPAD-
81Y module.
17. Test the communicaon. Turn on
the ignion and check if LEDs are on.
Bekijk gratis de handleiding van CRUX ACPAD-81Y, stel vragen en lees de antwoorden op veelvoorkomende problemen, of gebruik onze assistent om sneller informatie in de handleiding te vinden of uitleg te krijgen over specifieke functies.
Productinformatie
| Merk | CRUX |
| Model | ACPAD-81Y |
| Categorie | Niet gecategoriseerd |
| Taal | Nederlands |
| Grootte | 8006 MB |


