Handleiding
Je bekijkt pagina 39 van 43
76 77
ENEN
• Use small cookware for small amount of food. Abig and only partially lled up cookware requires alot of energy.
• Always cover the cookware with asuitable lid. When cooking without alid, you consume much more energy.
• Always cook food with asmall amount of water or fat. You save energy. This way vitamins and minerals will be
preserved when cooking vegetables.
• At the beginning of the cooking, set the cooking zone to the highest power level and reduce the cooking zone
power level after it is heated up.
Examples of possible damage
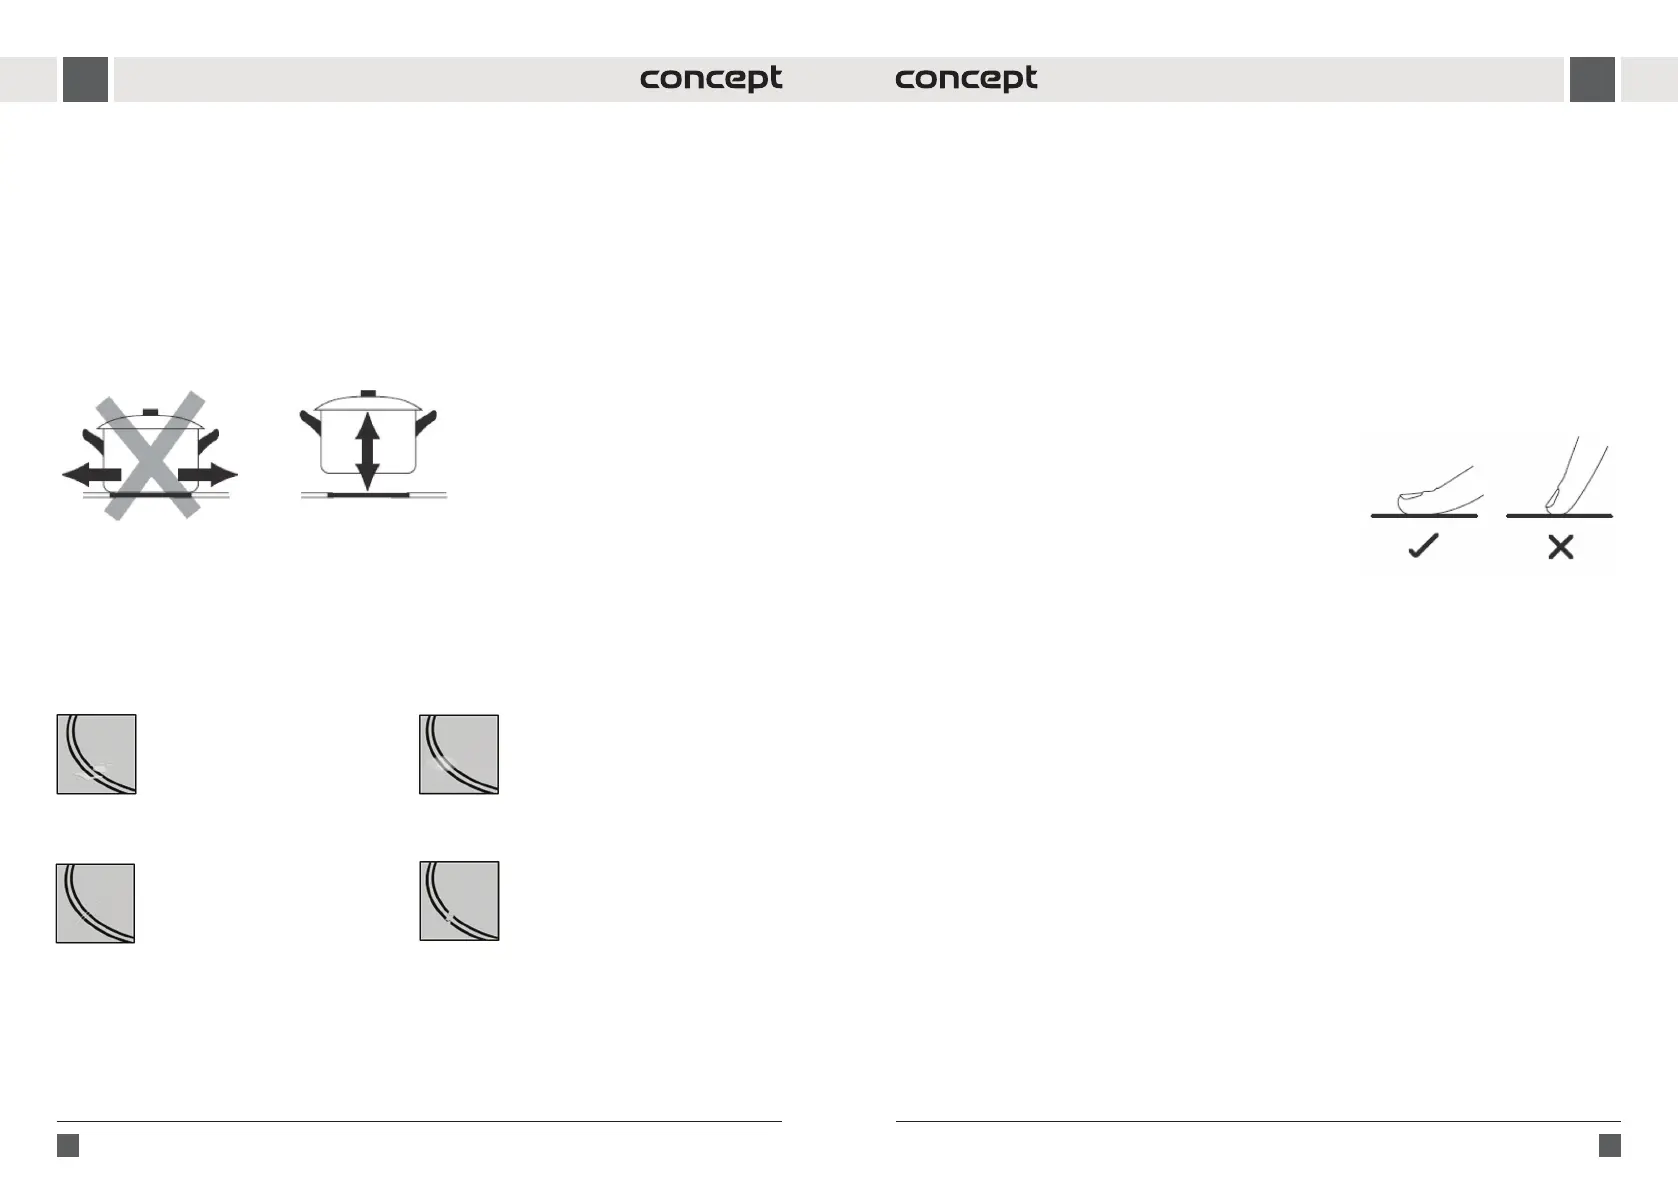
• Coarse bottoms of cookware could scratch the ceramic glass plate. Check the cookware bottom regularly.
Cookware with coarse bottom can cause scratches of the hob. Always lift these objects up when you have to move
them on the cooking surface (Fig. 3), To protect the hob from being scratched.
• Salt, sugar and sand grains (e.g. from cleaning vegetables) can scratch the hob. Do not use the appliance as awork
surface or as astorage surface!
• Sugar, as well as food with high sugar content, damages the hob when in contact with it. Immediately remove the
overcooked food of this kind using aglass scraper.
CAUTION! The ceramic glass scraper is sharp and can cause injuries!
• The following damages do not negatively aect the function or performance of the hob.
• This damage has been caused by inappropriate maintenance of the hob and hence is not subject to warranty.
These are not technical problems with the appliance.
Stains
Burnt remains of sugar or food
with high sugar content.
Colouring
Metallic-gloss colouring caused
by the use of unsuitable cleaning
agents or abrasions from the
cookware bottom.
Scratches
Scratches caused by grains of salt,
sugar or sand or by the coarse
cookware bottom.
Wear of the decoration
Wear caused by the use of
unsuitable cleaning agents.
Fig. 3
OPERATING INSTRUCTIONS
• Areas designed for cooking only – electric cooking zones – are indicated on the hob. The diameters of the cooking
zones are derived from the usual dimensions of cookware.
• Only the surface inside the indicated diameter is heated; other surfaces remain relatively cold and can be used as
put aside areas.
• The temperature sensor prevents the cooking zone under the ceramic glass plate from overheating.
• The light up “H” symbol on the indicator position of the input power levels signals increased temperature of the
cooking zone after being switched o (residual heat). The symbol will go o as soon as the cooking zone has cooled
down to such atemperature that there is no risk of burning.
• The inputs of the cooking zones can be regulated within the range of 9 levels, which can be set by pressing the
button with respective indicators on the control panel. An acoustic signal sounds each time the button is pressed.
The response time for pressing asymbol is 1 second. For this period, it is necessary to hold your nger on the
symbol.
Note:
• The touch control is activated by placing a nger on the required
symbol on the ceramic glass hob.
• Use the entire ngertip, not just the tip, to operate the touch buttons
(Fig. 4).
• Keep the control panel clean and dry. Even asmall amount of water
on the control panel can make it more dicult to operate the
buttons. Do not place anything on the control panel of the hob.
• The sensors do not respond to matte and dark colours (do not use
black gloves).
• Make sure not to switch on the appliance accidentally. Risk of serious
burns!
Before rst use
Prior to rst operation of the appliance, you should wipe it with awet cloth.
Switching on the hob
Touch the ON/OFF symbol (6) for 3 seconds to activate the hob.
Switching on acooking zone
1. Touch the ON/OFF symbol (6) for 3 seconds to activate the hob. In addition to the cooking zone selection buttons
(2), “-” will be lit on the control panel display (6).
2. Press to select the cooking zone you want to use. Then use the slider, the tool for setting the cooking zone power
level (3), to select the desired cooking level by pulling from left to right.
Note:
• You can change the desired cooking zone power at any time during cooking from 0 to 9.
• If you do not set any required power level within 1 minute of switching on the hob, it will automatically switch o.
Switching OFF the cooking zone
1. Press the selected cooking zone that you wish to switch o. Then slide your nger across the slider (3) from right to
left to reduce the power of the selected cooking zone to 0.
2. By pressing the ON/OFF button (6) you can turn o the hob.
Note:
• After switching o the hob the “H” symbol can be displayed, which indicates that the used cooking zone is still hot
and there is arisk of serious burns.
• Symbol “H” disappears, when the used cooking zone cools down to asafe temperature (that is not too hot to touch).
• If the “H” symbol is light up on the control panel, it is possible to use the residual heat e.g. for heating up another
cookware.
Fig. 4
Bekijk gratis de handleiding van Concept SDV3860, stel vragen en lees de antwoorden op veelvoorkomende problemen, of gebruik onze assistent om sneller informatie in de handleiding te vinden of uitleg te krijgen over specifieke functies.
Productinformatie
| Merk | Concept |
| Model | SDV3860 |
| Categorie | Fornuis |
| Taal | Nederlands |
| Grootte | 4759 MB |


