Cecotec BelleCouture 6600 handleiding
Handleiding
Je bekijkt pagina 18 van 49
BELLECOUTURE 6600
BELLECOUTURE 6600
35
34
ENGLISHENGLISH
DARNING
The most suitable settings for this stitch are as follows:
a. Stitch width 2.5.
b. Stitch length from 2 to 4.
c. Multipurpose presser foot
d. Stitch pattern A.
- Turn the stitch length adjustment knob to the desired length.
- Set the pattern selection knob to the straight stitch position. The needle shall be placed in the centre.
- Place the fabric to be darned under the presser foot together with the fabric to be placed underneath.
- Lower the presser foot and sew alternately forwards or backwards using the lifter.
- Repeat this movement until the area to be darned is covered with rows of stitches.
- To sew in the opposite direction, refer to the corresponding section in this manual.
ATTACHING LACE
The most suitable settings for this stitch are as follows:
a. Stitch width 2.5.
b. Stitch length from 2 to 4.
c. Multipurpose presser foot
d. Stitch pattern A.
- Turn the stitch length adjustment knob to the desired length.
- Set the pattern selection knob to the straight stitch position. The needle shall be placed in the centre.
- Fold the edge of the fabric inwards (approx. 6 mm).
- Place the lace under the folded edge of the fabric, leaving it slightly below the fabric, as required by
the lace pattern.
- Sew along the edge of the fabric fold.
- You can add a decorative touch by using the satin stitch to sew the lace.
APPLIQUÉ
The most suitable settings for this stitch are as follows:
a. Stitch width 3 to 5.
b. Stitch length from 0.5 to 1.
c. Multipurpose presser foot
d. Stitch pattern B.
- Turn the stitch length adjustment knob to the desired length.
- Set the pattern selection knob to the zigzag stitching position.
- Select a narrow width.
- Cut out the appliqué design and baste it to the fabric.
- Stitch slowly around the edge of the design.
- Trim any excess material outside the seam. Make sure not to cut any stitches.
- Remove the basting thread.
Tie the top and bottom threads under the appliqué to avoid unravelling.
TWIN NEEDLE
NOTE: the twin needle is an optional accessory which is not included with the machine.
The most suitable settings for this stitch are as follows:
a. Stitch width 1.5 to 3.5.
b. Stitch length from 1 to 4.
c. Multipurpose presser foot
d. Stitch pattern A.
- Turn the stitch length adjustment knob to the desired length.
- Set the pattern selection knob to the straight stitch position. The needle shall be placed in the centre. Set the width to 0.
- Make sure that the two threads used to thread the twin needle have the same weight. You can only
use one or two colours.
- Insert the twin needle in the same way as the single needle. The at side of the needle must be
facing away from you.
- Follow the instructions for single needle threading. Thread each needle separately.
-
TIPS
- When sewing with a twin needle, always sew slowly to ensure the quality of the stitch.
- When using a twin needle for zigzag stitching, make sure that the stitch width adjustment knob is
set between 1.5 and 3.5. Do not use this needle with a setting higher than 3.5.
QUILTING
The most suitable settings for this stitch are as follows:
a. Stitch width 1.5 to 3.5.
b. Stitch length from 1 to 4.
c. Multipurpose presser foot
d. Stitch pattern A.
NOTE: the quilting foot is an optional accessory which is not included with the machine. If you do not
have it, use the multipurpose presser foot instead.
Set the pattern selection knob to the straight stitch position.
Insert the edge/quilting guide into the presser foot holder and adjust it as desired.
Move the fabric and sew successive lines. Each time you sew a new row, place the guide on the previous
row of stitches.
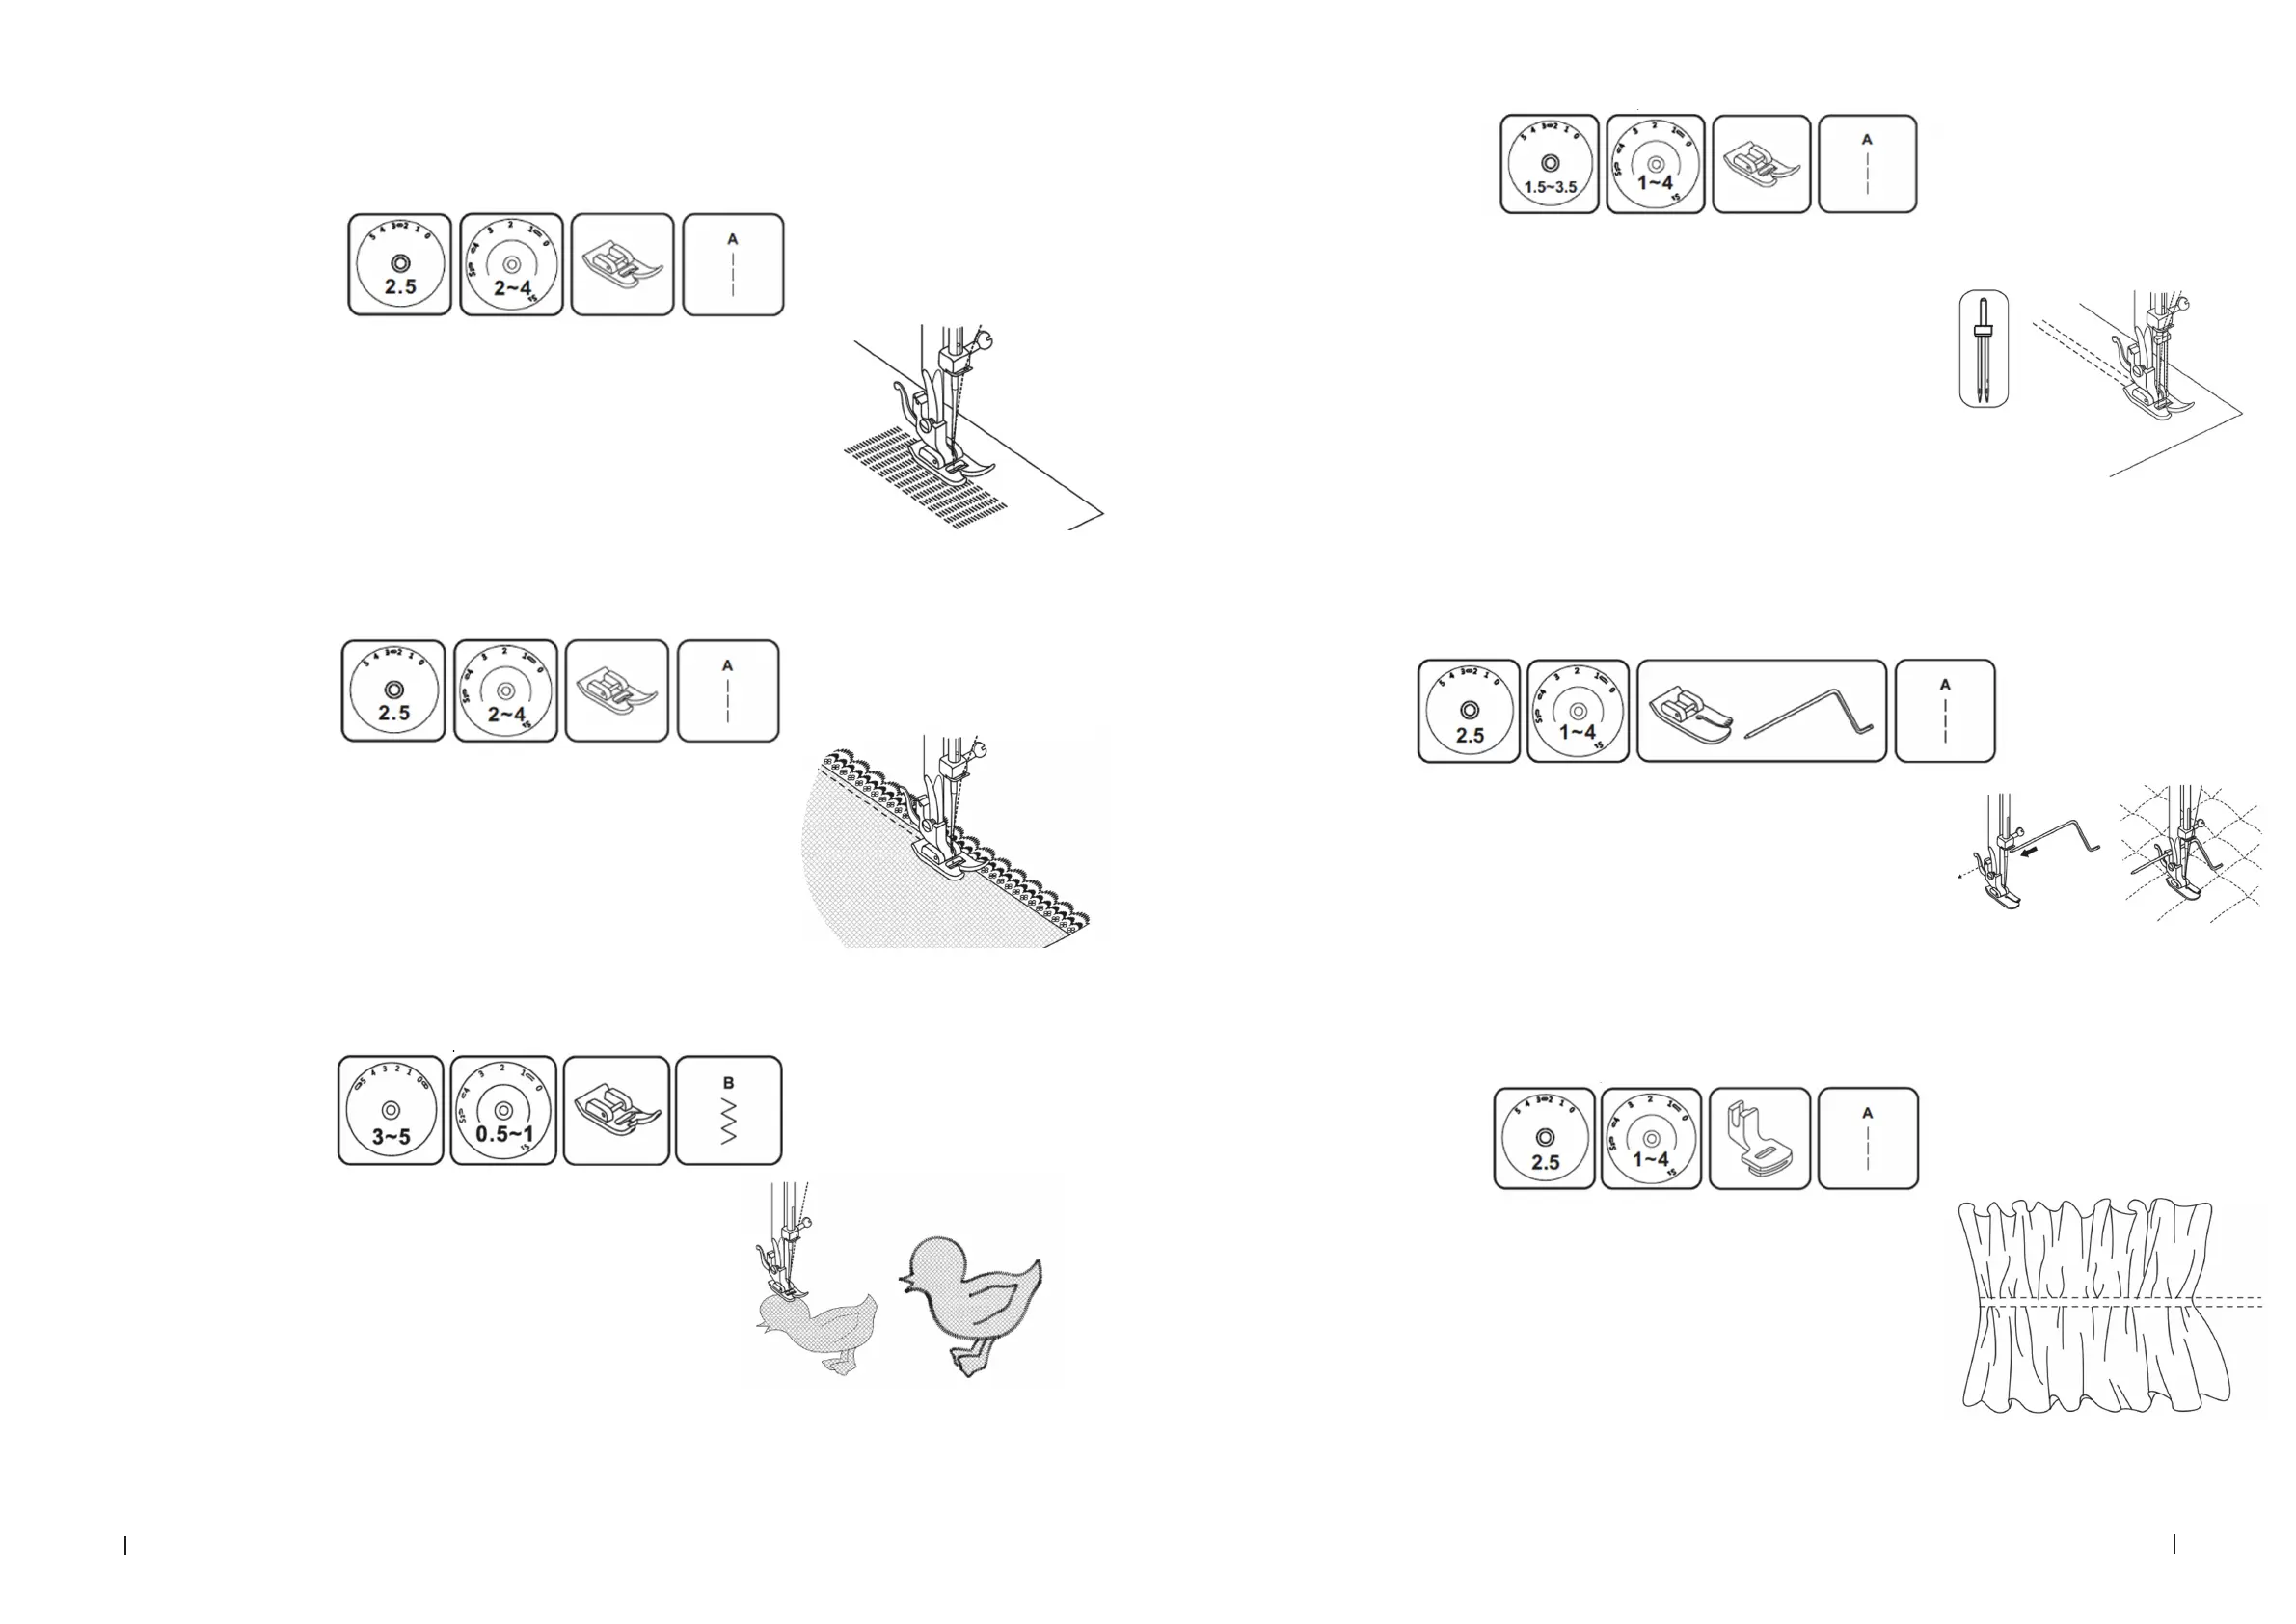
GATHERING
The most suitable settings for this stitch are as follows:
a. Stitch width 2.5.
b. Stitch length from 1 to 4.
c. Gathering foot
d. Stitch pattern A.
NOTE: the gathering foot is an optional accessory which is not included with the machine. If you do not
have this foot, use the multipurpose presser foot instead and gather the fabric manually by lowering the
tension below 2 and pulling the bottom thread to gather the material.
- Set the pattern selection knob to the straight stitch position.
- Attach the gathering foot.
- Sew one or more rows of straight stitches.
- If you need more gathering, loosen the top thread tension (choose a setting below 2) so that the
bottom thread is on the ungathered side.
- Pull the bottom thread to gather more of the material.
Bekijk gratis de handleiding van Cecotec BelleCouture 6600, stel vragen en lees de antwoorden op veelvoorkomende problemen, of gebruik onze assistent om sneller informatie in de handleiding te vinden of uitleg te krijgen over specifieke functies.
Productinformatie
| Merk | Cecotec |
| Model | BelleCouture 6600 |
| Categorie | Naaimachine |
| Taal | Nederlands |
| Grootte | 24665 MB |
