Cecotec BelleCouture 6600 handleiding
Handleiding
Je bekijkt pagina 15 van 49
BELLECOUTURE 6600
BELLECOUTURE 6600
29
28
ENGLISHENGLISH
Reverse sewing
Reverse stitching is used to secure the end of seams and to reinforce the parts that need it. When you reach the end of the
seam, press down the reverse stitch lever in the opposite direction and press the foot control lightly. Sew a few reverse
stitches. When you release the lever, the machine will resume forward sewing (A).
Undo stitch
Turn the handwheel towards you until the thread take-up lever is in the highest position. Lift the presser foot and pull the
fabric away from you.
Cutting the thread
Hold the threads behind the presser foot. Guide them with both hands into the slot (B) at the back of the presser foot bar
and press down to cut the thread. You can also use the thread cutter on the side of the machine.
Selecting the right needle, fabric, and thread
The fabric to be sewn determines the choice of needle and thread. The following tables are a practical guide to needle and thread selection.
Always refer to them before starting a new sewing project. Make sure to use the same size and type of thread in the bobbin and the top thread.
Needle selection according to fabric and thread
Needle size Fabric Thread
9-11(65-75) Lightweight fabrics: ne cottons, chion, silk, muslin,
quiana, interlock, cotton knits, tricot, jerseys, crepes,
polyester fabrics, fabrics for shirts and blouses.
Lightweight cotton, nylon or polyester thread.
12(80) Medium weight fabrics: cotton, sateen, kettle cloth,
canvas, double knit and lightweight wool. Most of the threads sold are of medium size and
suitable for these fabrics and needle types. Use
polyester yarns on synthetic materials and cotton
yarns on natural fabrics for best results. Always use
the same thread on the top and bottom.
14 (90) Medium weight fabrics: cotton duck, wool, heavy knit,
eece, denim.
16 (100) Heavy fabrics: tarpaulins, wool, tent and quilting fabrics,
netting, upholstery material (light to medium).
18 (110) Heavyweight fabrics, outerwear fabrics, upholstery
fabrics, some leathers and vinyls.
Strong thread, carpet thread. (exert strong pressure
with your foot - use high numbers).
NOTE: adapt the needle size to the thread size and the weight of the fabric.
Needle selection depending on the fabric
Needle Description Type of fabric
HAx 1
15x 1
Sharp or blue-tipped needles. Sizes range from ne to
coarse. From 9 (65) to 18
(110).
Natural fabrics: wool, cotton, silk, etc. Quiana. Not
recommended for double fabrics.
15x 1/705H (SIN) Universal needles (slightly rounded tip). From 9 (65) to
18 (110).
Natural and synthetic fabrics, polyester blends. Knitted
fabrics: polyester, interlocks, tricot, single and double
knit. Can be used instead of 15x1 for sewing all fabrics.
15x 1/705HS (SUK) Ball-tipped needle. From 9 (85) to 18 (110). Jersey, lycra, swimwear fabrics, stretch fabrics.
130 PCL Leather needles. From 12 (80) to 18 (110).
(110)
Leather, vinyl, upholstery. (Leaves a smaller hole than
the standard large needle).
NOTE:
- Double needles can be used for specic or decorative tasks.
- When sewing with twin needles, the stitch width dial must be set to less than 2.5.
- European needle sizes are 65, 70, 80, etc. The American and Japanese needle sizes are 9, 11, 12, etc.
- Change the needle frequently, about every other garment, or when the thread breaks or the machine skips stitches.
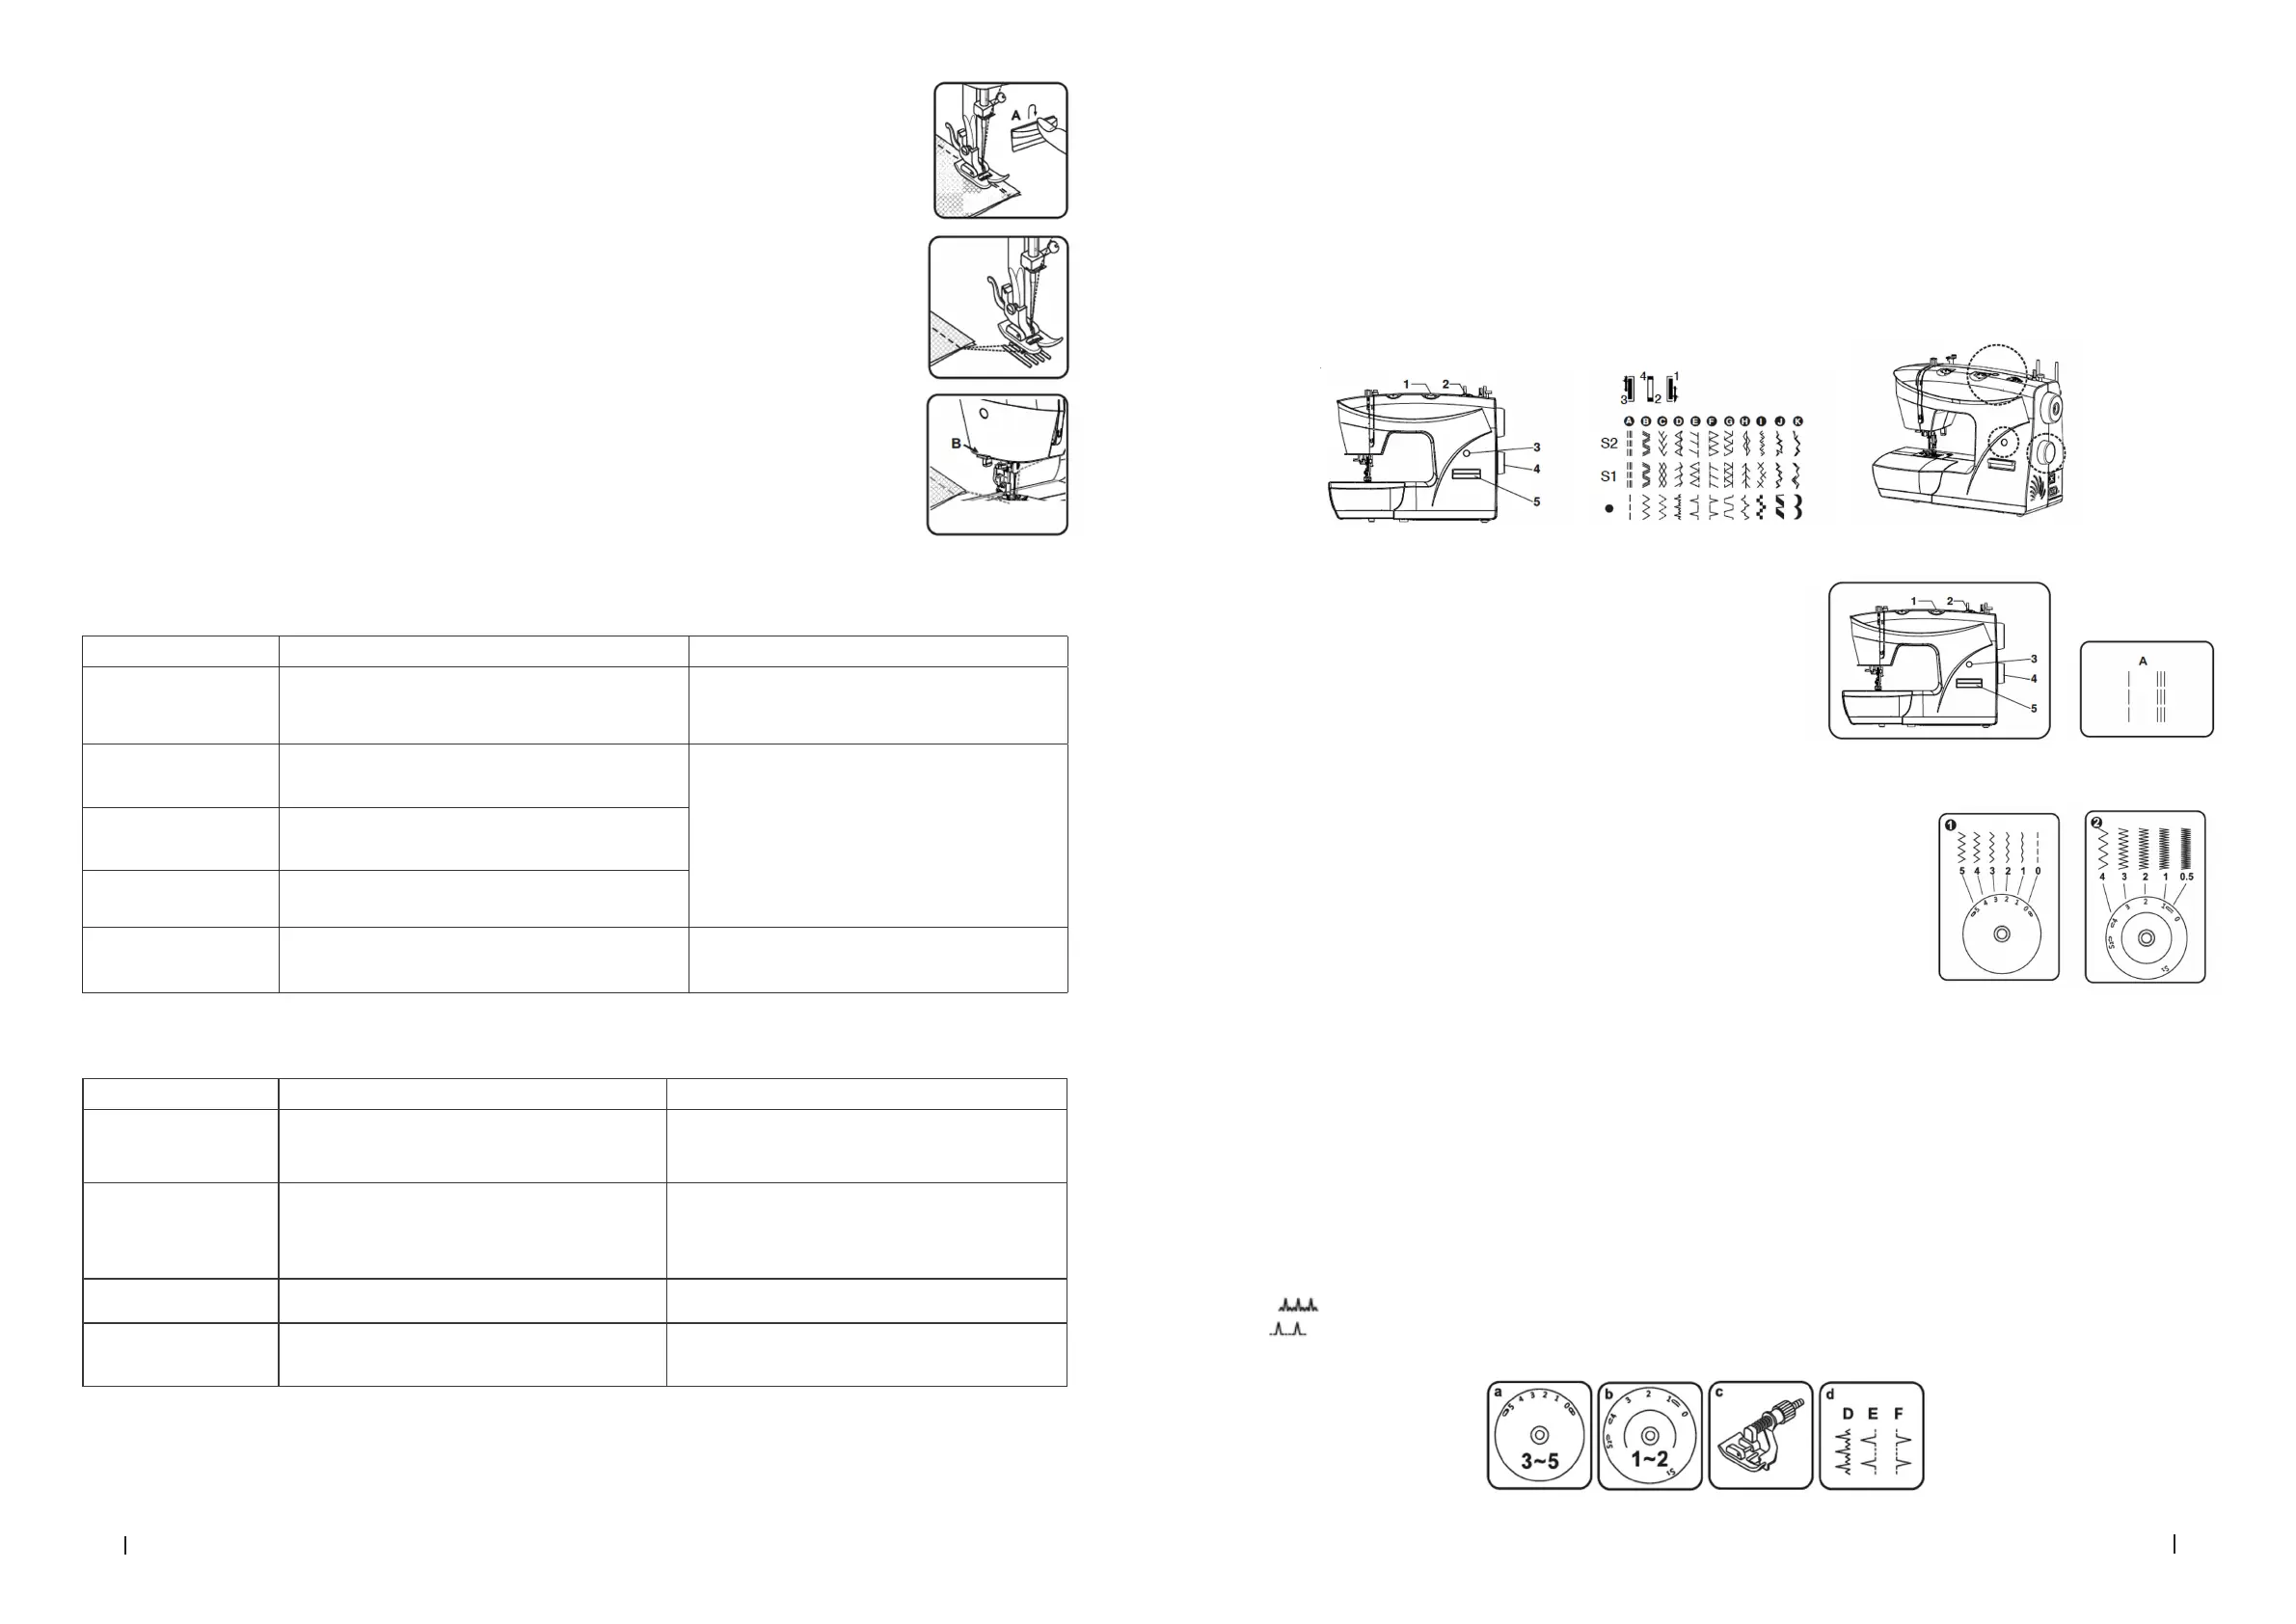
Selecting the stitch pattern
- To make a straight stitch, select pattern A with the pattern selection knob (4). Set the stitch length with the stitch length adjustment knob
(2). You can choose any needle position by turning the stitch width adjustment knob (1).
- To make a zigzag stitch, select pattern B with the pattern selection knob (4). Adjust the stitch length (2) and stitch width (1) according to the
fabric to be used.
- To make any of the stitch patterns of the top row, turn the stitch length adjustment knob (2) to position S2. Then select the desired pattern
with the patter selection knob (4). Finally, set the stitch width with the stitch width adjustment knob (1).
- To make any of the stitch patterns of the second row, turn the stitch length adjustment knob (2) to position S1. Then select the desired
pattern with the patter selection knob (4). Finally, set the stitch width with the stitch width adjustment knob (1).
- To make any pattern in the third row, select the letter above the stitch with the pattern selection knob (4). Set the stitch length (2) and width
(1) with the corresponding knobs.
- With the stitch display (3), you can see the selected settings.
- If desired, select the opposite stitch direction by moving the reverse stitch switch (5).
4. STARTING TO SEW
STRAIGHT STITCHING AND NEEDLE POSITION
- Turn the pattern selection knob (4) until the stitch display (3) shows the straight
stitch position (A).
- In general, the thicker the fabric, thread, and needle, the longer the stitch should
be.
- Choose the needle position (from the middle to the right) by changing the
position of the stitch width adjustment knob (1). The positions of this knob
range from 0 to 5.
ZIGZAG STITCHING
Set the pattern selection knob to position B.
1. Function of the stitch width adjustment knob
The maximum width of the zigzag stitch is 5. However, it can be reduced in any pattern. The stitch
width increases as you move the knob from 0 to 5. If you are sewing with a twin needle, do not select
a width greater than 2.5 (1).
2. Stitch length adjustment knob function while performing zigzag stitches
The zigzag stitch density increases as the stitch length adjustment knob setting approaches 0. To
achieve clean zigzag stitches, we recommend that you do not choose a length longer than 2.5 (2).
SATIN STITCHING
When the stitch length is set between 0 and 1, the stitches will be close together, which will produce the satin stitch, used to make buttonholes
and decorative stitches.
SEWING THIN FABRICS
If you are sewing very thin fabrics, it is recommended that you use an interlining on the reverse side of the fabric.
BLIND HEM/LINGERIE STITCHING
This stitch is suitable for hems, curtains, trousers, skirts, etc.
The most suitable settings for this stitch are as follows:
a. Stitch width 3 to 5.
b. Stitch length from 1 to 2.
c. Hemmer foot
d. Stitch pattern D, E or F.
Blind hem for stretch fabrics. Set the knob to position D.
Blind hem/lingerie for rm fabrics. Set the knob to position E or F.
Bekijk gratis de handleiding van Cecotec BelleCouture 6600, stel vragen en lees de antwoorden op veelvoorkomende problemen, of gebruik onze assistent om sneller informatie in de handleiding te vinden of uitleg te krijgen over specifieke functies.
Productinformatie
| Merk | Cecotec |
| Model | BelleCouture 6600 |
| Categorie | Naaimachine |
| Taal | Nederlands |
| Grootte | 24665 MB |
