Handleiding
Je bekijkt pagina 42 van 56
Cleaning and maintenance
EN
42 bora.com
Fig.7.2
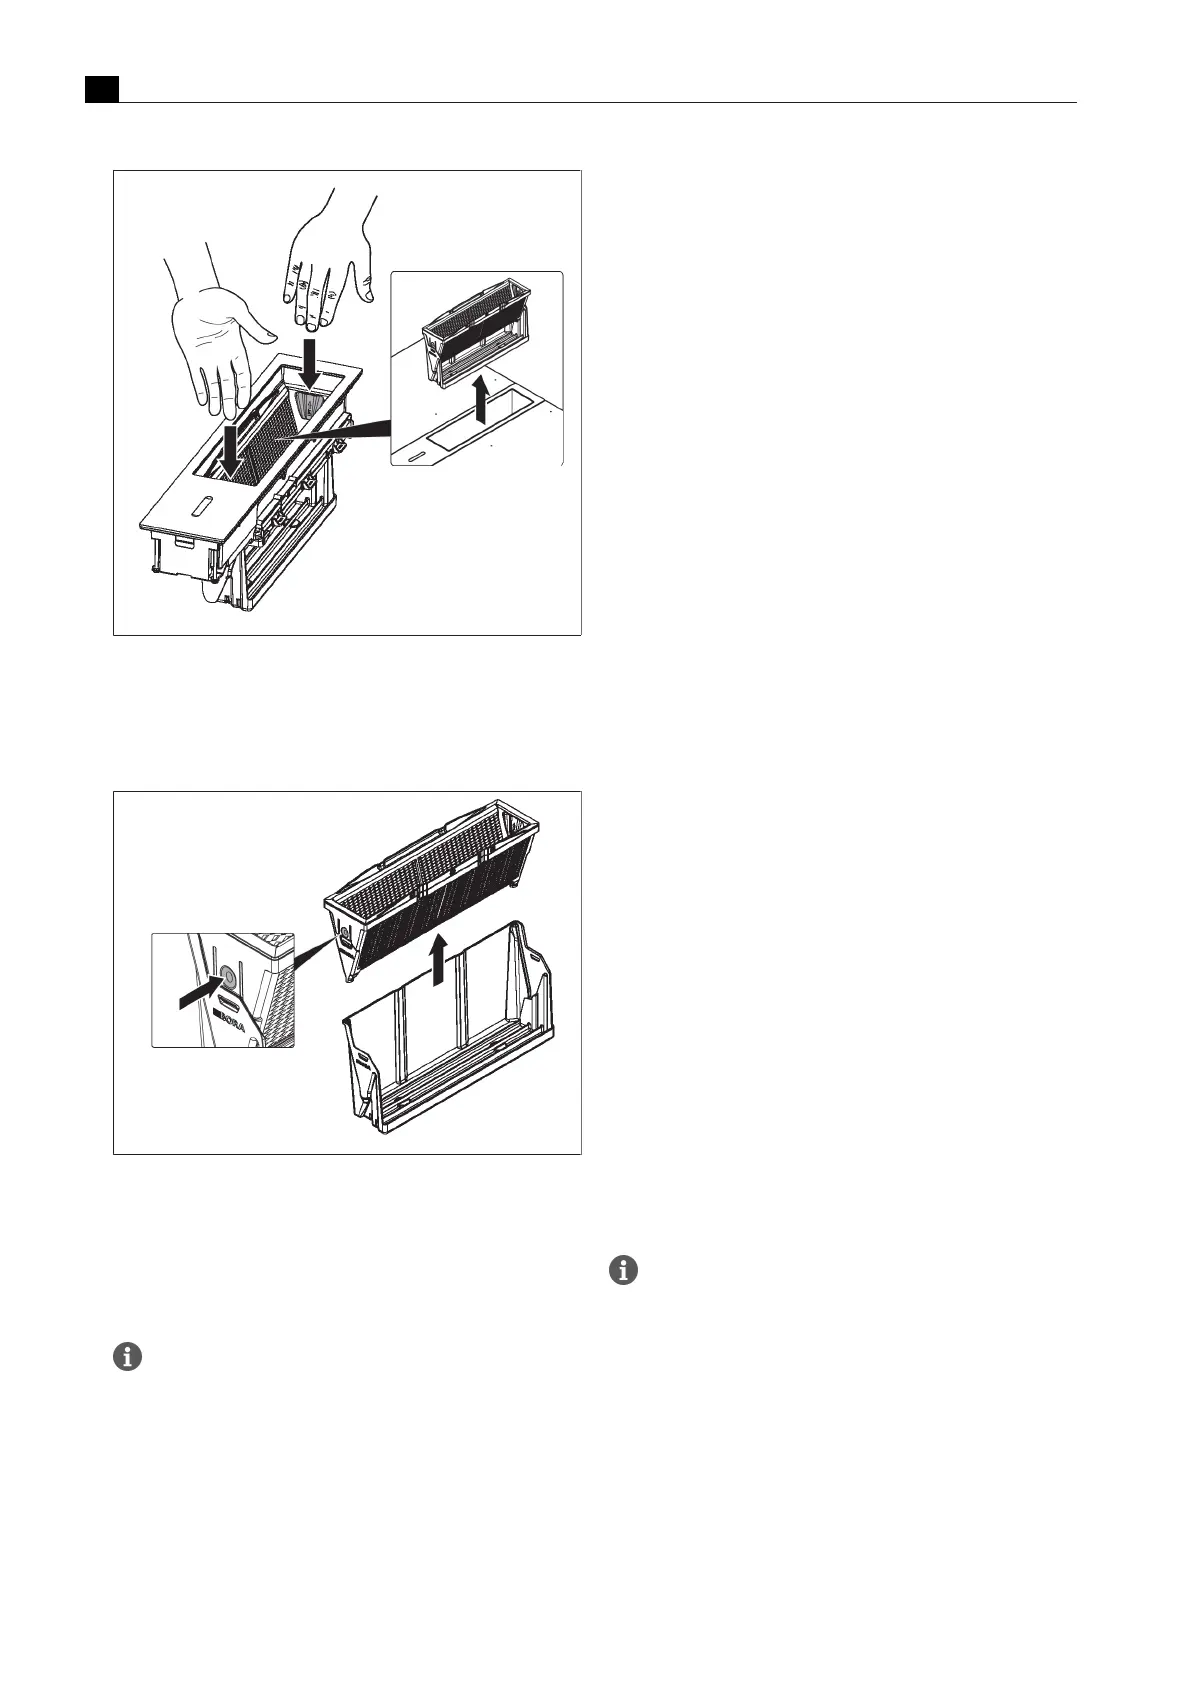
Removing the grease filter unit
Disassembling the grease filter unit
u
Remove the grease filter from the tray.
u
To do this, push in the 2 locking tabs on each end of the grease
filter
Fig.7.3
Removing the grease filter
7.3.2
Cleaning the components
The air inlet nozzle, grease filter and tray can be cleaned manually or
in a dishwasher.
u
Disassemble the grease filter unit prior to cleaning.
If the stainless steel grease filter can no longer be fully
cleaned, it must be replaced (Warranty, technical service,
spare parts, accessories).
Manual cleaning
u
Use a cleaner and degreaser in one.
u
Rinse the components with hot water.
u
Clean the components with a soft brush.
u
Rinse the components well after cleaning.
Cleaning in the dishwasher
u
Remove coarse food residues from the components.
u
Place the components in the dishwasher.
u
No water should be able to gather in the components.
u
Rinse the components with a rinsing program at a maximum
temperature of 65°C.
7.3.3
Fitting the components
Assembling the grease filter unit
It is not necessary to apply pressure when assembling the
components. The grease filter unit is designed so that the individual
parts can be assembled without force and with no room for error.
u
Carefully insert the grease filter into the tray.
u
Ensure that the lock clicks into place.
u
Do not force the grease filter into the tray.
T
If you notice any resistance whilst inserting the grease filter, you
just need to turn it around.
Fitting the grease filter unit
The grease filter unit can only be fully inserted without resistance if it
is facing the right way. If the instructions are followed correctly, it is
impossible to fit it incorrectly.
u
Carefully insert the grease filter unit into the cooktop extractor.
u
Do not force the grease filter unit into the cooktop extractor.
T
If you notice any resistance whilst inserting the grease filter unit,
you just need to turn it around.
Inserting the air inlet nozzle
u
Insert the air inlet nozzle in the inlet opening.
u
Make sure it is positioned correctly.
7.3.4
Replace the activated charcoal
filter
In recirculation mode, an additional activated charcoal filter is used.
The activated charcoal filter absorbs cooking odours. The activated
charcoal filter is installed on the plinth fan or the duct system. If an
activated charcoal filter has reached the end of its service life, the
filter service display will appear and the filter must be replaced. After
replacing the filter, the filter service life must be reset.
u
Change the activated charcoal filter when the filter service display
appears.
T
You can see the service life and a description of how to change the
filter in the activated charcoal filter operating instructions.
u
Reset the filter service display (Filter service life and filter service
display).
You can obtain activated charcoal filters from your specialist
supplier or from the BORA Shop via the website at http://
www.mybora.com.
7.4
Cleaning the cooktops
7.4.1
Cleaning glass ceramic
u
Make sure that the cooktop is switched off.
u
Wait until all cooking zones are cold.
u
Remove all coarse dirt and food residues from the cooktop using a
glass ceramic scraper.
u
Apply the cleaning agent to the cold cooktop.
Bekijk gratis de handleiding van Bora Classic 2.0 CKCB, stel vragen en lees de antwoorden op veelvoorkomende problemen, of gebruik onze assistent om sneller informatie in de handleiding te vinden of uitleg te krijgen over specifieke functies.
Productinformatie
| Merk | Bora |
| Model | Classic 2.0 CKCB |
| Categorie | Afzuigkap |
| Taal | Nederlands |
| Grootte | 7782 MB |


