Bolin Technology FEX22B4K-RNP2 handleiding
Handleiding
Je bekijkt pagina 22 van 49
22
Setting the Scene
Set image parameters to achieve the desired image effects
based on live video in different scenes.
Click Setup > Image > Image.
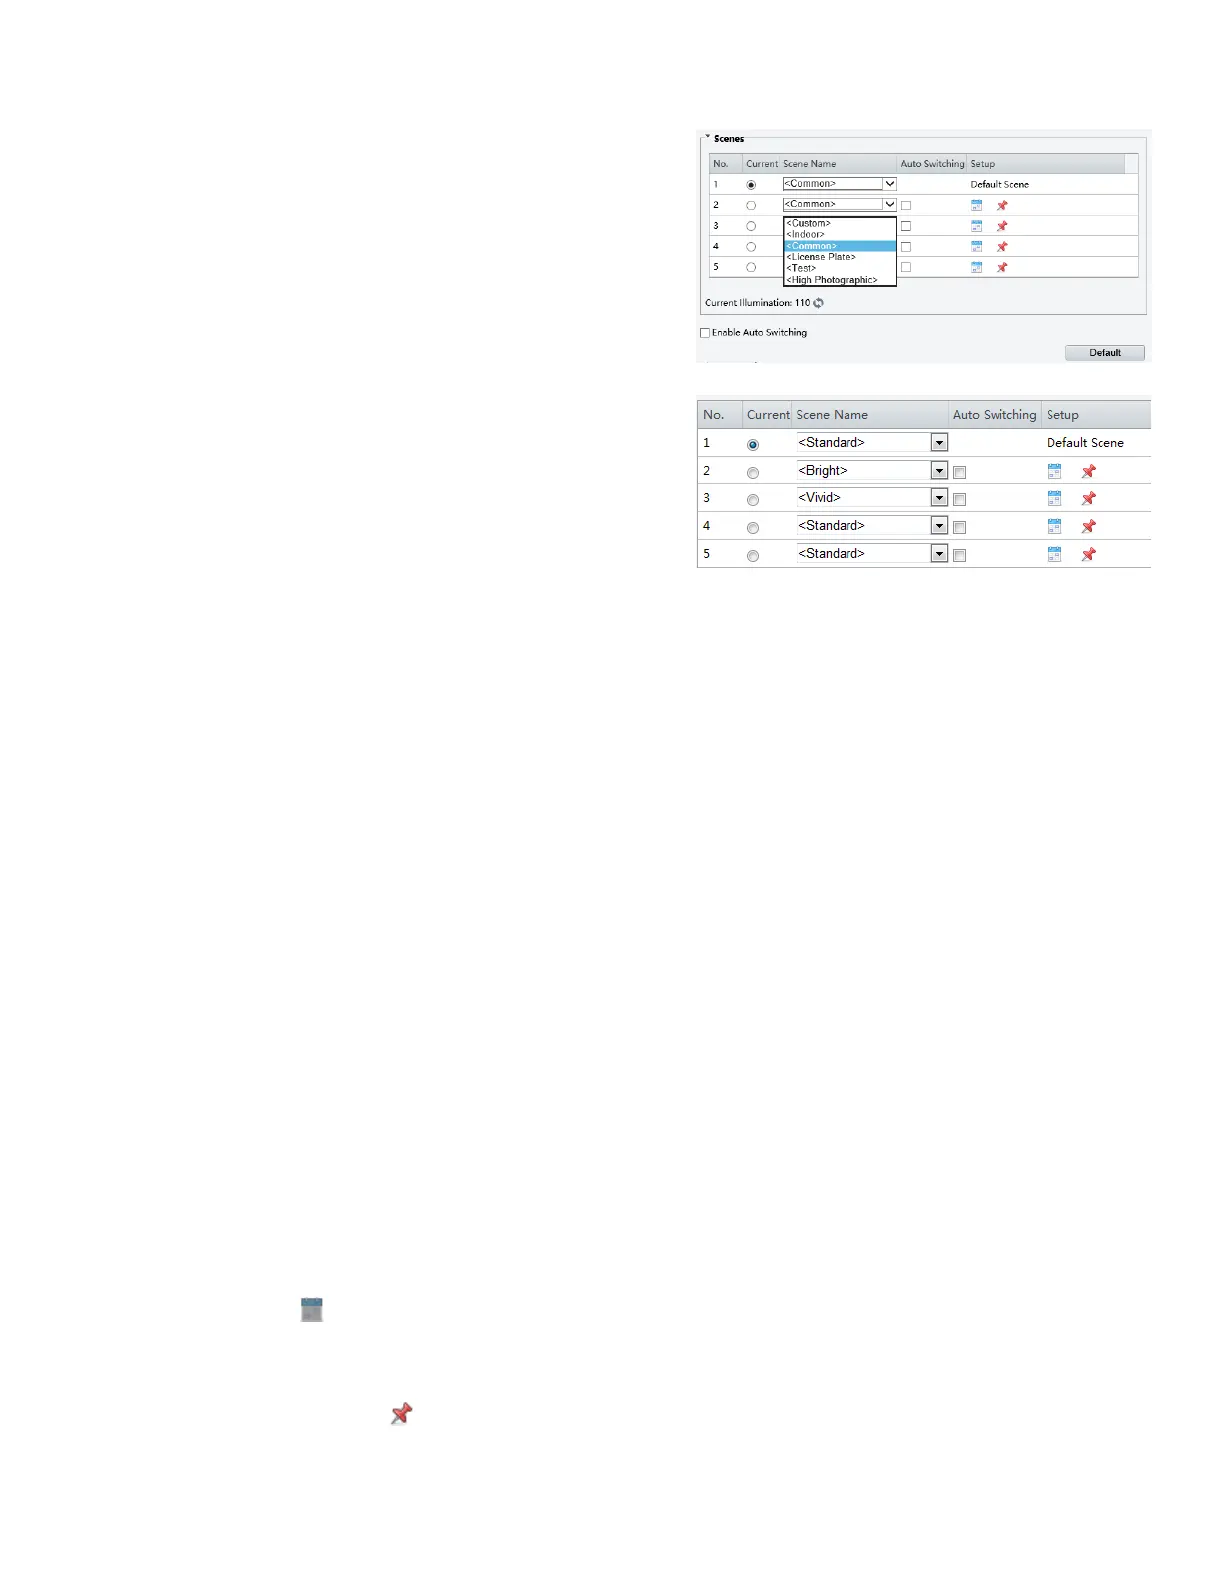
Click Scenes.
The scene management page for some models is displayed as
follows (Right Top), you can select the desired scene in the
drop-down list.
The Web interface of certain models is displayed as follows
(Right Below).
1. Click Scenes.
2. Select a scene, and then set scene switching parameters. The
following table describes some major parameters.
A. Current
a. Indicates the scene that is being used.
i. Select an option button to switch to the scene and display the corresponding image parameters for
the scene.
ii. The camera switches the current scene automatically when Enable Auto Switching is selected.
B. Scene Name
a. Name of the current scene. The device provides several preset scene modes. When you select a scene, the
corresponding image parameters are displayed. You can adjust image settings according to actual needs.
i. Common: recommended for outdoor scenes
ii. Indoor: recommended for indoor scenes
iii. License Plate: recommended for plate snapshot on roads
iv. High Sensitivity: recommended for scenes with low light
v. Highlight Suppression: recommended for scenes with intense light, for example, it is used to
reduce the car light to snapshot the license plate
vi. WDR: recommended for scenes with high-contrast lighting, such as window, corridor, front door
or other scenes that are bright outside but dim inside
vii. Custom: set a scene name as needed
viii. Standard: default image settings
ix. Vivid: increase the saturation of the image based on the standard mode.
x. Bright: increase the brightness of the image based on the standard mode.
C. Auto Switching
a. Indicates whether to add a scene to the auto-switching list.
i. If Auto Switching is selected, the system switches to a scene automatically when the condition
for switching to the scene is met. By default, the auto-switching list includes the default scene.
D. Setup
a. Click to set conditions for auto-switching, including schedule, illumination, and current elevation
(angle between the PTZ and the horizontal direction). It means that auto-switching is triggered only when
illumination and the current elevation during the set time period meet the set conditions. A condition is
invalid if both the start and end values are set to 0.
3. Select a scene and then click to set it as the default scene.
4. If auto-switching is enabled, the camera can switch to the scene automatically when the condition for switching to a
non-default scene is met. Otherwise, the camera remains in the default scene. When auto-switching is not enabled, the
camera remains in the current scene.
Bekijk gratis de handleiding van Bolin Technology FEX22B4K-RNP2, stel vragen en lees de antwoorden op veelvoorkomende problemen, of gebruik onze assistent om sneller informatie in de handleiding te vinden of uitleg te krijgen over specifieke functies.
Productinformatie
| Merk | Bolin Technology |
| Model | FEX22B4K-RNP2 |
| Categorie | Bewakingscamera |
| Taal | Nederlands |
| Grootte | 11905 MB |


