Handleiding
Je bekijkt pagina 21 van 92
EN / 21
checked regularly and replaced within the
periods recommended by its manufac-
turer or when necessary.
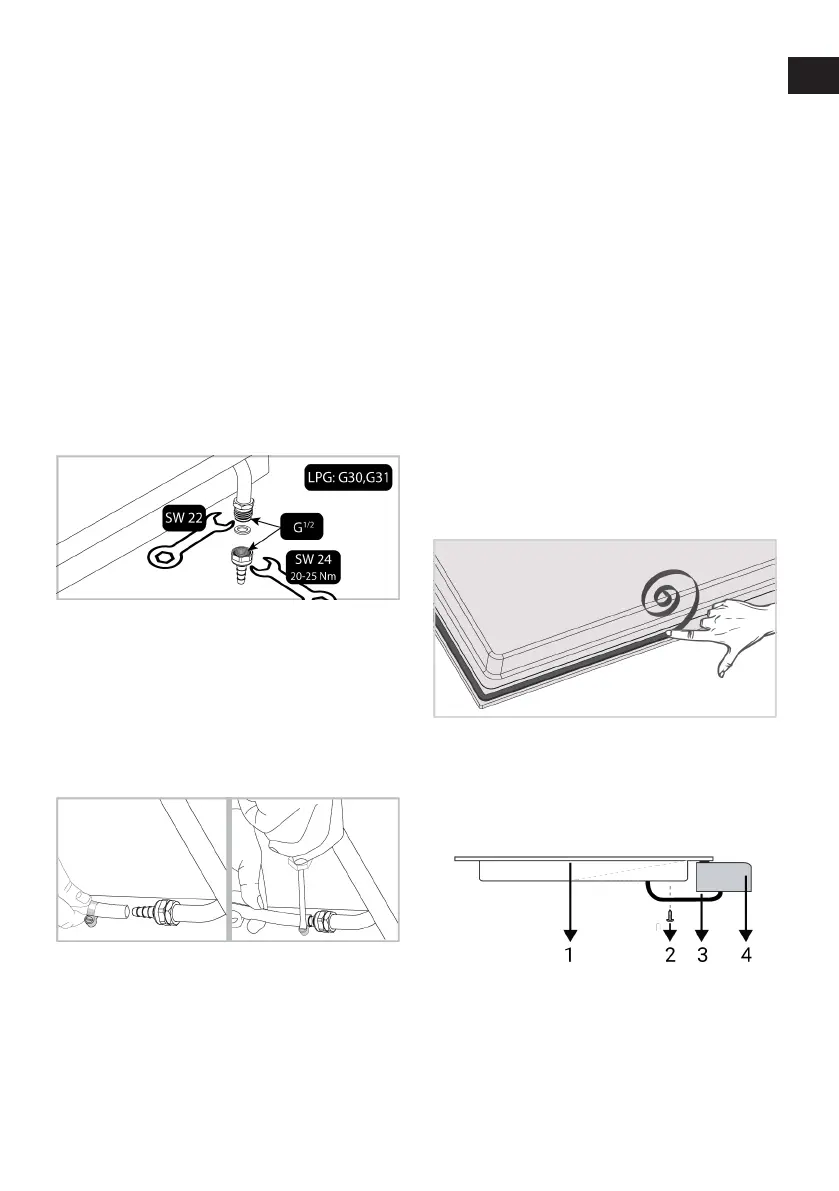
• A new sealing gasket must be used while
making the gas connection.
• The gas connection must be made via a
gas hose or a fixed connection.
Connection with clamped (threadless) gas
hose
1. Place the new seal in the connection
piece for liquid gas and make sure the
seal is seated correctly.
2. Secure the gas connection outlet of the
product with a 22 mm spanner, connect
the connecting piece to the gas outlet of
the product with a 24 mm spanner and
tighten securely.
3. Fit the mounting clamp to one end of
the gas hose. Soften the end of the gas
hose to which you have attached the
clamp by placing it in boiling water for
one minute.
4. Insert the softened gas hose all the way
into the connection piece. Tighten the
clamp securely with a screwdriver.
5. You must check for leakage of the con-
nection part after connection.
Leakage check at the connection point
• Make sure that all knobs on the product
are turned off. Make sure that the gas
supply is open. Prepare soapy foam and
apply it onto the connection point of the
hose for gas leakage control.
• Soapy part will froth if there is a gas leak-
age. In this case, inspect the gas connec-
tion once again.
• Instead of soap, you can use commer-
cially available sprays for gas leak check.
• If there is gas leak, shut off the gas sup-
ply and ventilate the room.
• Never use a match or lighter to make the
gas leakage control.
4.4 Installing the product
1. Remove burners, burner caps and grills
on the hob from the product.
2. Turning the hob upside down, place it on
a flat surface.
3. When installing the hob, apply the seal-
ing gasket, which was provided in the
packaging, around the hob as shown in
the following picture, ensuring that it re-
mains 1 to 2 mm inside from the outer
edge of the glass.
4. Place the hob on the counter and align
it.
5. Using the installation clamps secure the
hob by fitting through the holes on the
lower casing.
1 Hob
2 Screw
3 Installation clamp
4 Counter
EN
FR
AR
Bekijk gratis de handleiding van BEKO HILG 64221 B, stel vragen en lees de antwoorden op veelvoorkomende problemen, of gebruik onze assistent om sneller informatie in de handleiding te vinden of uitleg te krijgen over specifieke functies.
Productinformatie
| Merk | BEKO |
| Model | HILG 64221 B |
| Categorie | Fornuis |
| Taal | Nederlands |
| Grootte | 9837 MB |


