Baby Lock Gallant Longarm handleiding
Handleiding
Je bekijkt pagina 17 van 58
Gallant User Manual | 17
Oponal Accessories
Please visit www.babylock.com to view addional oponal accessories not featured in this guide.
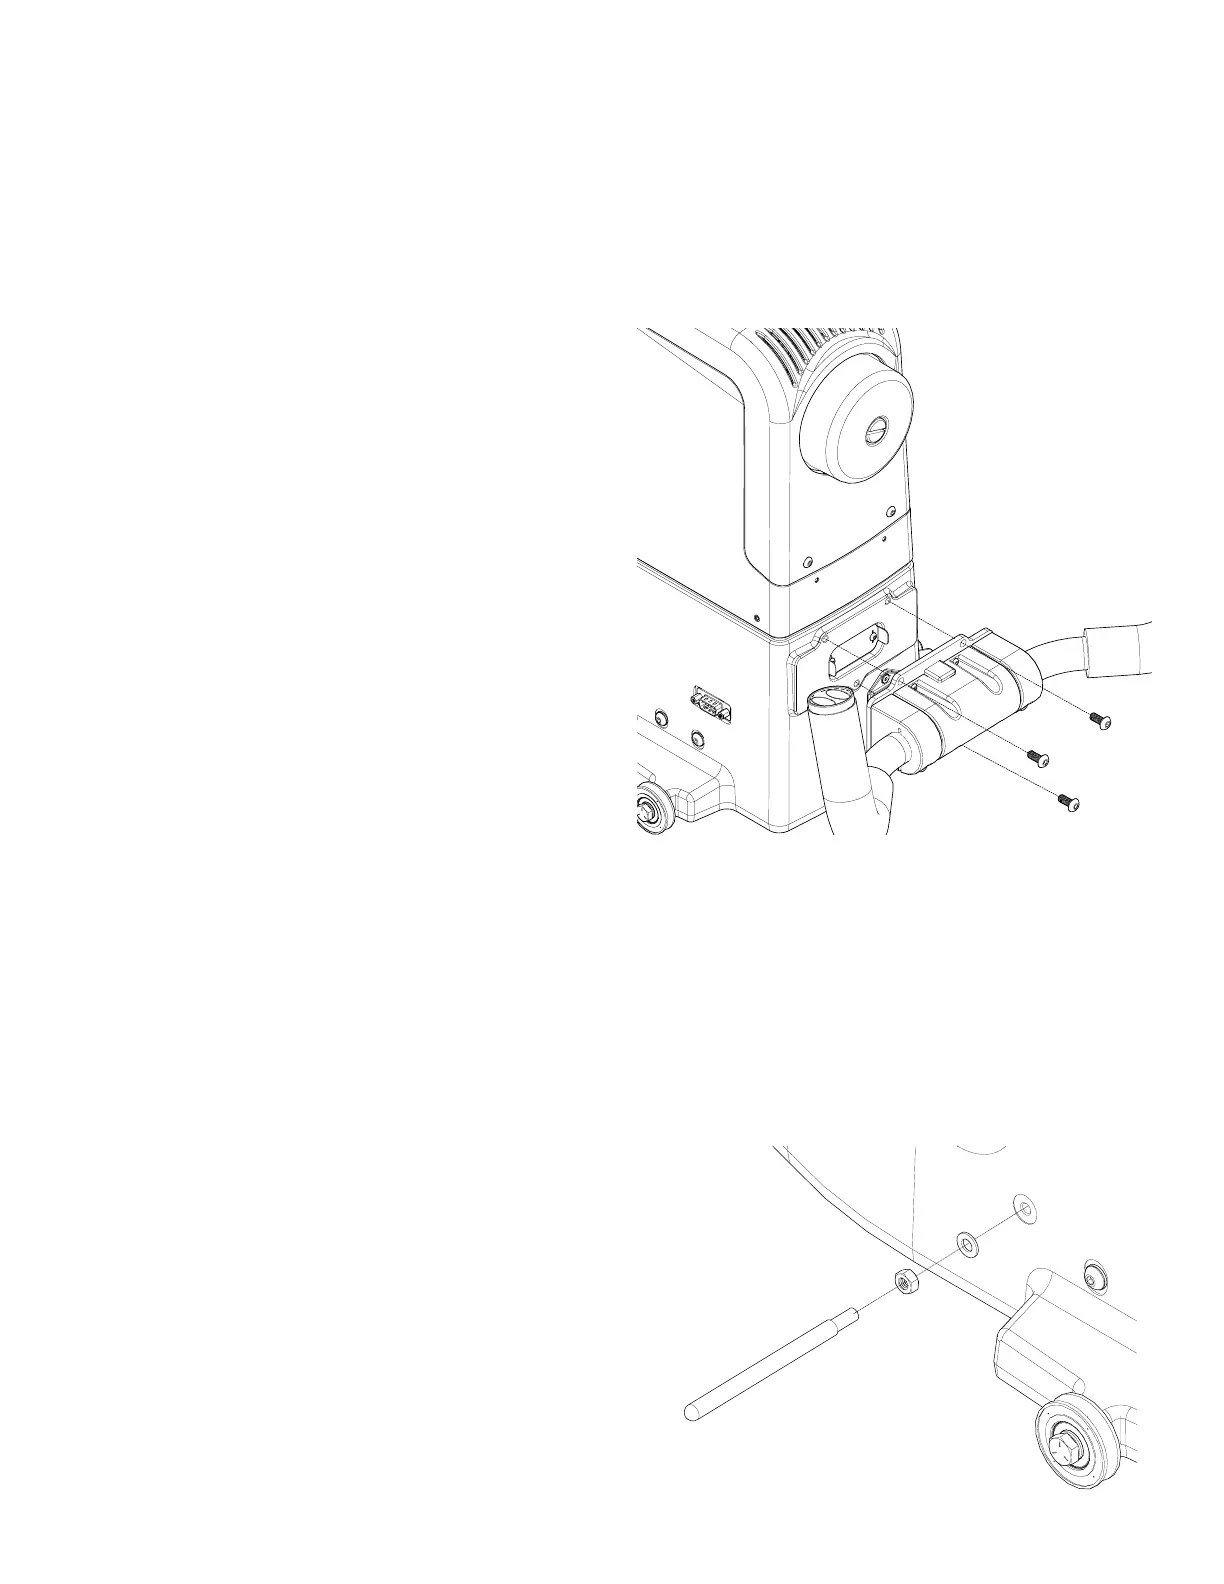
Rear Handlebars and Laser
To install the rear handlebar
NOTE: Make sure that the machine is o
before installing the rear handlebar. The
main power switch must be in the O (o)
posion.
1. Slightly loosen the two Philips screws on the
rear handlebar connecon cover with a #1
Phillips screwdriver (not provided). Do NOT
remove the screws.
2. Pull o the plasc cover. It protects the
rear handlebar connecon. Do NOT
remove the screws.
3. Re-ghten the two screws. They hold
the connecon board to the machine.
4. You will need three M5 x 12 SKB ZN screws for
the rear handlebars and the 3mm hex wrench.
5. Align the three holes in the handlebars with
the holes on the back of the machine.
6. Aach with the three screws. Tighten securely.
To install the laser pin
1. You will need the laser pin, washer and nut.
2. Screw the nut all the way onto the laser pin.
3. Slide the washer onto the laser pin threads and
screw the laser pin all the way into the side of
the machine.
4. While holding the laser pin rmly, ghten the
nut with the 8mm wrench (provided).
Bekijk gratis de handleiding van Baby Lock Gallant Longarm, stel vragen en lees de antwoorden op veelvoorkomende problemen, of gebruik onze assistent om sneller informatie in de handleiding te vinden of uitleg te krijgen over specifieke functies.
Productinformatie
| Merk | Baby Lock |
| Model | Gallant Longarm |
| Categorie | Niet gecategoriseerd |
| Taal | Nederlands |
| Grootte | 12386 MB |