Axxess AXPIO-JT1 handleiding
Handleiding
Je bekijkt pagina 2 van 16
2
DASH DISASSEMBLY KIT ASSEMBLY
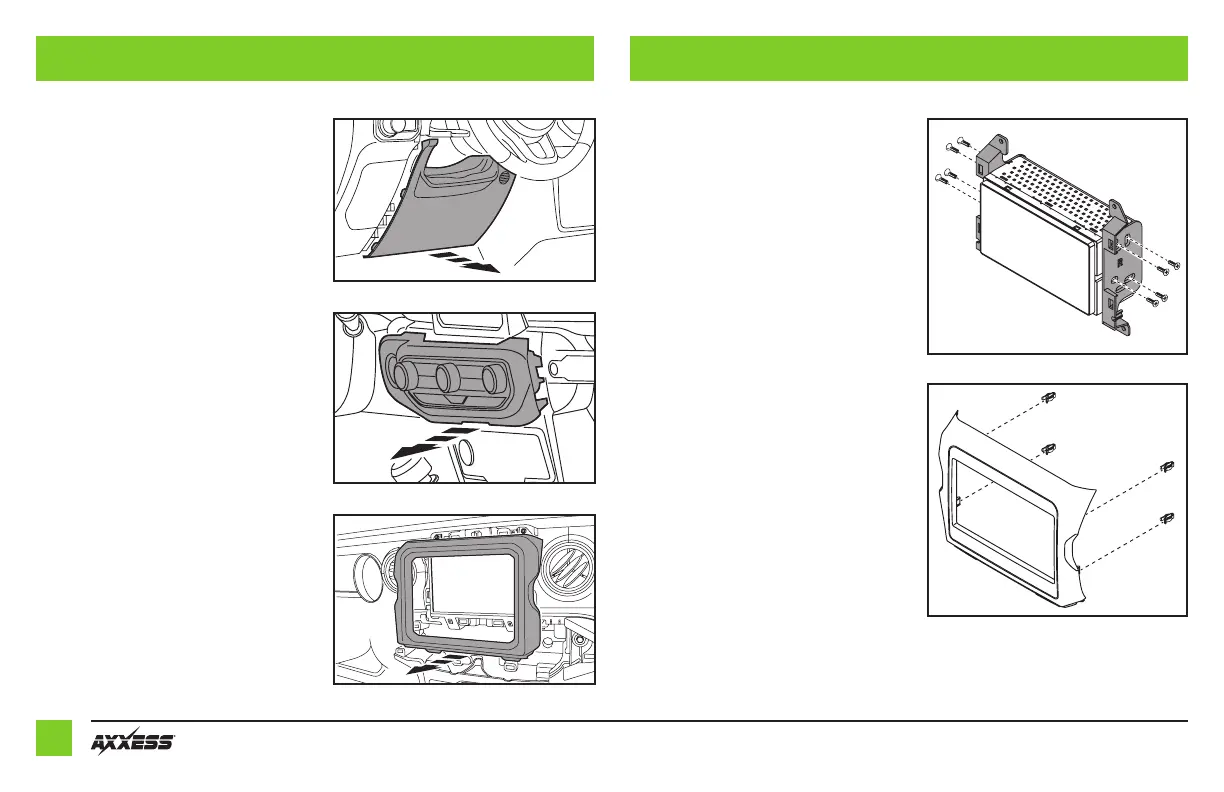
1. Unsnap and remove the panel below the
steering column. (Figure A)
2. Using the panel removal tool, carefully
unclip the climate control panel, unplug
the HVAC and start/stop button, and
then set aside. (Figure B)
3. Remove (2) Phillips screws securing the
radio trim panel, then, starting at the
bottom, unclip and remove the panel.
(Figure C)
4. Remove (4) Phillips screws securing the
factory radio, disconnect the wiring, and
then remove the radio.
(Figure A)
(Figure B)
(Figure C)
(Figure A)
(Figure B)
Radio provision
1. Secure the
shallow radio brackets
to
the radio using screws supplied with the
radio. (Figure A)
2. Locate the factory wiring harness and
antenna connector in the dash and
complete all necessary connections to
the radio. Metra recommends using the
proper mating adapter from Metra and/
or Axxess.
3. Reconnect the negative battery terminal
and test the Pioneer radio for proper
operation.
4. Place the radio into the dash, then
secure using the factory screws.
5. Attach (4)
panel clips
provided with this
kit onto the
radio bezel
, and then snap
the bezel over the radio. (Figure B)
6. Reassemble the dash in the reverse
order of disassembly to complete
the installation.
Bekijk gratis de handleiding van Axxess AXPIO-JT1, stel vragen en lees de antwoorden op veelvoorkomende problemen, of gebruik onze assistent om sneller informatie in de handleiding te vinden of uitleg te krijgen over specifieke functies.
Productinformatie
| Merk | Axxess |
| Model | AXPIO-JT1 |
| Categorie | Niet gecategoriseerd |
| Taal | Nederlands |
| Grootte | 5696 MB |


