Axxess AXPIO-IN1 handleiding
Handleiding
Je bekijkt pagina 3 van 20
REV. 8/26/24 INSTAXPIO-IN1
3
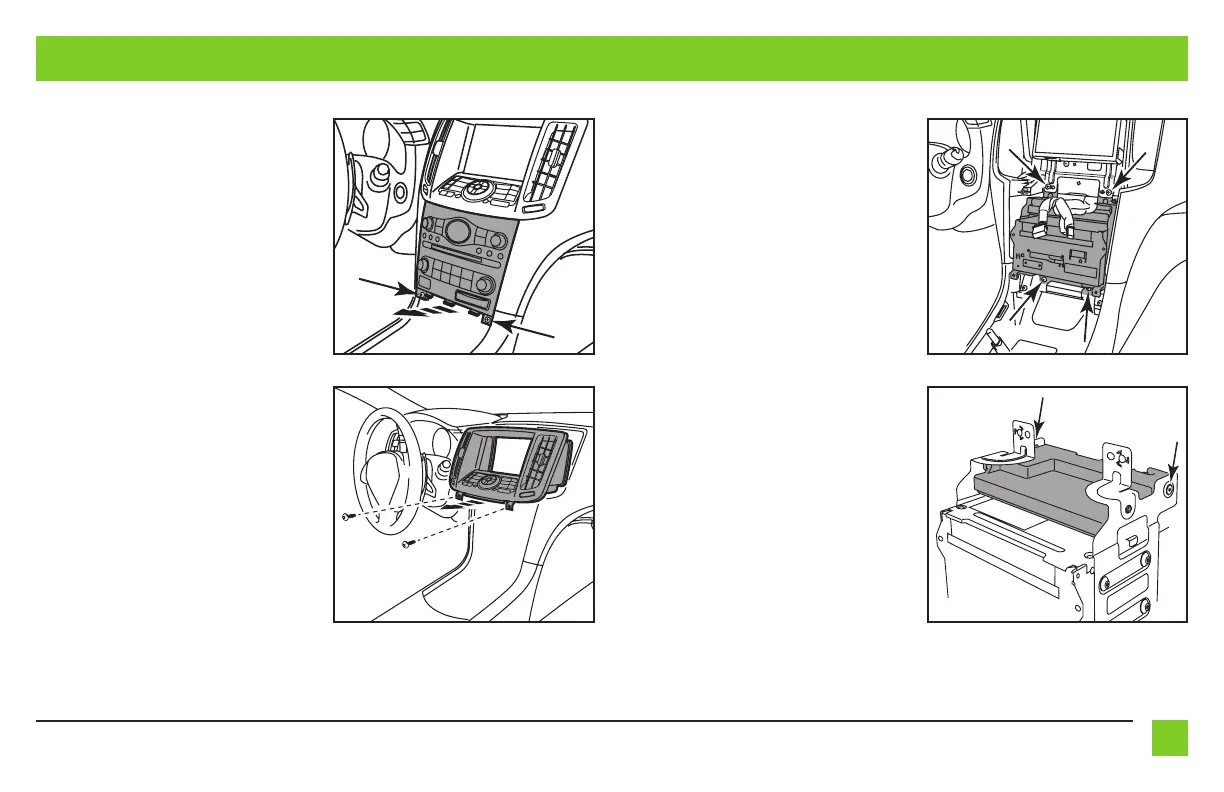
DASH DISASSEMBLY (CONT.)
2008-2013 vehicles:
3. Remove (2) screws at the bottom of the
radio/climate control panel and remove
panel. (Figure C)
4. Remove (2) screws at the bottom of the
factory display panel and remove panel
with the vents. (Figure D)
5. Remove the factory vents and save
them for Kit Assembly.
6. Remove (4) Phillips screws securing
the radio chassis and A\C amp bracket
assembly then remove the assembly
from the dash. (Figure E)
7. Remove (2) Torx screws securing the
A\C amp module to the radio chassis/
bracket assembly and save for Kit
Assembly. (Figure F)
Continue to Kit Preparation
(Figure F)(Figure D)
(Figure E)(Figure C)
Bekijk gratis de handleiding van Axxess AXPIO-IN1, stel vragen en lees de antwoorden op veelvoorkomende problemen, of gebruik onze assistent om sneller informatie in de handleiding te vinden of uitleg te krijgen over specifieke functies.
Productinformatie
| Merk | Axxess |
| Model | AXPIO-IN1 |
| Categorie | Niet gecategoriseerd |
| Taal | Nederlands |
| Grootte | 3415 MB |


