Axxess AXPIO-COM1 handleiding
Handleiding
Je bekijkt pagina 2 van 16
2
DASH DISASSEMBLY
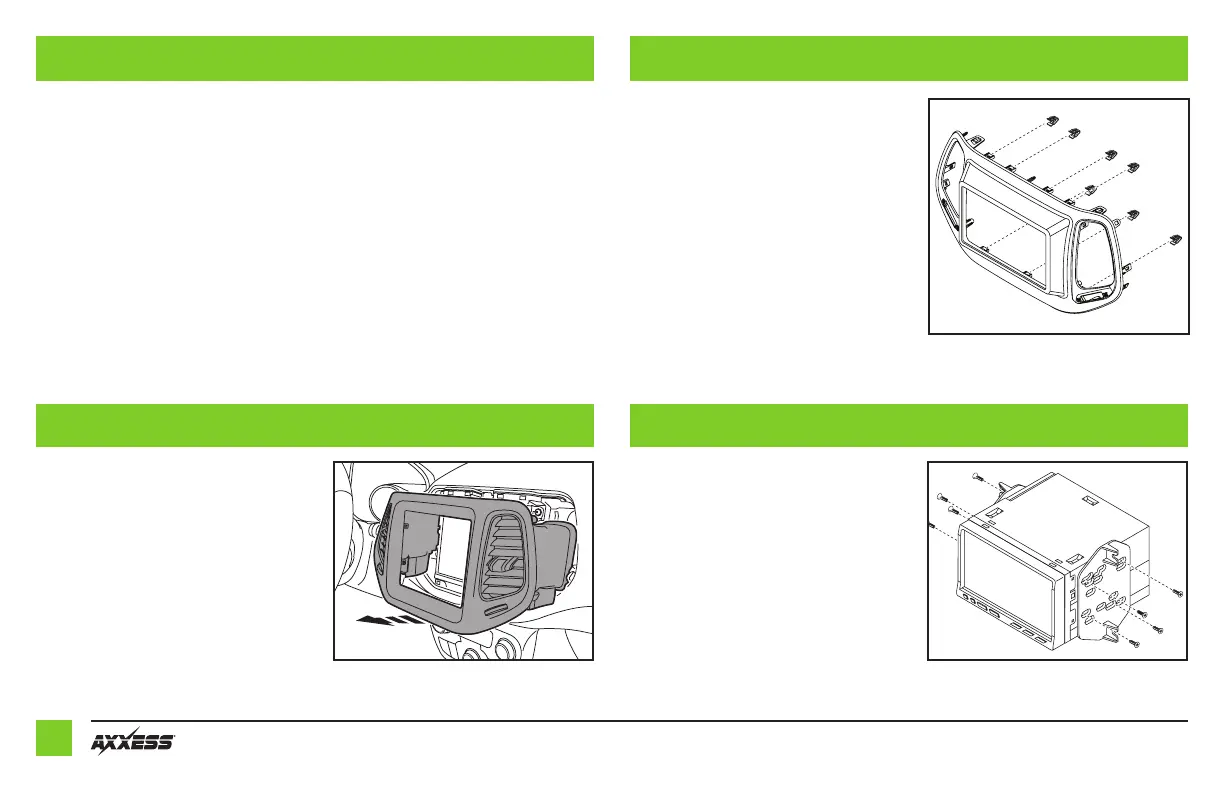
KIT PREPARATION
KIT ASSE MB LY
(Figure A) (Figure A)
(Figure A)
1. Unclip and remove the A/C vent panel
surrounding the radio. (Figure A)
2. Remove (4) 9/32" screws securing the
radio, then unplug and remove the radio.
Continue to Kit Preparation
1. Attach the
(7)
panel clips
to the
radio
trim panel
.
(Figure A)
Continue to Kit Assembly
ISO DDIN radio provision
1. Attach the
radio brackets
to the radio
using the screws supplied with the radio.
(Figure A)
2.
Locate the factory wiring harness and
antenna connector in the dash and
complete all necessary connections to the
radio. Metra recommends using the proper
mating adapter from Metra and/or Axxess.
3. Test the radio for proper operation.
• This package includes a dash kit, interface with plug-n-play harnessing, and antenna adaptor
• Provides a built-in STOP/START engine override (if equipped)
• Provides accessory power (12V 10-amp)
• Provides NAV outputs (parking brake, reverse, and speed sense)
• Retains audio controls on the steering wheel
• Works in both single and dual-zone vehicles
• Retains safety chimes through an included off- board speaker
• Retains factory back up camera
• Micro “B” USB updatable
• Dash kit is painted scratch-resistant matte black to match the factory finish
FEATURES
(CONT.)
Bekijk gratis de handleiding van Axxess AXPIO-COM1, stel vragen en lees de antwoorden op veelvoorkomende problemen, of gebruik onze assistent om sneller informatie in de handleiding te vinden of uitleg te krijgen over specifieke functies.
Productinformatie
| Merk | Axxess |
| Model | AXPIO-COM1 |
| Categorie | Niet gecategoriseerd |
| Taal | Nederlands |
| Grootte | 4608 MB |


