Axxess AXHN-1 handleiding
Handleiding
Je bekijkt pagina 1 van 4
CAUTION!
All accessories, switches, climate
controls panels, and especially air bag indicator
lights must be connected before cycling the
ignition. Also, do not remove the factory radio
with the key in the on position, or while the
vehicle is running.
AXHN-1
INSTALLATION INSTRUCTIONS
AxxessInterfaces.com © COPYRIGHT 2020 METRA ELECTRONICS CORPORATION REV. 1/22/20 INSTAXHN-1
INTERFACE FEATURES
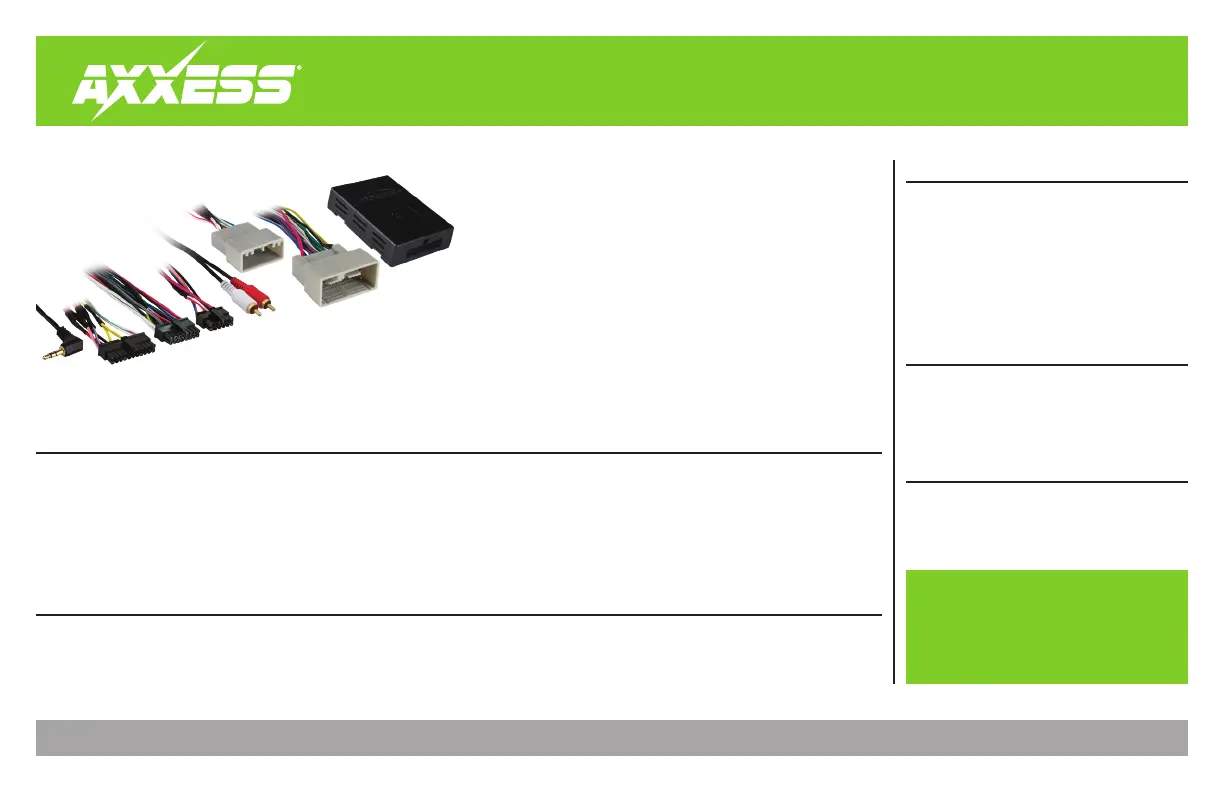
INTERFACE COMPONENTS
TOOLS REQUIRED
• Crimping tool and connectors, or solder gun,
solder, and heat shrink • Small flat-blade
screwdriver • Tape • Wire cutter • Zip ties
TABLE OF CONTENTS
Connections to be made .......................................2
Installing the AXHN-1 .............................................3
Programming the AXHN-1 .....................................3
Setting the factory clock .......................................3
Troubleshooting .....................................................3
Honda Clock Retention 2012-2014
APPLICATIONS
• Provides accessory power (12-volt 10-amp)
• Can be used in non-amplified, or amplified models
• Provides NAV outputs (parking brake, reverse, speed sense)
• AXSWC harness included (AXSWC sold separately)
• Retains balance and fade
• Retains the ability to set the factory clock
• Retains the factory AUX-IN jack
• Micro-B USB updatable
• AXHN-1 interface • AXHN-1 harness
• 8-pin subwoofer harness
• 16-pin harness with stripped leads
HONDA
Civic * (without NAV) 2013
CR-V (without NAV) 2012-2014
* All trims except LX
Bekijk gratis de handleiding van Axxess AXHN-1, stel vragen en lees de antwoorden op veelvoorkomende problemen, of gebruik onze assistent om sneller informatie in de handleiding te vinden of uitleg te krijgen over specifieke functies.
Productinformatie
| Merk | Axxess |
| Model | AXHN-1 |
| Categorie | Niet gecategoriseerd |
| Taal | Nederlands |
| Grootte | 440 MB |


