Axxess AXBUCH-LX6V handleiding
Handleiding
Je bekijkt pagina 2 van 2
AxxessInterfaces.com © COPYRIGHT 2020 METRA ELECTRONICS CORPORATION REV. 1/28/20 INSTAXBUCH-LX6V
AxxessInterfaces.com © COPYRIGHT 2020 METRA ELECTRONICS CORPORATION REV. 1/28/20 INSTAXBUCH-LX6V
INSTALLATION INSTRUCTIONS
INSTALLATION INSTRUCTIONS
AXBUCH-LX6V
AXBUCH-LX6V
To retain the factory backup camera to an aftermarket radio:
• Connect the Black wire to chassis ground, and also to the Black wire from the AXCSD-6V.
• Connect the Yellow wire to the Blue/Red wire from the AXCSD-6V.
• Connect the reverse wire from the aftermarket radio, to the reverse signal in the vehicle, and
also to the Blue/White wire from the AXCSD-6V.
• Connect the
male
Yellow RCA jack to the backup camera input from the aftermarket radio.
• Disregard the
Green/Purple wire with terminal
, it will not be used in this application.
To allow an aftermarket camera to be added to the OEM screen:
• Connect the ground wire from the aftermarket camera to chassis ground.
• Connect the power wire from the aftermarket camera to accessory power.
• Connect the
female
Yellow RCA jack to the aftermarket camera.
• Tape off and disregard the following (2) wires, they will not be used in this application;
Black, Yellow
• The AXCSD-6V will not be used in this application.
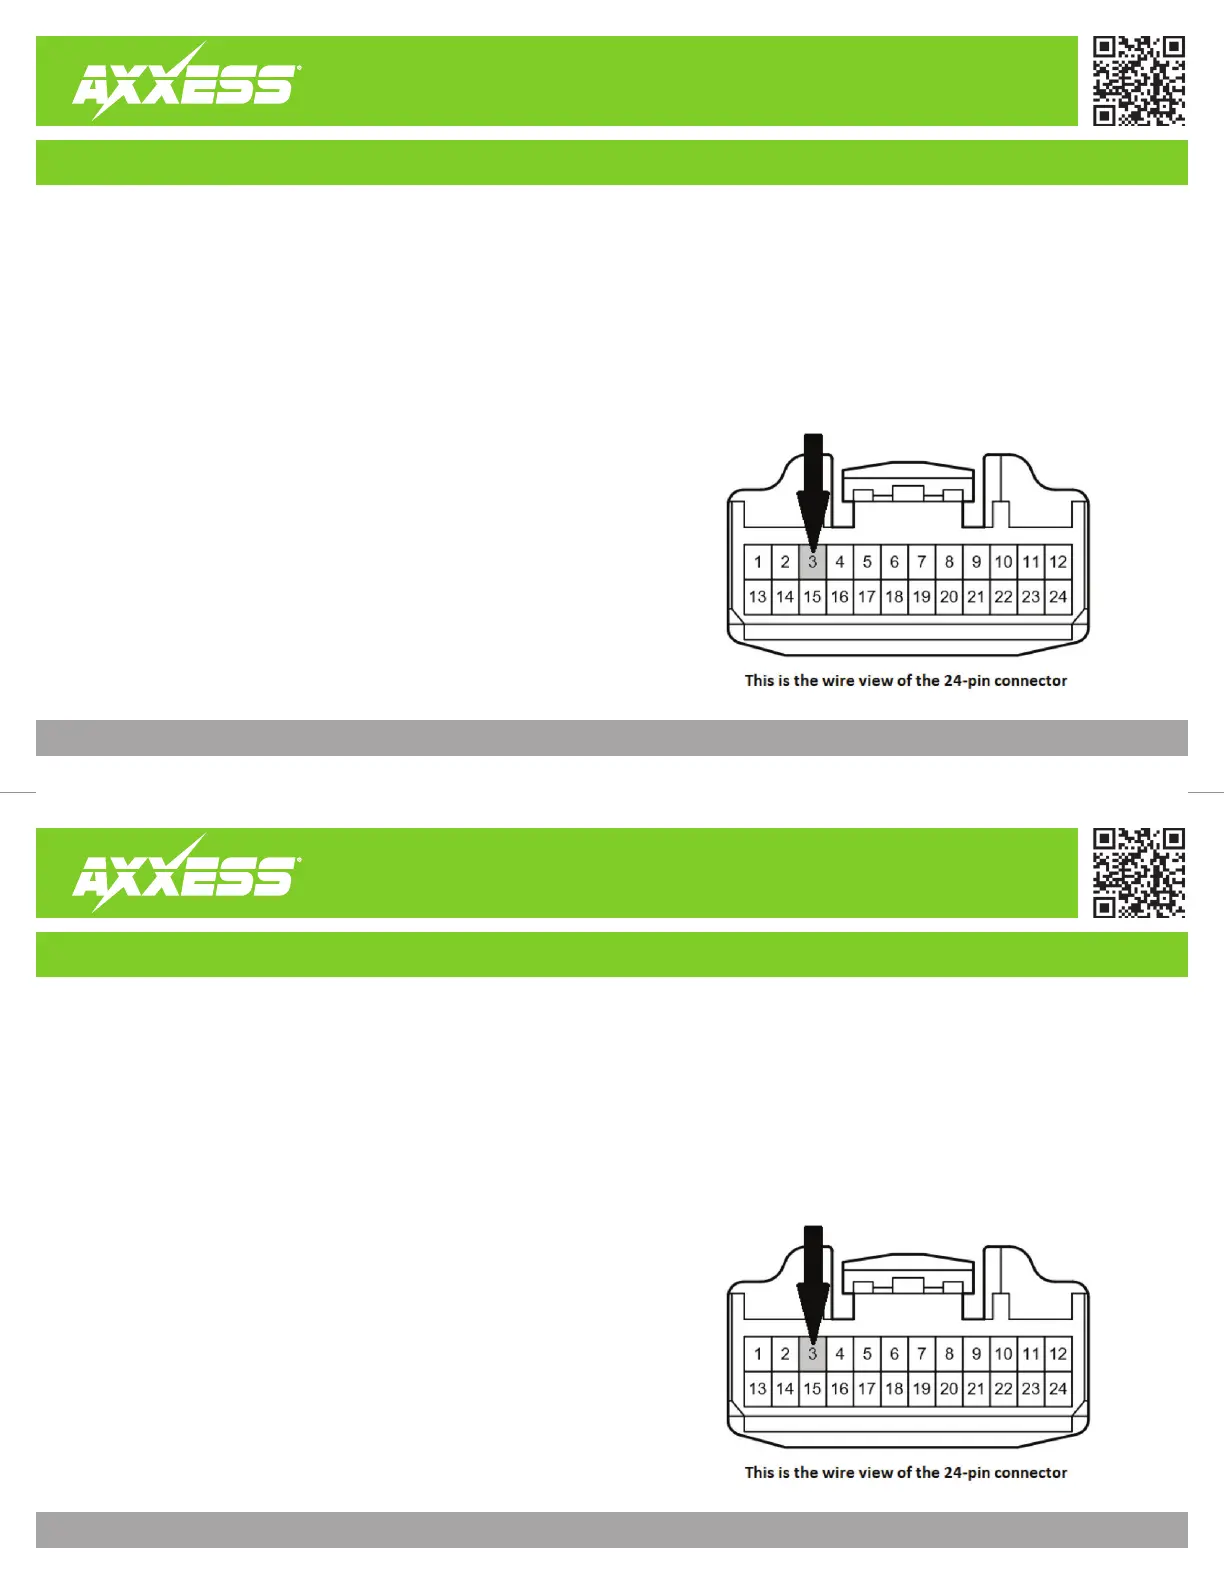
• Looking at the 24-pin connector from the factory radio, If a wire is not present in pin-3,
follow these steps;
1. From the male connector from the AXBUCH-LX6V harness, locate pin-3.
2. Insert the
Green/Purple
wire with terminal into pin-3.
3. Locate a reverse wire from the vehicle, then attach the
Green/Purple wire with terminal
to that wire.
• Remove the 24-pin connector from the factory radio, then install the
AXBUCH-LX6V harness
in between.
CONNECTIONS
CONNECTIONS
To retain the factory backup camera to an aftermarket radio:
• Connect the Black wire to chassis ground, and also to the Black wire from the AXCSD-6V.
• Connect the Yellow wire to the Blue/Red wire from the AXCSD-6V.
• Connect the reverse wire from the aftermarket radio, to the reverse signal in the vehicle, and
also to the Blue/White wire from the AXCSD-6V.
• Connect the
male
Yellow RCA jack to the backup camera input from the aftermarket radio.
• Disregard the
Green/Purple wire with terminal
, it will not be used in this application.
To allow an aftermarket camera to be added to the OEM screen:
• Connect the ground wire from the aftermarket camera to chassis ground.
• Connect the power wire from the aftermarket camera to accessory power.
• Connect the
female
Yellow RCA jack to the aftermarket camera.
• Tape off and disregard the following (2) wires, they will not be used in this application;
Black, Yellow
• The AXCSD-6V will not be used in this application.
• Looking at the 24-pin connector from the factory radio, If a wire is not present in pin-3,
follow these steps;
1. From the male connector from the AXBUCH-LX6V harness, locate pin-3.
2. Insert the
Green/Purple
wire with terminal into pin-3.
3. Locate a reverse wire from the vehicle, then attach the
Green/Purple wire with terminal
to that wire.
• Remove the 24-pin connector from the factory radio, then install the
AXBUCH-LX6V harness
in between.
Bekijk gratis de handleiding van Axxess AXBUCH-LX6V, stel vragen en lees de antwoorden op veelvoorkomende problemen, of gebruik onze assistent om sneller informatie in de handleiding te vinden of uitleg te krijgen over specifieke functies.
Productinformatie
| Merk | Axxess |
| Model | AXBUCH-LX6V |
| Categorie | Niet gecategoriseerd |
| Taal | Nederlands |
| Grootte | 463 MB |


