Axxess AXBUC-VW92 handleiding
Handleiding
Je bekijkt pagina 3 van 4
3
REV. 3/28/24 INSTAXBUC-VW92
• Connect the AXBUC-VW92 to the wiring harness in the vehicle located at the radio location
(26-pin connector).
INSTALLING THE INTERFACE & DIP SWITCH SETTINGS
Installation Steps
1. Connect Ground wire from the VW92 to the aftermarket radio’s ground wire.
2. Connect the Yellow wire from the VW92 to the Yellow wire of your aftermarket radio.
3. Purple is a Reverse input, connect the reverse trigger from your vehicle or interface to
this wire. Do not connect this wire to the vehicle’s BCM for the reverse signal. VW uses
PWM circuitry, if connected to the BCM, the backup camera will flicker while the vehicle
is running. You must find a dedicated reverse signal or use an interface that provides a
reverse output.
4. Plug in the CAM OUT Video cable into the rear view camera input of your aftermarket radio.
5. Plug in the White connector into the interface box.
6. Plug in the vehicle connector and test.
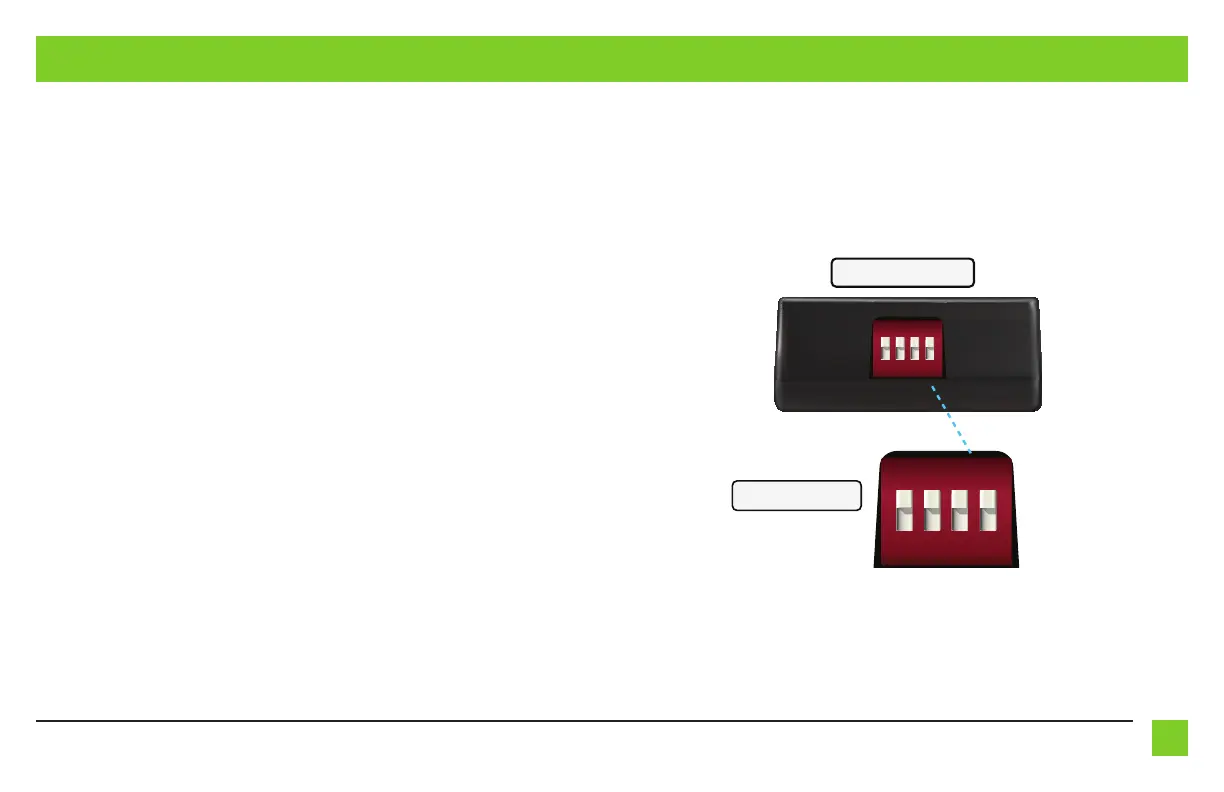
Dip Switch Settings
If after the AXBUC-VW2 is installed your screen quickly flashes the backup camera, or is displaying a
blank screen when you put the vehicle into reverse, you will need to adjust the dip switches on the
side of the interface.
If screen is blank or flashing while in reverse, try this sequence.
Interface End View
ON
VE
2 3 4
Dipswitch Detail
ON
VE
2 3 4
Step 1 - Set Dip Switch 3 to OFF. - If not working go to step 2.
Step 2 - Move all Dip Switches to OFF - If not working go to step 3.
Step 3 - Flip Dip Switch 3 ON, leaving 1,2,4 OFF.
Bekijk gratis de handleiding van Axxess AXBUC-VW92, stel vragen en lees de antwoorden op veelvoorkomende problemen, of gebruik onze assistent om sneller informatie in de handleiding te vinden of uitleg te krijgen over specifieke functies.
Productinformatie
| Merk | Axxess |
| Model | AXBUC-VW92 |
| Categorie | Niet gecategoriseerd |
| Taal | Nederlands |
| Grootte | 480 MB |


