Asus PRIME X399-A handleiding
Handleiding
Je bekijkt pagina 42 van 96
2-2
Chapter 2: Basic Installation
Chapter 2
C
D
A
B
C
D
B
A
1
2
3
B
B
C
A
1
2
3
A
B
Apply the Thermal Interface Material to the CPU heatsink and CPU before you install the
heatsink and fan if necessary.
The load plate screws are Torx T20 models. A torque value of 14 inch-lbf is recommended.
Carrier frame
with CPU
C
D
A
B
C
D
B
A
1
2
3
B
B
C
A
1
2
3
A
B
C
D
A
B
C
D
B
A
1
2
3
B
B
C
A
1
2
3
A
B
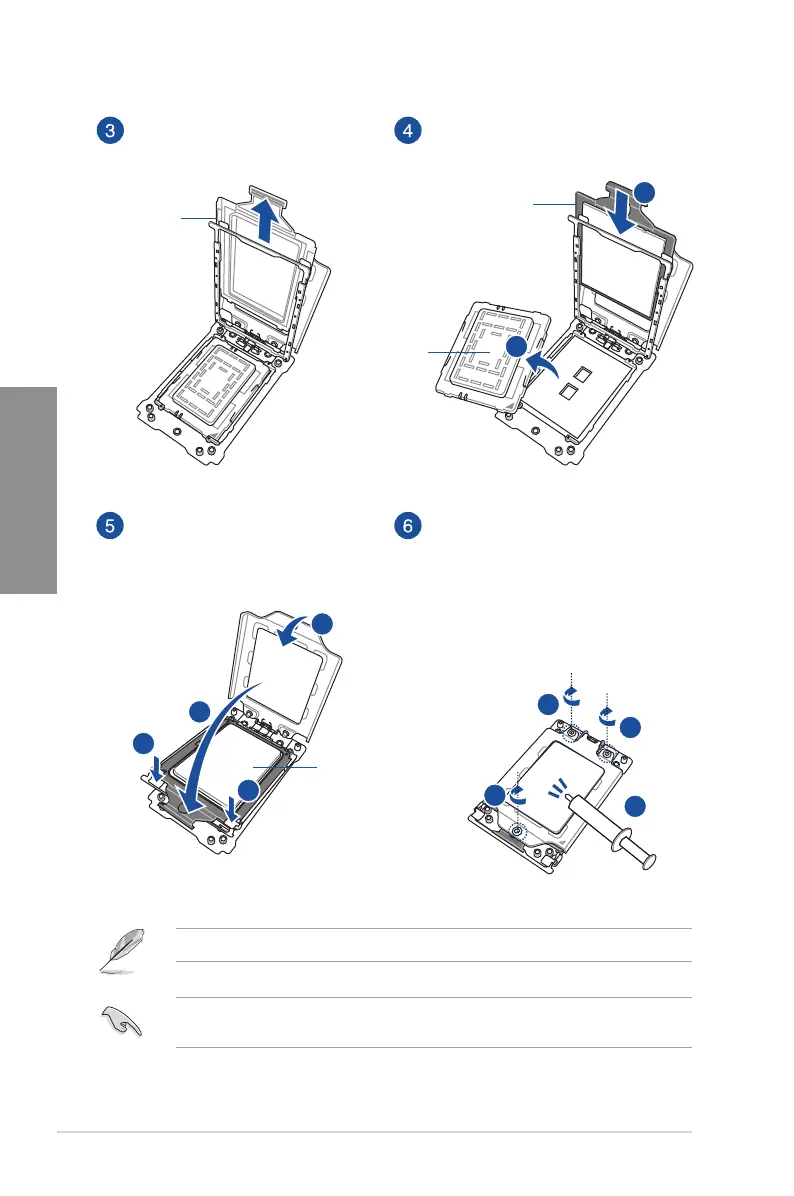
PnP cap
Carrier frame
with CPU
External cap
Remove the external cap.
Gently press down the rail frame
until it latches to the socket housing,
then press down the load plate.
Slide the carrier frame with CPU into the
rail frame until you hear a click sound, then
remove the PnP cap.
Drive the three screws slightly into the
holes in sequence 1>2>3, just enough to
attach the load plate to the socket. When
the three screws are attached, tighten
them in sequence 1>2>3 to completely
secure the load plate. Then apply the
Thermal Interface Material to the CPU.
Bekijk gratis de handleiding van Asus PRIME X399-A, stel vragen en lees de antwoorden op veelvoorkomende problemen, of gebruik onze assistent om sneller informatie in de handleiding te vinden of uitleg te krijgen over specifieke functies.
Productinformatie
| Merk | Asus |
| Model | PRIME X399-A |
| Categorie | Niet gecategoriseerd |
| Taal | Nederlands |
| Grootte | 8909 MB |
Caratteristiche Prodotto
| Breedte | 305 mm |
| Diepte | 269 mm |
| Gebruikershandleiding | Ja |
| Ethernet LAN | Ja |
| Type stroombron | ATX |


