Asus PRIME X399-A handleiding
Handleiding
Je bekijkt pagina 41 van 96
ASUS PRIME X399-A
2-1
Chapter 2
C
D
A
B
C
D
B
A
1
2
3
B
B
C
A
1
2
3
A
B
Basic Installation
2
2.1 Building your PC system
The diagrams in this section are for reference only. The motherboard layout may vary with
models, but the installation steps are the same for all models.
Chapter 2: Basic Installation
2.1.1 CPU installation
Unplug all power cables before installing the CPU.
The AMD SocketTR4 socket is compatible with AMD SocketTR4 processors. Ensure
you use a CPU designed for the SocketTR4 socket. The CPU ts in only one correct
orientation. DO NOT force the CPU into the socket to prevent bending the connectors on
the socket and damaging the CPU!
C
D
A
B
C
D
B
A
1
2
3
B
B
C
A
1
2
3
A
B
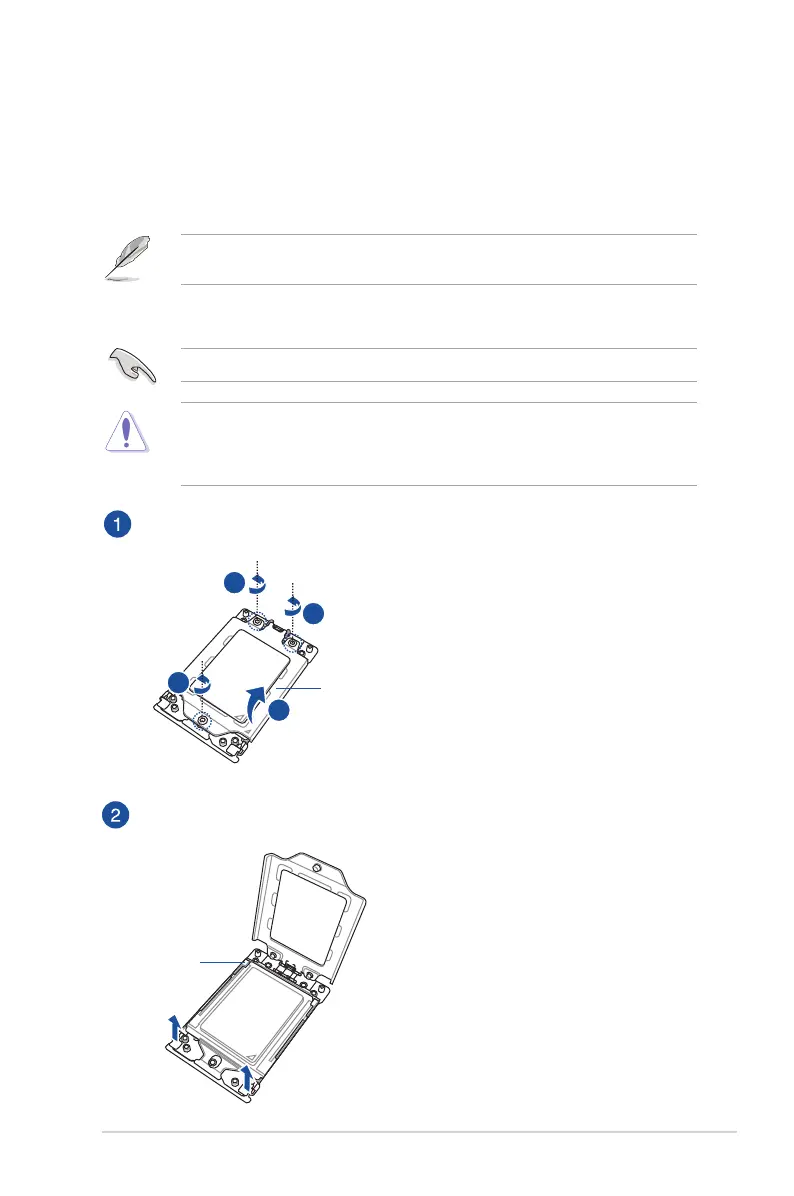
Load plate
Rail frame
Use the bundled Torx screwdriver to remove the load plate screws in sequence
3>2>1, then lift the load plate.
Use your ngers to pull up the tabs on both sides of the rail frame to release the rail frame,
then lift the rail frame to its fully open position.
Bekijk gratis de handleiding van Asus PRIME X399-A, stel vragen en lees de antwoorden op veelvoorkomende problemen, of gebruik onze assistent om sneller informatie in de handleiding te vinden of uitleg te krijgen over specifieke functies.
Productinformatie
| Merk | Asus |
| Model | PRIME X399-A |
| Categorie | Niet gecategoriseerd |
| Taal | Nederlands |
| Grootte | 8909 MB |
Caratteristiche Prodotto
| Breedte | 305 mm |
| Diepte | 269 mm |
| Gebruikershandleiding | Ja |
| Ethernet LAN | Ja |
| Type stroombron | ATX |


