Handleiding
Je bekijkt pagina 5 van 24
98
Unpacking and Assembly
1. Open the lid of the monitor box, remove the upper Styrofoam tray containing
the stand and place it to one side.
4. Carefully lift the monitor out of the Styrofoam tray and stand it on the desk
ready for use.
Warning: Do not put pressure on the display area of the monitor while
assembling or moving the monitor. The display screen is fragile - applying
force to it will break the display.
Keep the monitor box and Styrofoam packaging for future transportation
and storage of the monitor.
Warning: Ensure the stand has clicked into place before lifting the monitor.
Before unpacking the stand, ensure that the box is placed on a flat,
clear surface.
Refer to the diagrams on pages 6 and 7
2. Open the soft bag that protects the monitor to reveal where the stand
attaches to the rear of the monitor. Leave the monitor laying in the Styrofoam
tray to avoid damaging it while installing the stand.
3. Insert the top of the monitor stand into the mount on the rear of the monitor
and press downwards on the stand until it clicks into place. Do not use
excessive force to ensure that the monitor is not damaged.
Connecting the Power Cable
Connect the included power cable to the power connector, and then plug the
other end into a wall outlet.
Do not apply pressure to the rear of the monitor while fitting the mounting
accessory - downwards pressure on the screen may crack or otherwise
damage it.
1. Lay the monitor face down in its Styrofoam packaging tray.
2. Locate the mounting spacers in the accessory bag that comes with the
monitor. With the monitor laying in its Styrofoam tray, screw in the four
spacers into the holes in the recess where the stand attaches. Do not over
tighten - tightening the spacers too much may cause damage to the monitor.
3. Screw the VESA mounting accessory into the mounting spacers.
4. Carefully lift the monitor and mounting accessory out of the tray and place
into position.
Ensure there is 50mm clearance around all sides of the monitor when it is
installed to ensure that is does not overheat.
Do not attempt to lay the screen on any uneven surface including soft
surfaces such as carpet and seating while attaching the mounting
accessory - damage to the screen may occur.
Mounting Options
The monitor has 100 x 100mm spaced mounting holes to allow it to be mounted
to any compatible 100mm VESA standard monitor arm or wall mount accessory
(not included).
The mounting holes are recessed in the region on the back of the monitor where
the stand attaches and are hidden by the stand when it is installed. VESA mounts
cannot be used with the monitor while the stand is attached.
M4 threaded mounting spacers are included with the monitor which must be used
when mounting the monitor to a monitor arm or other mount. Mount the monitor
to a VESA mounting accessory as follows.
Connecting a Video Source
The monitor includes four video inputs which can be connected simultaneously.
To connect a computer or other source device, plug one of the included HDMI,
DisplayPort or USB-C cables into the computer and into a corresponding port on
the monitor.
Audio Output
The display features inbuilt speakers as well as an audio output jack to allow
headphones and external speakers to be connected. When an external audio
device is connected, the display’s on-board speakers will be disabled.
Connecting the Monitor
Disassembly and Storage
1. Open the lid of the monitor box, remove the upper Styrofoam tray and place it
to one side.
2. Place the soft bag over the monitor and lay it in face down in the Styrofoam
tray in the box. Ensure that the bag sits flat against the screen of the monitor
and is not folded over itself or bunched up. Excessive bunching of the bag
under the monitor screen may damage the screen when it is laid in the box.
Before disassembling the monitor, ensure that the box is placed on a flat,
clear surface.
3. Open the bag to reveal where the monitor attaches to the stand. Push the
monitor stand latch toward the top edge of the monitor and lift the base of the
stand upwards to release the stand from the monitor.
4. Close the bag and fold neatly over the rear of the monitor. Place the upper
Styrofoam tray on top of the monitor in the box.
5. Undo the screw, separating the base from the stand and place both pieces in
the upper foam packaging tray.
Notes:
- The USB-C connection will provide up to 65W of power to computers which
support USB Power Delivery (USB PD). This allows the computer to display
video on the monitor while being charged over a single cable. As a result, the
USB-C connection type is the best option if your computer has this capability.
- Depending on the capabilities of the computer it may not be able to provide 4K
at a full 60Hz refresh rate if connected to the monitor using HDMI. The USB-C
or DisplayPort connection should be used as a first preference if the computer
supports these connection types.
- Not all USB-C ports on computers support video output and/or charging using
USB PD. If your computer does not show video on the monitor or start charging
when connected to the monitor using USB-C, check that the USB-C port on
the computer supports DisplayPort Alternate Mode video output and USB PD
charging.
- Not all USB-C cables support video transfer or charging above 60W. It is
recommended that you use the USB-C cable supplied with the monitor to
avoid potential issues with cables that have been obtained separately.
EN
The display includes two USB A ports that can be used to attach USB peripherals
such as a keyboard, mouse or webcam to the computer.
In order for the computer to see devices attached to these ports, the computer
must be connected to either (or both) of the USB-C and/or USB-B ports.
Notes:
- If the computer is only connected to the USB-C port on the display the ports will
operate at USB 2.0 speeds because video trac shares the USB-C cable with the
USB data. This speed is sucient for most peripherals such as keyboards, mice
and webcams.
- If the computer is connected to the USB-B port on the display, the ports will
operate at USB 3.0 speeds. This is preferable if using high speed storage devices
such as external hard drives and USB flash drives.
The audio port on the display only supports output devices such as headphones
and speakers. It is not possible to connect microphones or other input devices to
this port. Headphones with built in microphones can be connected to this port,
however the microphone will not function.
To send audio from your computer to the display speakers or connected audio
device, select "32C4KPD" as the audio destination in your computer's sound
settings.
Connecting Audio Devices Connecting USB Devices
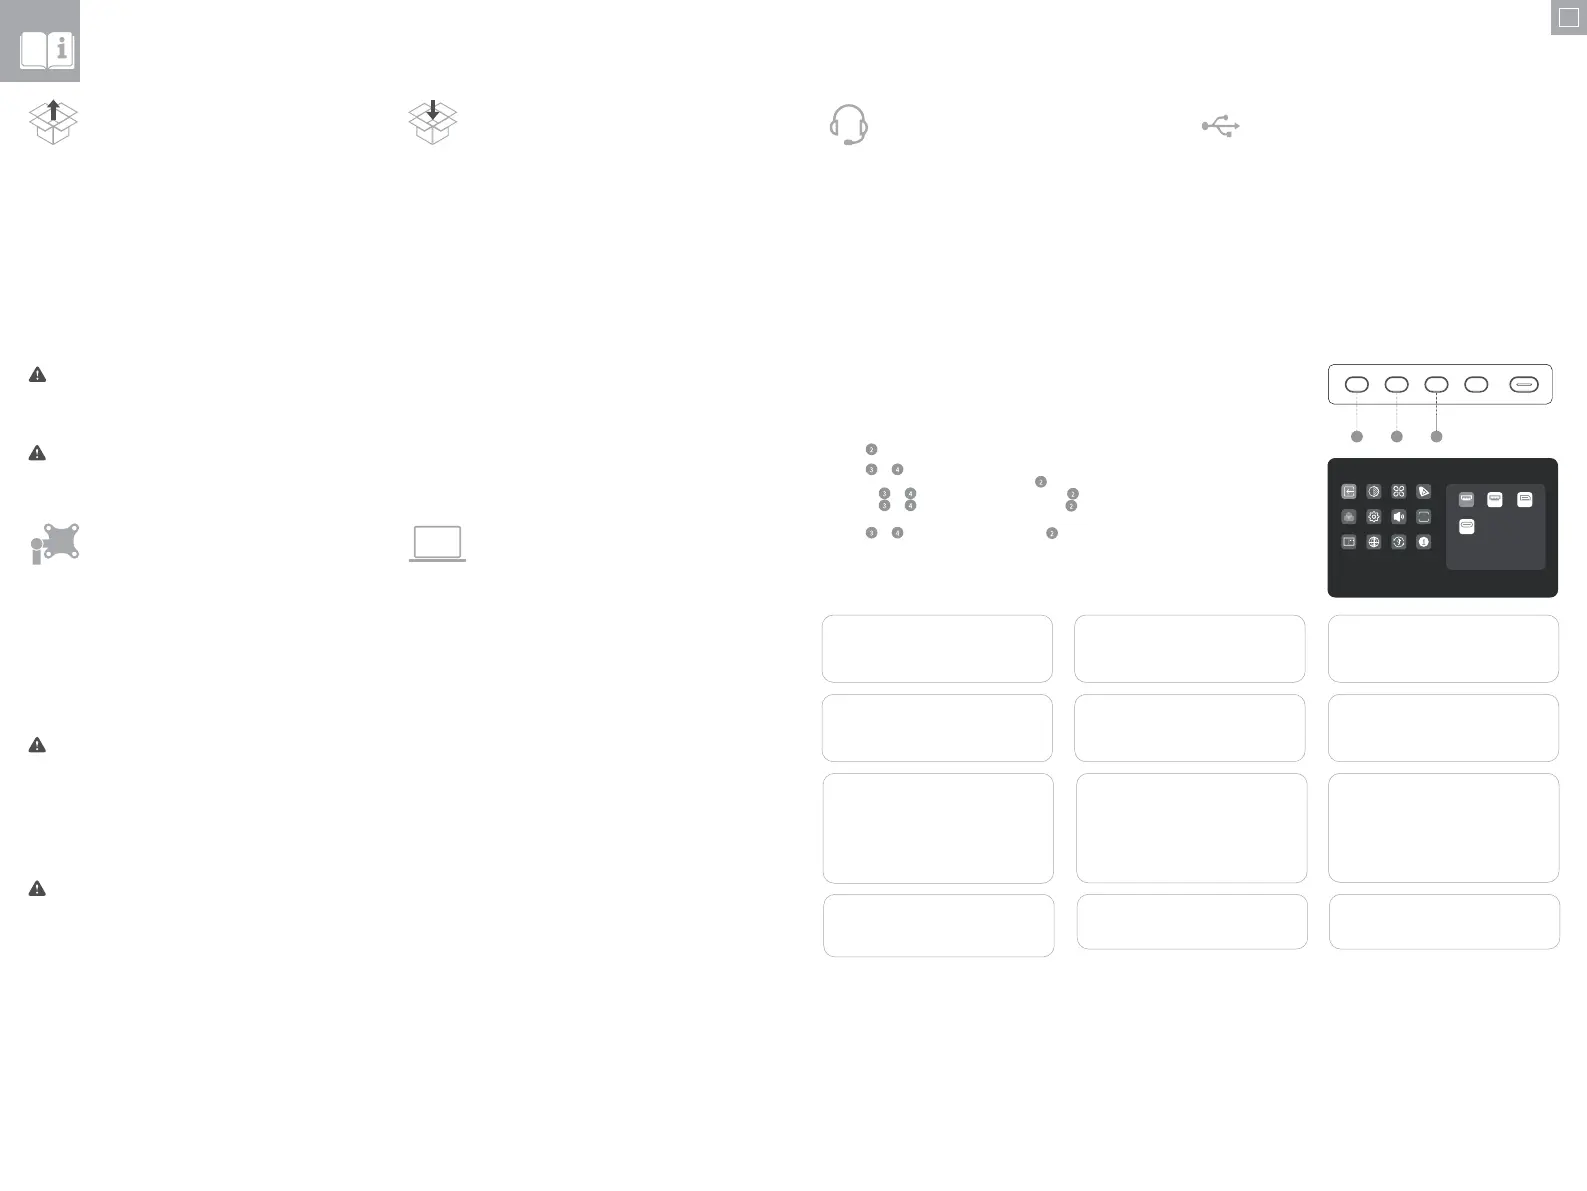
OSD Menu
1. Press to enter the OSD menu.
3. Press
or to adjust the setting, then press to confirm your changes and exit.
2. Press
or to browse functions.
• Highlight the desired function, then press to enter the sub-menu.
• Press or to browse sub-menus, then press to highlight the desired function.
• Press or to highlight an option, then press to confirm the settings and exit the current screen.
The OSD (On-Screen Display) lets you adjust the settings on your monitor.
2 3 4
Picture Settings
Adjust the monitor's Saturation, Sharpness and
Gamma.
Input Signal
Switches between video inputs.
Audio
You can mute or adjust the volume of the
monitor's speakers.
Colour Temperature
Adjust your monitor's colour temperature
between Warm, Cool and User Defined.
Brightness/Contrast
Adjust the Brightness, Shadow Balance and
Contrast.
HDR
Enables the monitor's HDR (High Dynamic
Range) mode, for more vivid colours.
Not all devices and programs support HDR
input, and may look too bright with this
enabled.
OSD Settings
Change the transparency of the OSD menu
and how long it stays on the screen.
Video Presets
Choose between picture presets, including
Standard, Reading, Movie, Night, Comfort,
SRGB and Adobe modes.
PIP/PBP
Picture in Picture mode allows Clarity Max to
display video from two sources at once.
Use this menu to select the sources and
choose how you would like them to be
displayed.
USB Options
You can upgrade your monitor's firmware via
USB, prevent your computer from powering
USB devices while in sleep mode, and switch
which USB port (C or B) Clarity Max is using for
non-video data.
Language
Set OSD language.
Reset
Reset your monitor to factory default settings.
Input Signal
3840*2160@60Hz
HDR
HDMI 1
Type-C
HDMI 2 DP
Bekijk gratis de handleiding van Alogic Clarity Max Touch B32CPT2, stel vragen en lees de antwoorden op veelvoorkomende problemen, of gebruik onze assistent om sneller informatie in de handleiding te vinden of uitleg te krijgen over specifieke functies.
Productinformatie
| Merk | Alogic |
| Model | Clarity Max Touch B32CPT2 |
| Categorie | Speaker |
| Taal | Nederlands |
| Grootte | 3960 MB |