Handleiding
Je bekijkt pagina 7 van 23
1312
EN
The display includes two USB A ports that can be used to attach USB peripherals
such as a keyboard, mouse or webcam to the computer.
In order for the computer to see devices attached to these ports, the computer
must be connected to either (or both) of the USB-C and/or USB-B ports.
Notes:
- If the computer is only connected to the USB-C port on the display the ports will
operate at USB 2.0 speeds because video trac shares the USB-C cable with
the USB data. This speed is sucient for most peripherals such as keyboards,
mice and webcams.
- If the computer is connected to the USB-B port on the display, the ports will
operate at USB 3.0 speeds. This is preferable if using high speed storage
devices such as external hard drives and USB flash drives.
The audio port on the display only supports output devices such as headphones
and speakers. It is not possible to connect microphones or other input devices to
this port. Headphones with built in microphones can be connected to this port,
however the microphone will not function.
To send audio from your computer to the display speakers or connected audio
device, select "27C4KPDWT" as the audio destination in your computer's sound
settings.
Connecting Audio Devices Connecting USB Devices
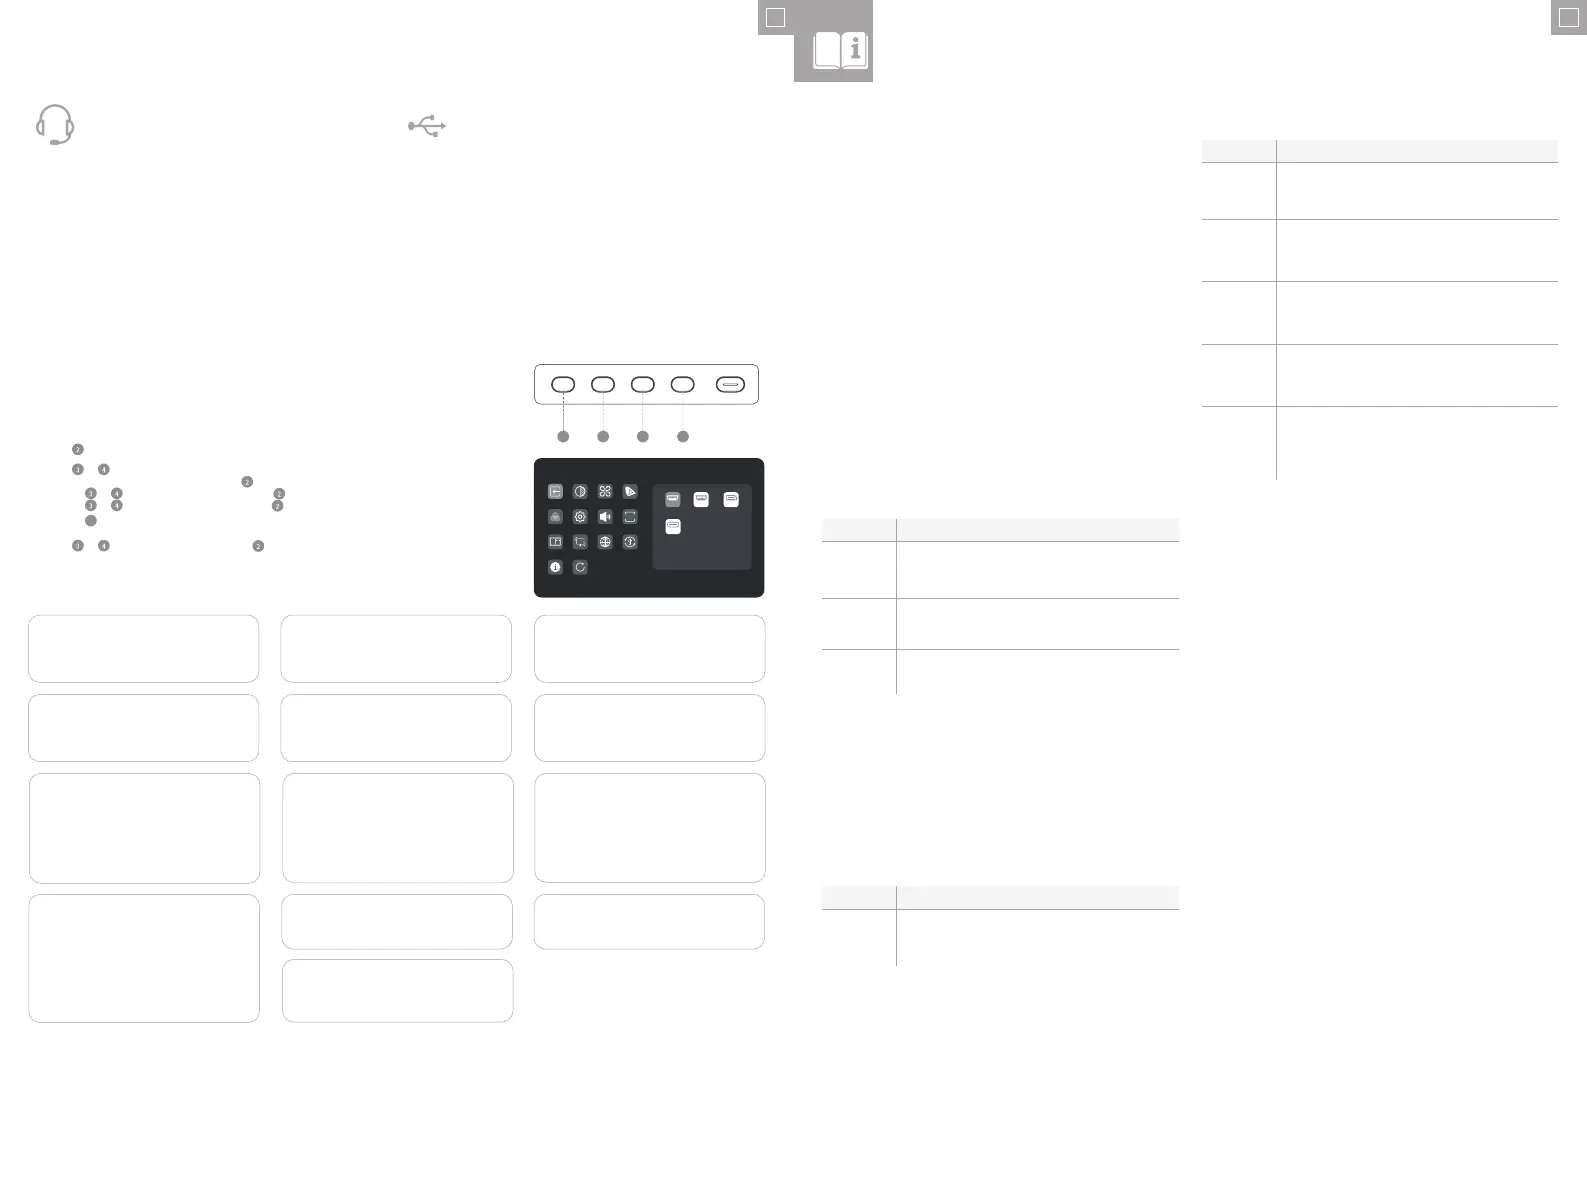
OSD Menu
1. Press to enter the OSD menu.
3. Press
or to adjust the setting, then press to confirm your changes and exit.
2. Press
or to browse functions.
• Highlight the desired function, then press to enter the sub-menu.
• Press or to browse sub-menus, then press to highlight the desired function.
• Press or to highlight an option, then press to confirm the settings and exit the current screen.
• Press
5
to cancel or go back to the previous menu.
The OSD (On-Screen Display) lets you adjust the settings on your monitor.
2 3 4 5
Input Signal
3840*2160@60Hz
HDR
HDMI 1
Type-C
HDMI 2 DP
Note:
When picture-in-picture is enabled, the rotation
sensor will be disabled.
When the rotation sensor is turned on, rotating the
monitor will disable picture-in-picture.
Picture Settings
Adjust the monitor's Saturation, Sharpness and
Gamma.
Input Signal
Switches between video inputs.
Audio
You can mute or adjust the volume of the
monitor's speakers.
Colour Temperature
Adjust your monitor's colour temperature
between Warm, Cool and User Defined.
Brightness/Contrast
Adjust the Brightness, Shadow Balance and
Contrast.
HDR
Enables the monitor's HDR (High Dynamic
Range) mode, for more vivid colours.
Not all devices and programs support HDR
input, and may look too bright with this
enabled.
OSD Settings
Change the transparency of the OSD menu
and how long it stays on the screen.
Video Presets
Choose between picture presets, including
Standard, Reading, Movie, Night, Comfort,
SRGB and Adobe modes.
PIP/PBP
Picture in Picture mode allows Clarity Pro to
display video from two sources at once.
Use this menu to select the sources and
choose how you would like them to be
displayed.
Rotation Sensor
When enabled, Clarity Pro will automatically
switch between portrait and landscape modes
when you rotate the screen.
This is not supported on all computers and
configurations. macOS users may have to
adjust the screen manually using DisplayLink
for portrait mode.
USB Options
You can upgrade your monitor's firmware via
USB, prevent your computer from powering
USB devices while in sleep mode, and switch
which USB port (C or B) Clarity Pro is using for
non-video data.
Language
Set OSD language.
Reset
Reset your monitor to factory default settings.
1. To use the in-built webcam, the monitor must be connected to your computer via
either its USB-C or USB-B port.
2. After connecting, navigate to “USB Switch” in the “USB” sub-menu of your
monitor’s option menu and select either “TYPE-C” or “TYPE-B” depending on
which cable you’ve connected.
3. Open any program which uses the webcam, and it will automatically pop-out of
the monitor.
a. You may have to switch from your laptop’s inbuilt webcam to “27C4KPDWT”.
1. Use the scroll wheel on the rear of the webcam to adjust the framing.
2. To change picture settings such as brightness and contrast, use your computer’s
settings menu:
a. Windows: Settings -> Bluetooth & devices -> Cameras -> 27C4KPDWT
b. macOS: Picture settings can only be adjusted via third-party applications.
c. ChromeOS: Picture settings can only be adjusted on a per-application basis.
The webcam will automatically retract when not being used by any program.
a. Do not try to physically push the webcam back into the monitor, you may
damage it.
b. If webcam does not retract, try unplugging it and plugging it back in.
Setting up the Webcam
Adjusting the Webcam
Retracting the Webcam
EN
1. To use the touchscreen, the monitor must be connected to your computer via
either its USB-C or USB-B port.
2. After connecting, navigate to “USB Switch” in the “USB” sub-menu of your
monitor’s option menu and select either “TYPE-C” or “TYPE-B” depending on
which cable you’ve connected.
3. Download our Clarity Pro Touch drivers (see QR codes in Glossary).
4. The touchscreen should be automatically recognised by your computer. If not,
consult our troubleshooting section below
Note:
The Clarity Active Stylus can be magnetically attached to the bottom left corner of
your monitor when not in use.
Using the Touchscreen
Symptom Solution
My computer
isn’t reacting to
my touch
• Unplug your USB cable from your computer and plug it back in.
• Check you've selected the correct USB cable in your monitor's settings.
• Restart your computer
• Contact ALOGIC support if the above do not resolve your issue.
Warnings
• Only use the monitor indoors in dry locations. Do not use the monitor in damp places
or near water sources such as in bathrooms and kitchens.
• Store and use in a cool, dry, ventilated place. Do not place close to heat sources or
in direct sunlight.
• Ensure that the equipment is installed on a flat, stable surface. If placed on an
uneven or unsteady surface the monitor may fall and be damaged, cause personal
injury or damage other items.
• It is normal for the device to be slightly warm to touch during operation. Provide
adequate ventilation and do not cover the device while in operation.
• Do not cover or block the ventilation holes on the rear cover of the monitor. Do not
use on a bed, sofa, blanket or similar where the monitor may fall over or become
covered.
• The acceptable electrical supply voltage and frequency ranges are indicated on the
label on the rear cover of the monitor. Do not connect the monitor to power sources
which fall outside these limits.
• If the device will not be used for weeks or months, it is recommended that the power
be disconnected to save energy and protect the equipment from damage caused
by lightning strike induced power surges if a thunderstorm occurs.
• Do not insert foreign objects into the ventilation holes in the cover of the monitor as
damage, fire or electric shock could occur.
• The monitor contains no user serviceable parts. Disassembling or attempting to
repair this product yourself will void the warranty and expose you to the risk of
electric shock. If you suspect a fault with the device, please contact the seller you
purchased the product from or ALOGIC after sales support for assistance.
• Do not use the product if it becomes damaged as this could pose a risk of causing
damage to connected devices and expose you to electric shock.
• Do not crush, cut, pull or twist the mains power cord excessively. If the power cord
becomes damaged do not use the product until a replacement power cord can be
obtained. Using a damaged power cord may result in electric shock.
• Do not spray liquids on the monitor. Do not use chemicals such as solvents on
the surface of the monitor. Clean the monitor only by wiping with a clean, dry, soft,
scratch-avoiding microfibre cloth.
• Disassembling or failing to properly use and care for your device will void the
warranty on the product.
• ALOGIC bears no responsibility for damage to the device or incidental damages
arising from improper use or lack of care and is not liable for repair/replacement of
the device or other damages in these circumstances.
Troubleshooting
Symptom Solution
The power
button does not
light up when
pressed
• Verify that the mains power cord is securely attached to the power adapter,
is connected to a power outlet and the power outlet is switched on.
• Verify that the power adapter is securely connected to the rear of the
monitor.
The power
button lights up,
but nothing is
displayed on the
screen
• Disconnect the power adapter from the Monitor and reconnect in 2-3
minutes.
• Press and hold the power button for 5 seconds to reset the monitor
settings.
• Contact ALOGIC Support if the points above do not work.
Monitor does
not show HDMI
or DisplayPort
video from the
computer
• Check that an appropriate video cable is connected between the computer
and display and the correct input is selected on the monitor.
• Check your computer's settings to verify that it is detecting the monitor and
is outputting video to it.
Monitor does
not show USB-C
video from the
computer
• Verify that you are using the USB-C cable that came with the monitor.
• Check your computer's settings to verify that it is detecting the monitor and
is outputting video to it.
• Check that the USB-C port on your computer that the monitor is connected
to supports video output using DisplayPort Alternate Mode (DP Alt. Mode).
Laptop computer
does not charge
when connected
to the monitor
using USB-C
• Verify that the USB-C port on your computer supports charging using the
USB Power Delivery (USB-PD) standard.
• Some laptops require more than 65W of power to charge. These tend to
be high end graphics and gaming focused computers.
• If necessary, connect the power adapter that came with the computer to
your laptop in addition to the USB-C cable that is connected to the monitor.
Symptom Solution
My computer
isn’t recognising
my webcam
• Try restarting your computer
• Navigate to USB Options -> Switch Active USB in Clarity Pro's OSD and
ensure the selected USB type is the one you're connecting with.
• Try unplugging/disconnecting/disabling other webcams.
My webcam isn’t
sliding out from
my monitor
• Check that the webcam named "27C4KPDW" is selected in your
computer's settings menu.
• Restart the application you want to use the webcam with.
• Ensure you have the correct webcam selected in your video software.
My webcam isn’t
retracting into
my monitor
• Try unplugging your computer from the monitor.
• Try opening and closing an application which uses the webcam.
Bekijk gratis de handleiding van Alogic Clarity Fold Touch 27C4KPDTFS, stel vragen en lees de antwoorden op veelvoorkomende problemen, of gebruik onze assistent om sneller informatie in de handleiding te vinden of uitleg te krijgen over specifieke functies.
Productinformatie
| Merk | Alogic |
| Model | Clarity Fold Touch 27C4KPDTFS |
| Categorie | Monitor |
| Taal | Nederlands |
| Grootte | 3824 MB |