Zodiac Hydroxinator iQ handleiding
Handleiding
Je bekijkt pagina 9 van 32
Page 9
Page 8
MagnaPool™ | Installation Manual
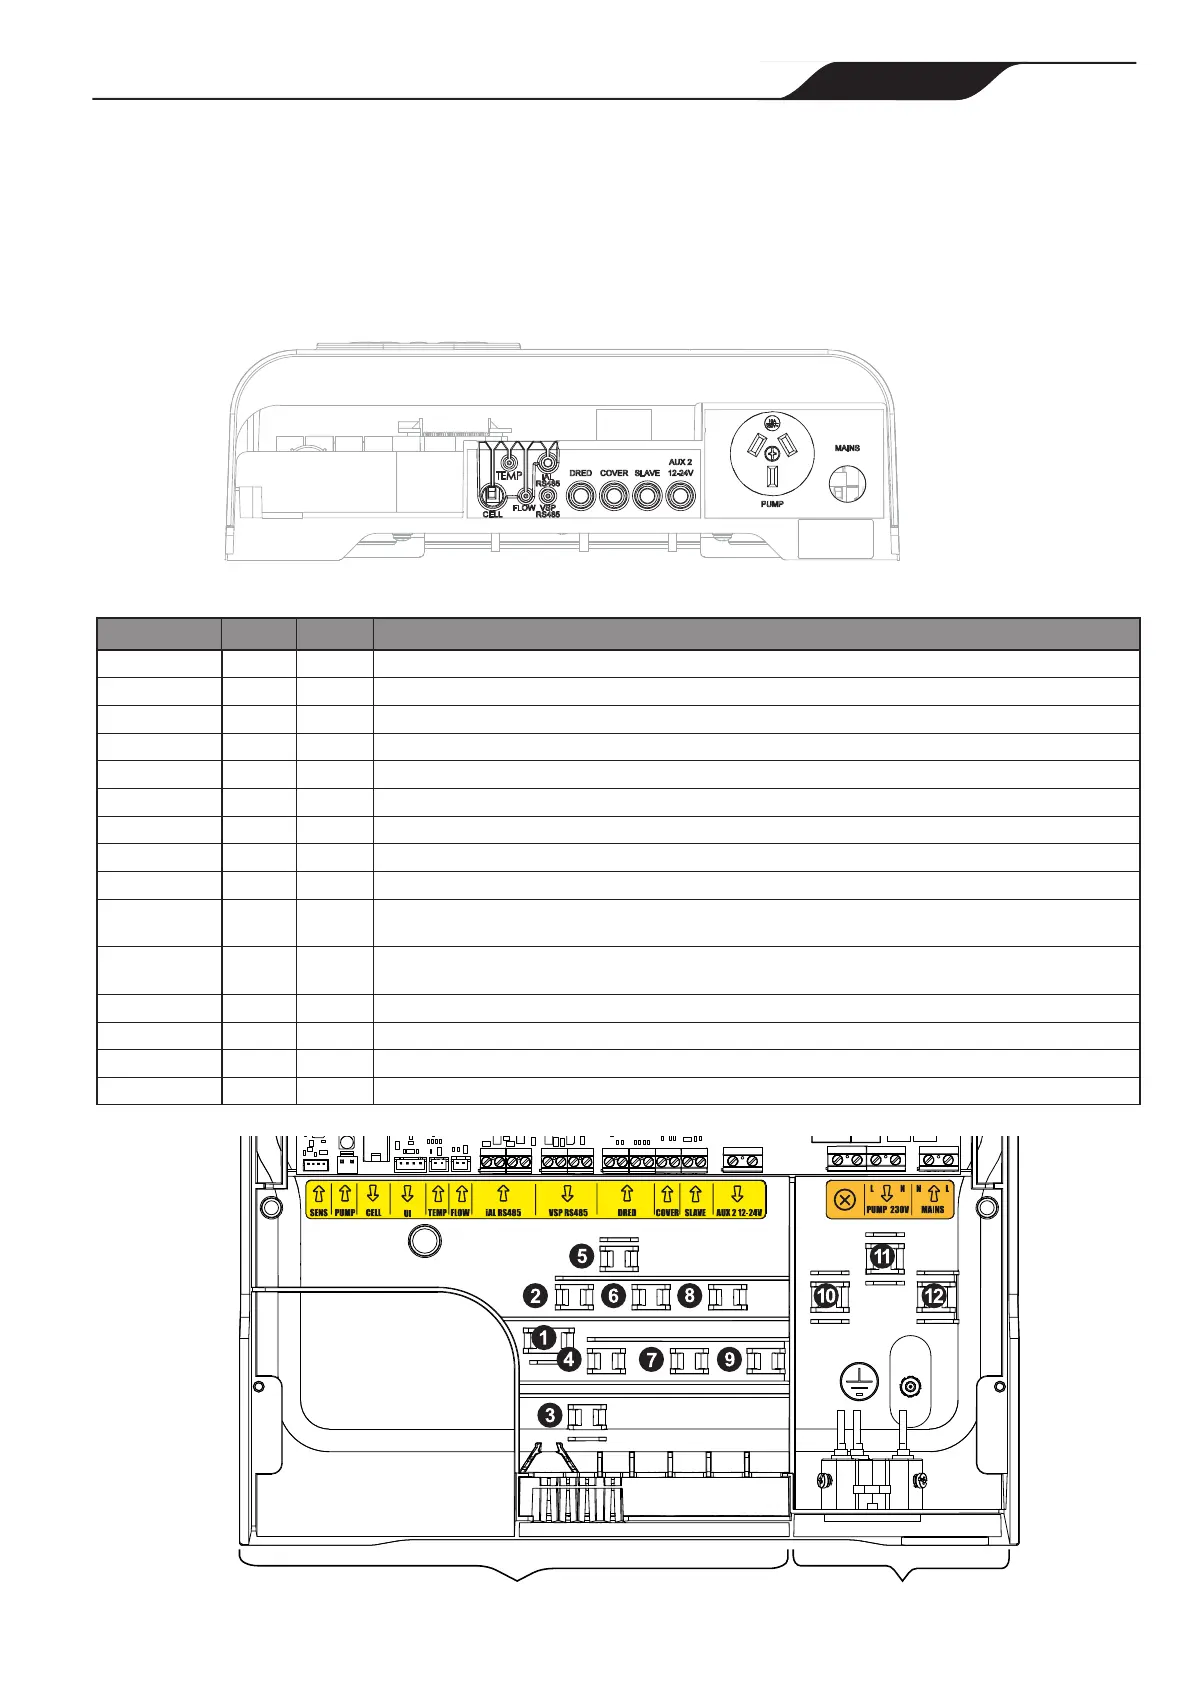
4.3.2 Controller Enclosure Wiring
1. Wire low voltage connections on the low
voltage side of the enclosure, see Figure 10.
2. Wire high voltage connections on the high
voltage side of the enclosure, see Figure 10.
3. Use the internal labels (low voltage - yellow, high
voltage - orange) to identify connection points.
4. Use the cable ties provided to secure internal
wiring to the controller frame. See Figure
10 for recommended cable tie locations and
Table 5 for connection point functions.
5. Pass cables through the appropriately labeled
strain relief ports. It may be necessary to
pierce the strain relief grommet prior to
passing the cables through it.
LOW VOLTAGE HIGH VOLTAGE
Figure 9. Controller Connection Ports
NAME TYPE ROUTE FUNCTION
SENS Input - Connection of the pH or pH/ORP sensing PCBA
PUMP Input - Connection of the pH pump for pH Link and Dual Link modules
CELL Output 1 Connection of the electrolysis cell
UI Output - Connection of the user interface
TEMP Input 3 Connection of the water temperature probe
Flow Input 2 Not used in AUS / South Africa
iAL RS485 Input 4 Not used in AUS / South Africa
VSP RS485 Output 5 RS485 variable speed pump connection
DRED Input 6 DRED Funtion (Demand Response Enabled Device) – for Australia only
COVER Input 7
Pool cover contact – lower the chlorine production
(dry contact: cover open = open contact/cover closed = closed contact)
SLAVE
Input 8
For use with 3rd party ORP sensor controllers. Do not use with AquaLink or general automation
controllers
AUX 2 12-24V Output 9 ON/OFF control of a LOW VOLTAGE external device (12 – 24V) or a heating system
AUX 1 230V Output 10 ON/OFF control of a HIGH VOLTAGE device. - Not available in Australia
PUMP 230V Output 11 230 V Power supply for the filtration pump Maximum 8A
MAINS Input 12 Device power supply 230 VAC – 50Hz
Table 5. Controller Wiring Positions
LOW VOLTAGE HIGH VOLTAGE
Figure 10. Controller Wiring
Bekijk gratis de handleiding van Zodiac Hydroxinator iQ, stel vragen en lees de antwoorden op veelvoorkomende problemen, of gebruik onze assistent om sneller informatie in de handleiding te vinden of uitleg te krijgen over specifieke functies.
Productinformatie
| Merk | Zodiac |
| Model | Hydroxinator iQ |
| Categorie | Niet gecategoriseerd |
| Taal | Nederlands |
| Grootte | 6511 MB |


