Zodiac Hydroxinator iQ handleiding
Handleiding
Je bekijkt pagina 11 van 32
Page 11
Page 10
MagnaPool™ | Installation Manual
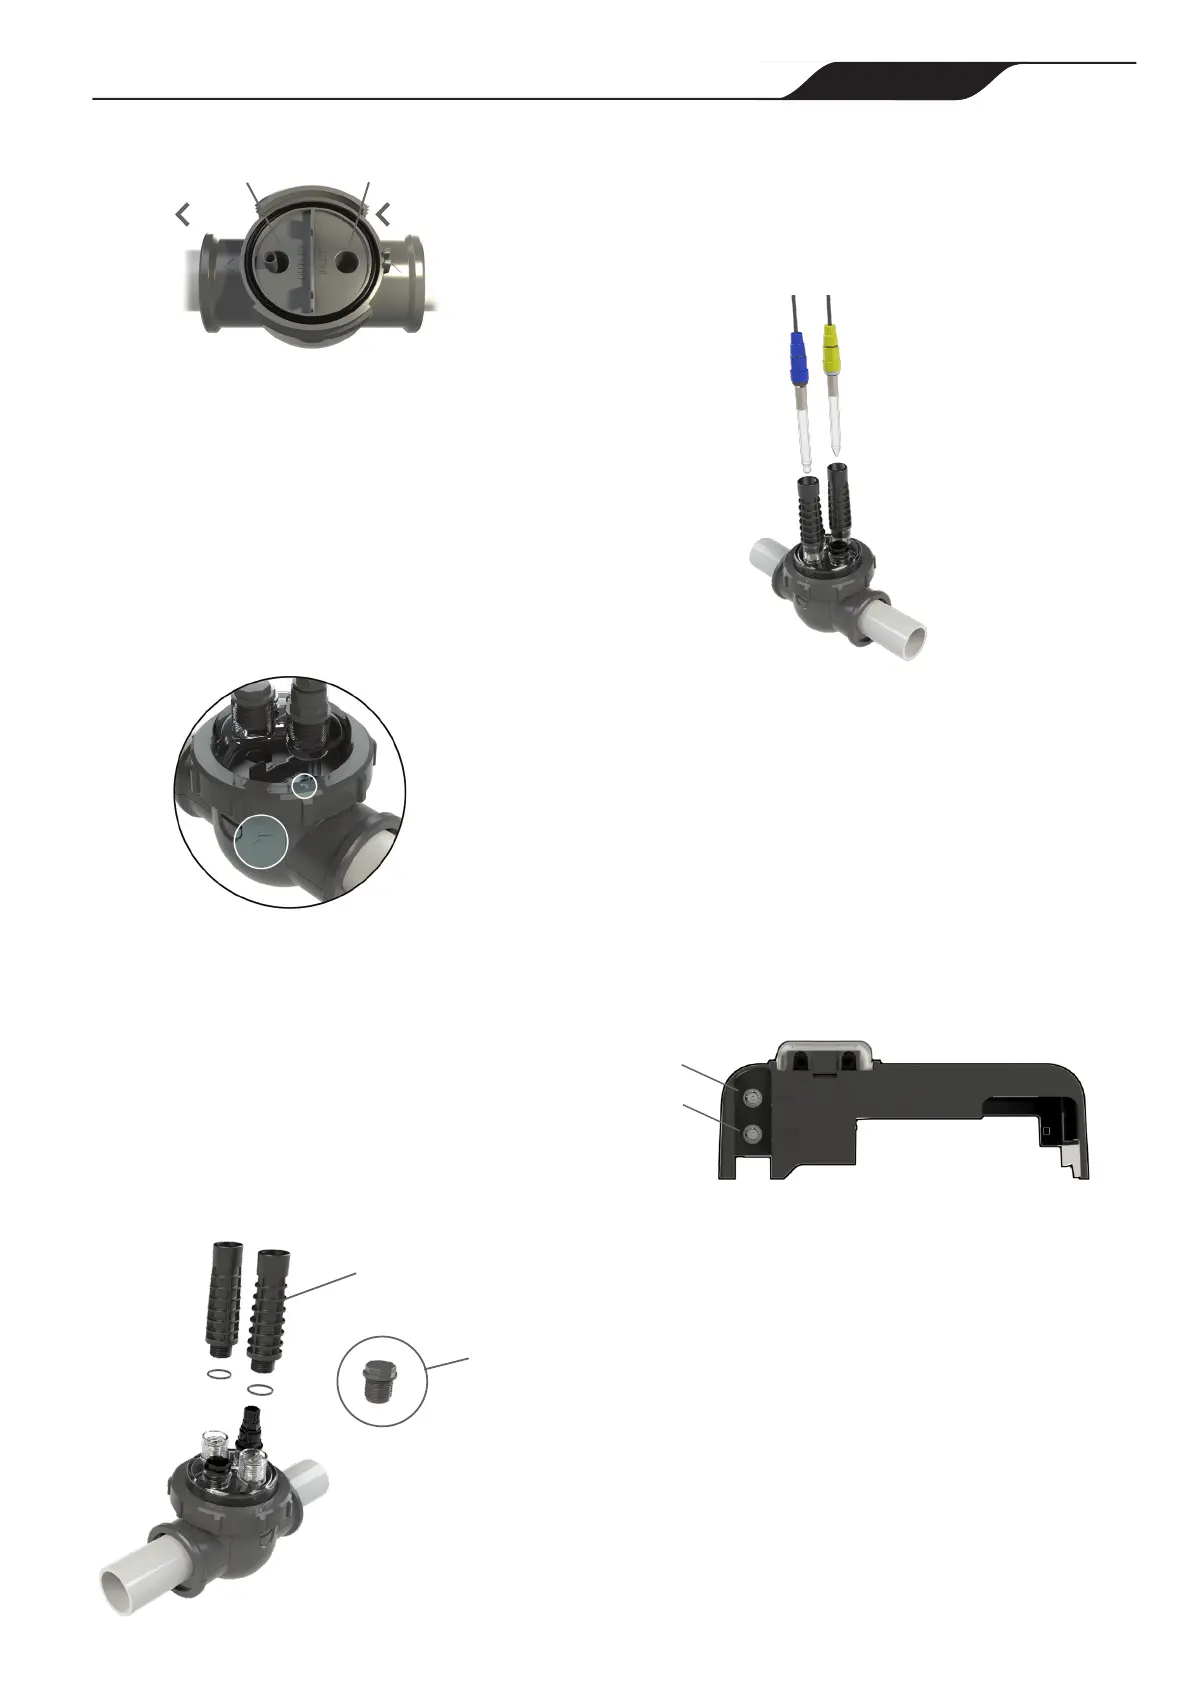
Flow Flow
InletOutlet
Figure 14. POD Orientation
3. Assemble the POD around the pipe, the tabs
will click into place.
5.4 Install the POD Cap
1. Place the POD cap on the POD assembly. The
cover and POD assembly are keyed for proper
orientation. Use caution to ensure the POD
O-ring is clean and properly seated.
2. Align the arrow on the POD with the locking ring.
Figure 15. POD Locking Ring Orientation
3. Tighten the locking ring with the locking collar
tool until snug. Do not overtighten.
5.5 Install and Calibrate
the Sensor(s)
1. Install the sensor holder(s) into the correct
port on the POD cap. Remove the cap plug if
necessary.
NOTE: The ORP sensor is with Dual Link module only.
Sensor
Holder
Cap
Plug
Figure 16. Sensor Holder Installation
2. Carefully remove the protective tube
from the sensor.
3. Rinse the end of the sensor with tap water.
Shake off excess water.
4. Carefully screw the sensor(s) into sensor holder.
Figure 17. pH/ORP Sensor Installation
5. Calibrate the sensor(s).
(See Section 5.7. Calibration Procedure)
To maintain accurate and reliable operation, the
sensors must be calibrated before the initial use
of the controller with pH/Dual Link module. After
initial calibration, it is recommended to recalibrate
sensors every few months.
6. Connect the sensor lead(s) to the module
at the base of the controller (pH = blue),
(ORP = yellow).
pH
ORP
Figure 18. pH/ORP Connection Ports
Bekijk gratis de handleiding van Zodiac Hydroxinator iQ, stel vragen en lees de antwoorden op veelvoorkomende problemen, of gebruik onze assistent om sneller informatie in de handleiding te vinden of uitleg te krijgen over specifieke functies.
Productinformatie
| Merk | Zodiac |
| Model | Hydroxinator iQ |
| Categorie | Niet gecategoriseerd |
| Taal | Nederlands |
| Grootte | 6511 MB |


