Zodiac Hydroxinator iQ PRO handleiding
Handleiding
Je bekijkt pagina 12 van 32
Page 13
Page 12
MagnaPool™ | Installation Manual
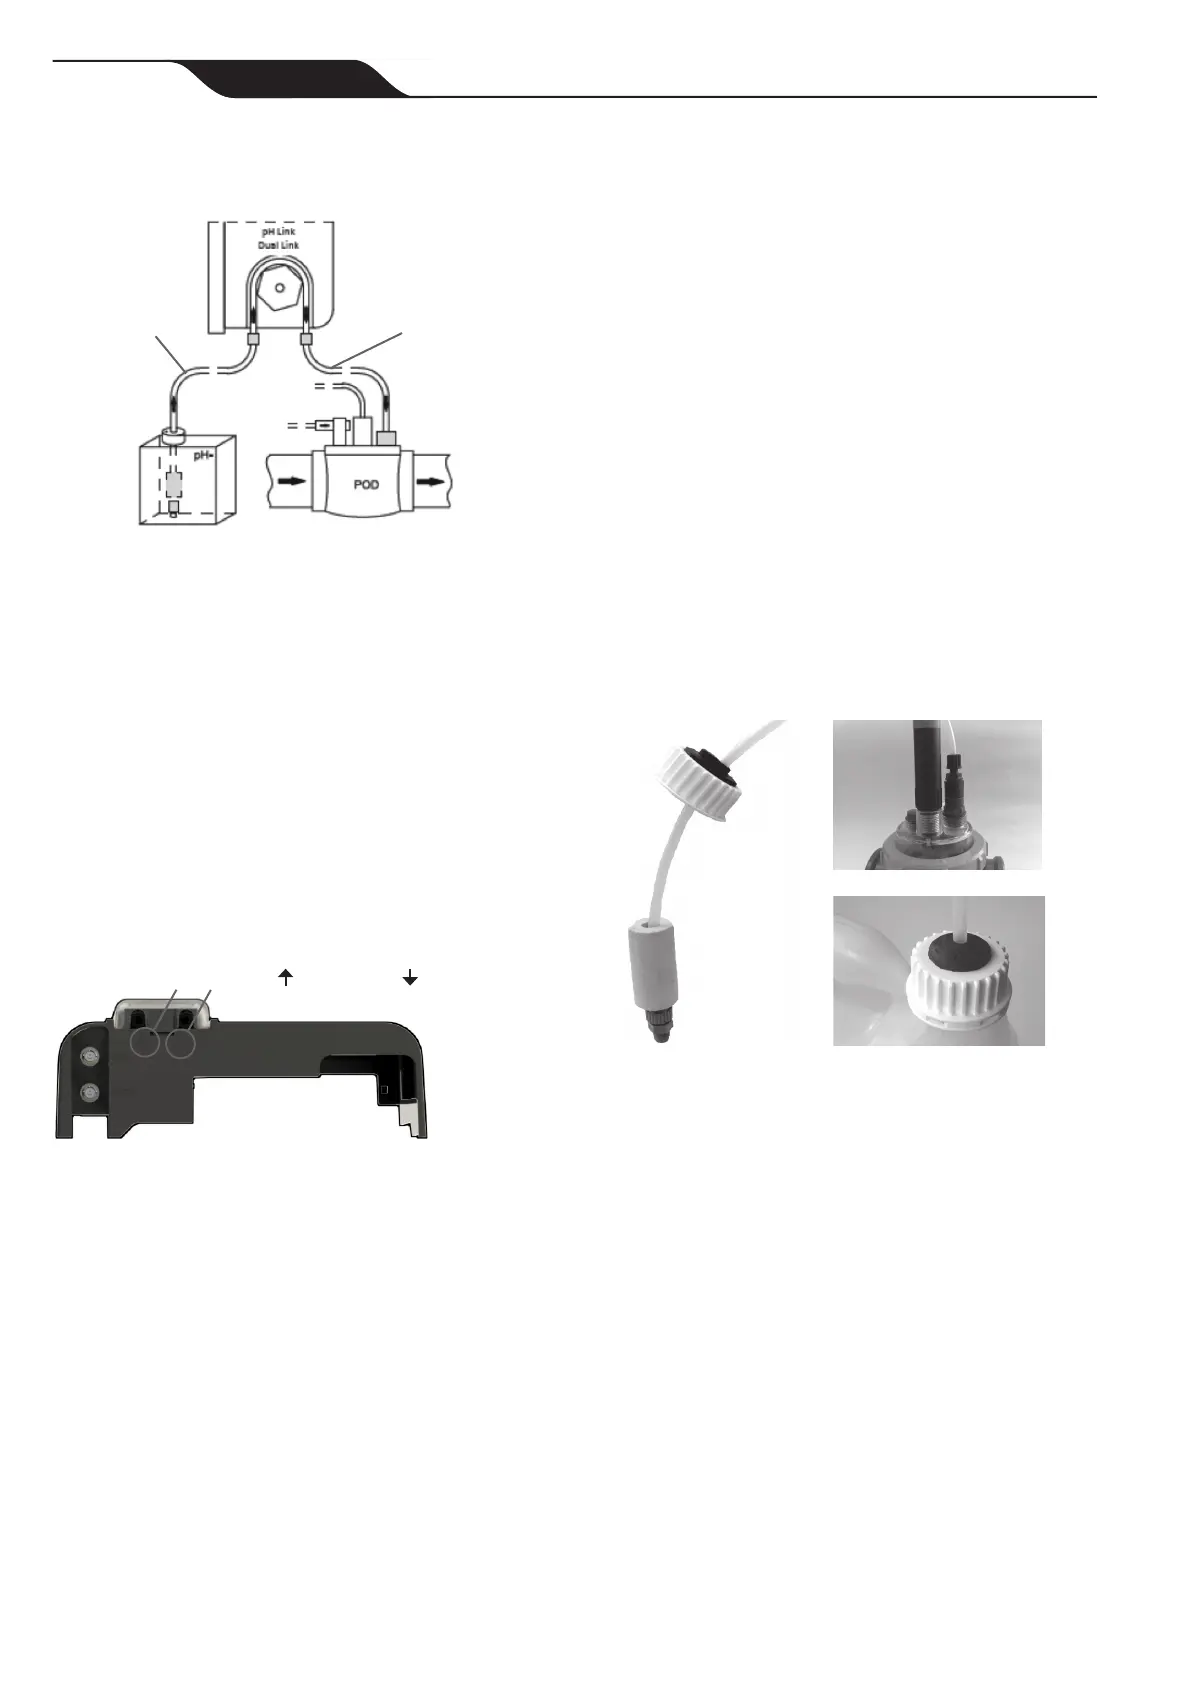
5.6 Install the pH Down Intake and
Injection lines.
Intake line
(Pump to
pH down)
Injection line
(Pump to POD)
Figure 19. pH- Pump Conguration
The pump rotates in a clockwise direction. Acid is
fed into the left side of the pump (via the Intake line)
and injected into the POD from the right side (via
the Injection line).
CAUTION: For safety reasons, install the Injection line
before the Intake line to ensure pH is not
accidentally dosed into the system before all
connections are made.
Never store acid directly underneath any
equipment as fumes will cause corrosion and
resulting damage can void your warranty. It is
recommended to store your acid container in
a safe, protected well ventilated area.
ow direction ( pump inlet, Injection)
Figure 20. pH- Pump Ports
5.6.1 Install the Injection Line
1. Remove the protective cover from the pump.
2. Cut a section of the plastic tubing that has
adequate length to reach from the injection valve
at the pump to the non-return valve on the POD.
3. Remove the threaded cap from the pump outlet
(right).
4. Thread tubing through the hole in the cap,
connect the tubing to the nipple on the module
and reattach the threaded cap.
NOTE: For a better t, soften both ends of the tubing by
immersing in warm water.
5. Remove the threaded cap from the POD intake
valve.
6. Thread tubing through the hole in the cap,
connect the tubing to the nipple on the POD
and reattach the threaded cap.
5.6.2 Install the pH Down Intake Line
1. Cut a section of the plastic tubing that has
adequate length to reach from the pH down
reservoir to the pump.
2. Remove the threaded cap from
the pump inlet (left side).
3. Pass one end of the tubing through the
threaded cap and attach tubing to the nipple
on the pump inlet.
4. Remove the cap from the pH down container.
5. Select the appropriate size acid cap
(included), either 5 L or 15/20 L.
6. Thread tubing through the hole in the cap
through the ceramic weight.
7. Remove nut from the blue compression tting.
8. Pass the tubing through the nut and attach it
to the nipple on the compression tting.
9. Reattach the threaded nut.
10. Put the weighted end of the hose into the pH
down reservoir.
11. Secure the pH down cap tightly on the container.
12. Replace the protective cover on the pump.
Figure 21. pH- Intake Connections
5.7 Calibration Procedure
To maintain accurate and reliable operation,
the sensors must be calibrated before using the
controller with pH/Dual Link module. After initial
calibration, it is recommended to recalibrate
sensors every few months.
5.7.1 Clean the Sensor(s)
Sensor(s) must be cleaned before calibration,
including prior to initial use after installation.
1. Turn off the lter pump.
2. Close all valves.
3. Remove the sensor and the sensor holder
from the POD.
4. Rinse the sensor with water and air dry.
NOTE: To avoid damaging the active sensor, do not rub
or dry with a cloth.
5. Brush the junctions and metal strip using a
toothbrush for 1 minute.
Bekijk gratis de handleiding van Zodiac Hydroxinator iQ PRO, stel vragen en lees de antwoorden op veelvoorkomende problemen, of gebruik onze assistent om sneller informatie in de handleiding te vinden of uitleg te krijgen over specifieke functies.
Productinformatie
| Merk | Zodiac |
| Model | Hydroxinator iQ PRO |
| Categorie | Niet gecategoriseerd |
| Taal | Nederlands |
| Grootte | 6511 MB |


