Handleiding
Je bekijkt pagina 61 van 344
Install Hardware Options
61
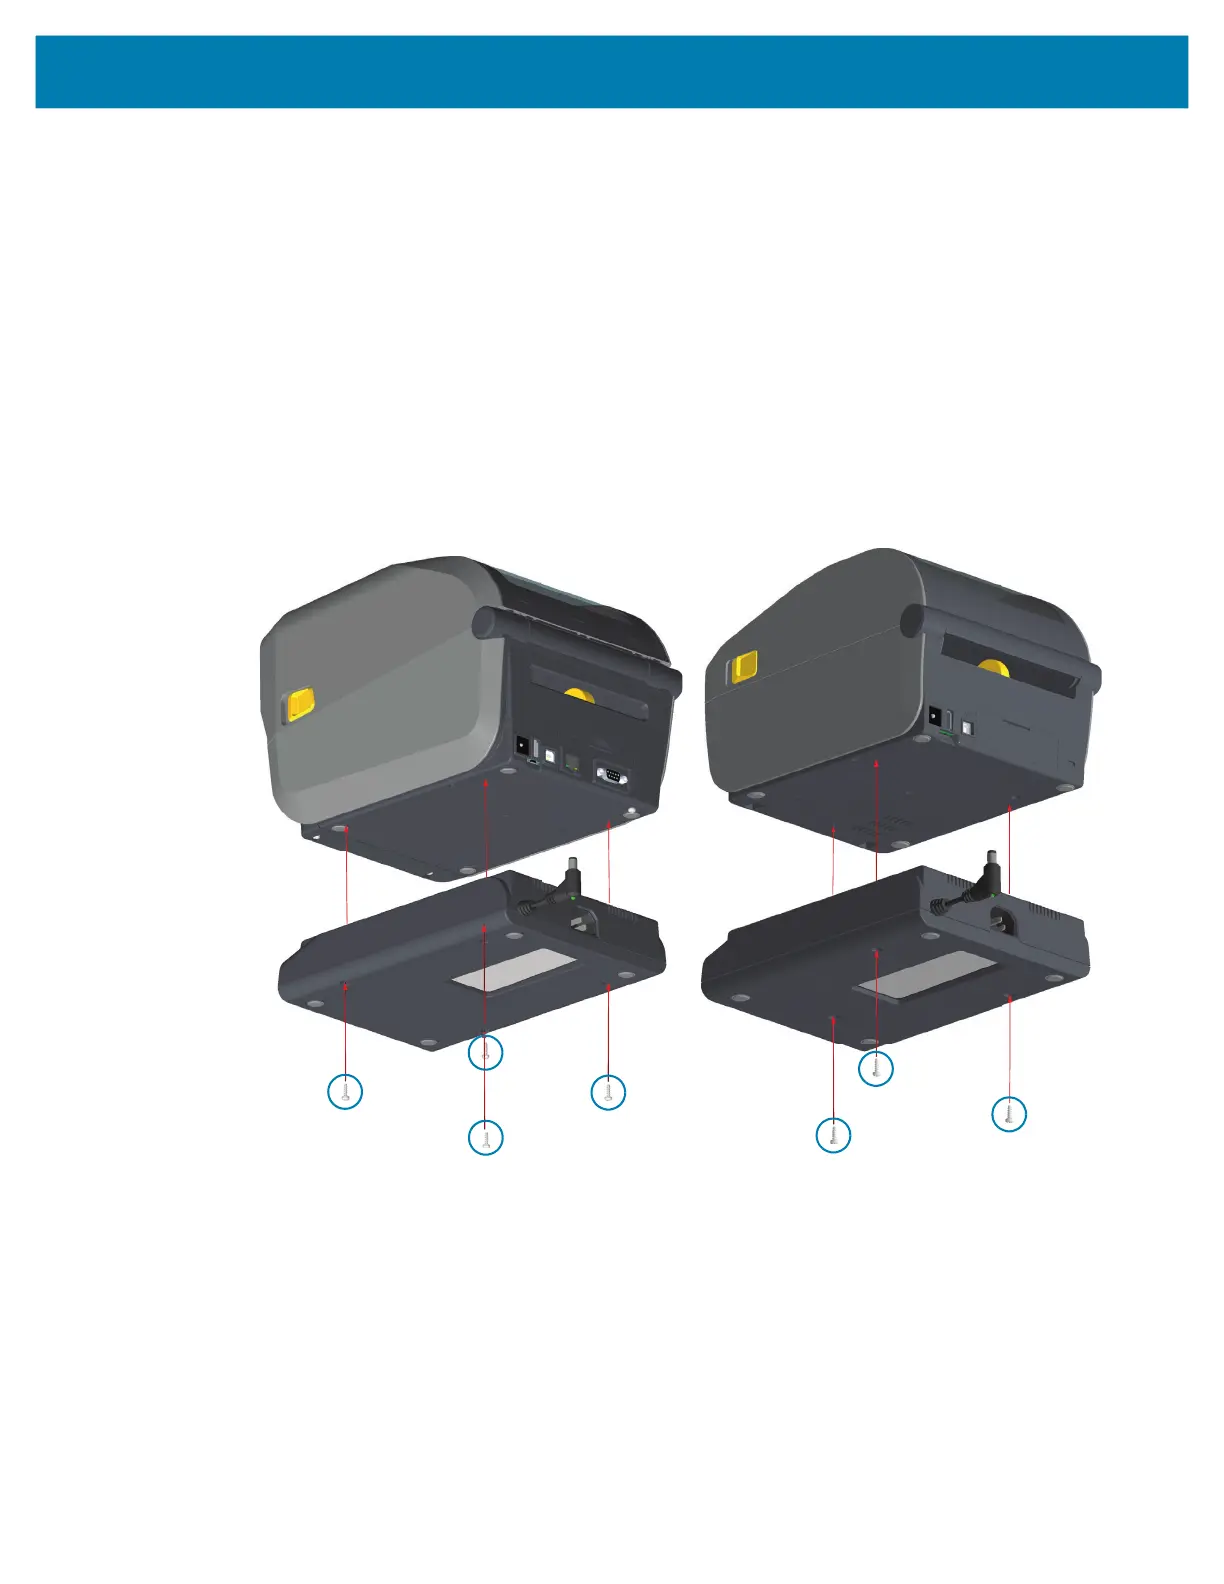
Installing the Attached Power Supply Base Options
The power base is ready to attach to the printer. The base is installed using T10 wrench (that you supply)
and the mounting screws provided with the upgrade kit. The direct thermal printer models attach to the
printer with three screws and thermal transfer printer models use four screws.
1. Remove any media rolls from the printer. Remove the original power supply cable from the back of the
printer.
2. Turn the printer over and align the power base to the bottom of the printer with the printer power plug
oriented toward the rear of the printer. The printer’s rubber feet align with recesses in the top of the
power base.
3. Use the screws provided to attach the power base to the printer. Three screws for Direct Thermal
printers. Four screws for Thermal Transfer printers. Tighten the screws using the T10 wrench supplied
in the kit.
Thermal Transfer Printers Direct Thermal Printers
Bekijk gratis de handleiding van Zebra ZD620, stel vragen en lees de antwoorden op veelvoorkomende problemen, of gebruik onze assistent om sneller informatie in de handleiding te vinden of uitleg te krijgen over specifieke functies.
Productinformatie
| Merk | Zebra |
| Model | ZD620 |
| Categorie | Printer |
| Taal | Nederlands |
| Grootte | 67590 MB |
Caratteristiche Prodotto
| Kleur van het product | Black, Grey |
| Gewicht | 1600 g |
| Breedte | 177 mm |
| Diepte | 221 mm |
| Hoogte | 151 mm |
