Yealink RoomPanel E2 handleiding
Handleiding
Je bekijkt pagina 11 van 48
8
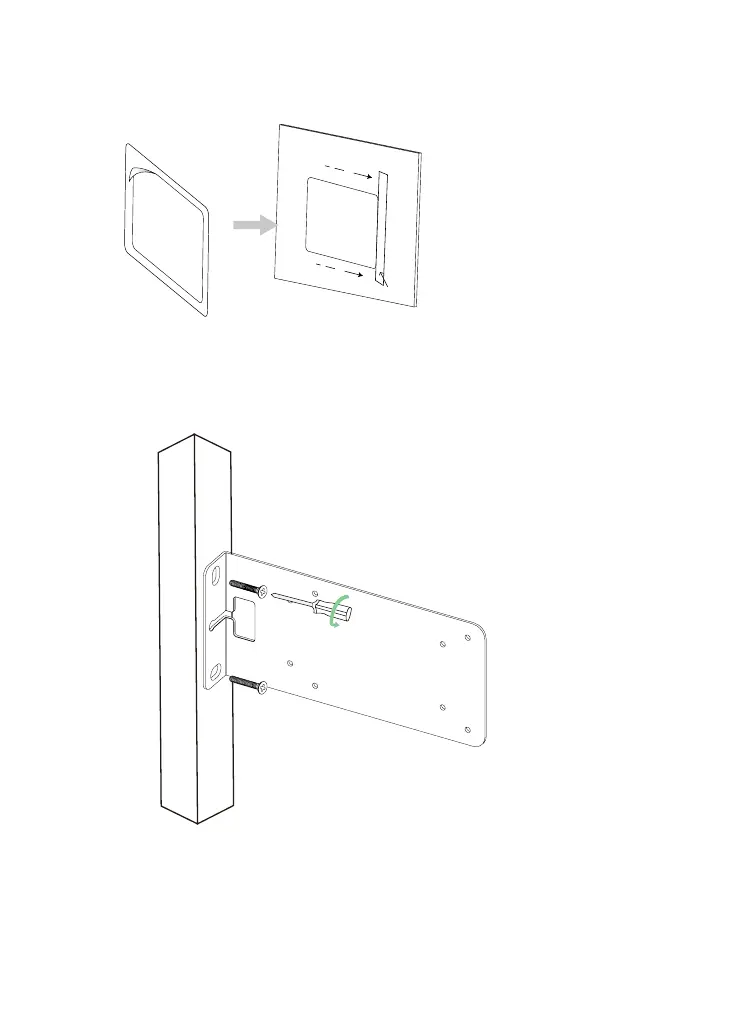
Step 6
:
Glue the glass sticker on the back of the glass (Optional)
You can glue the glass sticker to the back of glass which the RoomPanel E2
installed to maintain the aesthetics.
Note:
You can press the glass
sticker with a ruler, and
glue it while pressing to
reduce the generation of
air bubbles.
Ruler
Option 4: Mullion Mounting
Step 1: Install the mullion mount bracket
Expansion screws:
φ
6 × 30mm
Screws:
T4 x 30mm
Bekijk gratis de handleiding van Yealink RoomPanel E2, stel vragen en lees de antwoorden op veelvoorkomende problemen, of gebruik onze assistent om sneller informatie in de handleiding te vinden of uitleg te krijgen over specifieke functies.
Productinformatie
| Merk | Yealink |
| Model | RoomPanel E2 |
| Categorie | Niet gecategoriseerd |
| Taal | Nederlands |
| Grootte | 2363 MB |


