Handleiding
Je bekijkt pagina 21 van 34
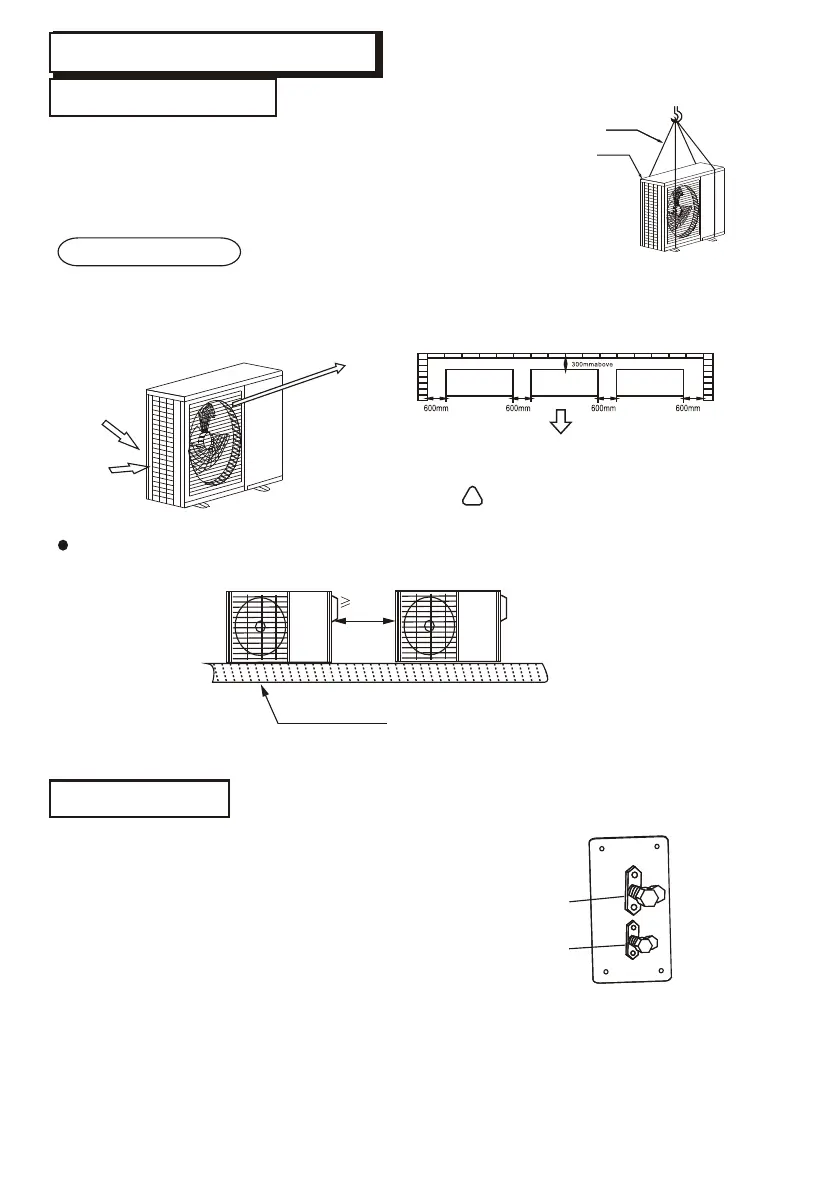
Baffle
Steel bar
1.Please use 4 pieces of 6mm steel wire hanging the outdoor unit up and
move in.
2. To avoid the outdoor unit is out of shpe, please add the baffles at the
surface of outdoor unit where the steel wire rope may touch.
3.After moving, please remove the tray wood on the bottom.
At least 600mm space must be left between outdoor units as the sketch indicated.
4 pieces for one unit
600mm
Bolt
Liquid side
High-presure
valve
Low-pressure
valve
Gas side
1. The junction is inside the cover of the right panel, please take
off the cover first.
2. The pipe gets out of the side gap of the cover.
3. After connecting from the valve gap, reinstall it from left, right or
b ackwards for installation.
4.The right picture is the sketch map of valve installation
board of outdoor. Gas-side(low pressure)is the
one upward, liquid side is the one downward.
INSTALLATION SPACE
After leaving repair space as illustrated below, install the outdoor unit with power supply equipmentinstalled at the
side of the outdoor unit. Please refer to ELECTRIC SUPPLY INSTALLATION MANUAL for the installation method.
Please make sure necessary space for installation and repair.
1.
2.
!!
Air outlet of the outdoor unit
Overview of the outdoor unit
No obstruction from the air outlet of outdoor unit
Above
AboveAbove
Above
Air inlet
Air linlet
Air outlet
Refrigerant pipe
Move outdoor unit in
OUTDOOR UNIT INSTALLATION
17
Bekijk gratis de handleiding van Yamato R32 YD24T1, stel vragen en lees de antwoorden op veelvoorkomende problemen, of gebruik onze assistent om sneller informatie in de handleiding te vinden of uitleg te krijgen over specifieke functies.
Productinformatie
| Merk | Yamato |
| Model | R32 YD24T1 |
| Categorie | Airco |
| Taal | Nederlands |
| Grootte | 3017 MB |


