Yamaha BRK-TV2 handleiding
Handleiding
Je bekijkt pagina 2 van 2
CS-500
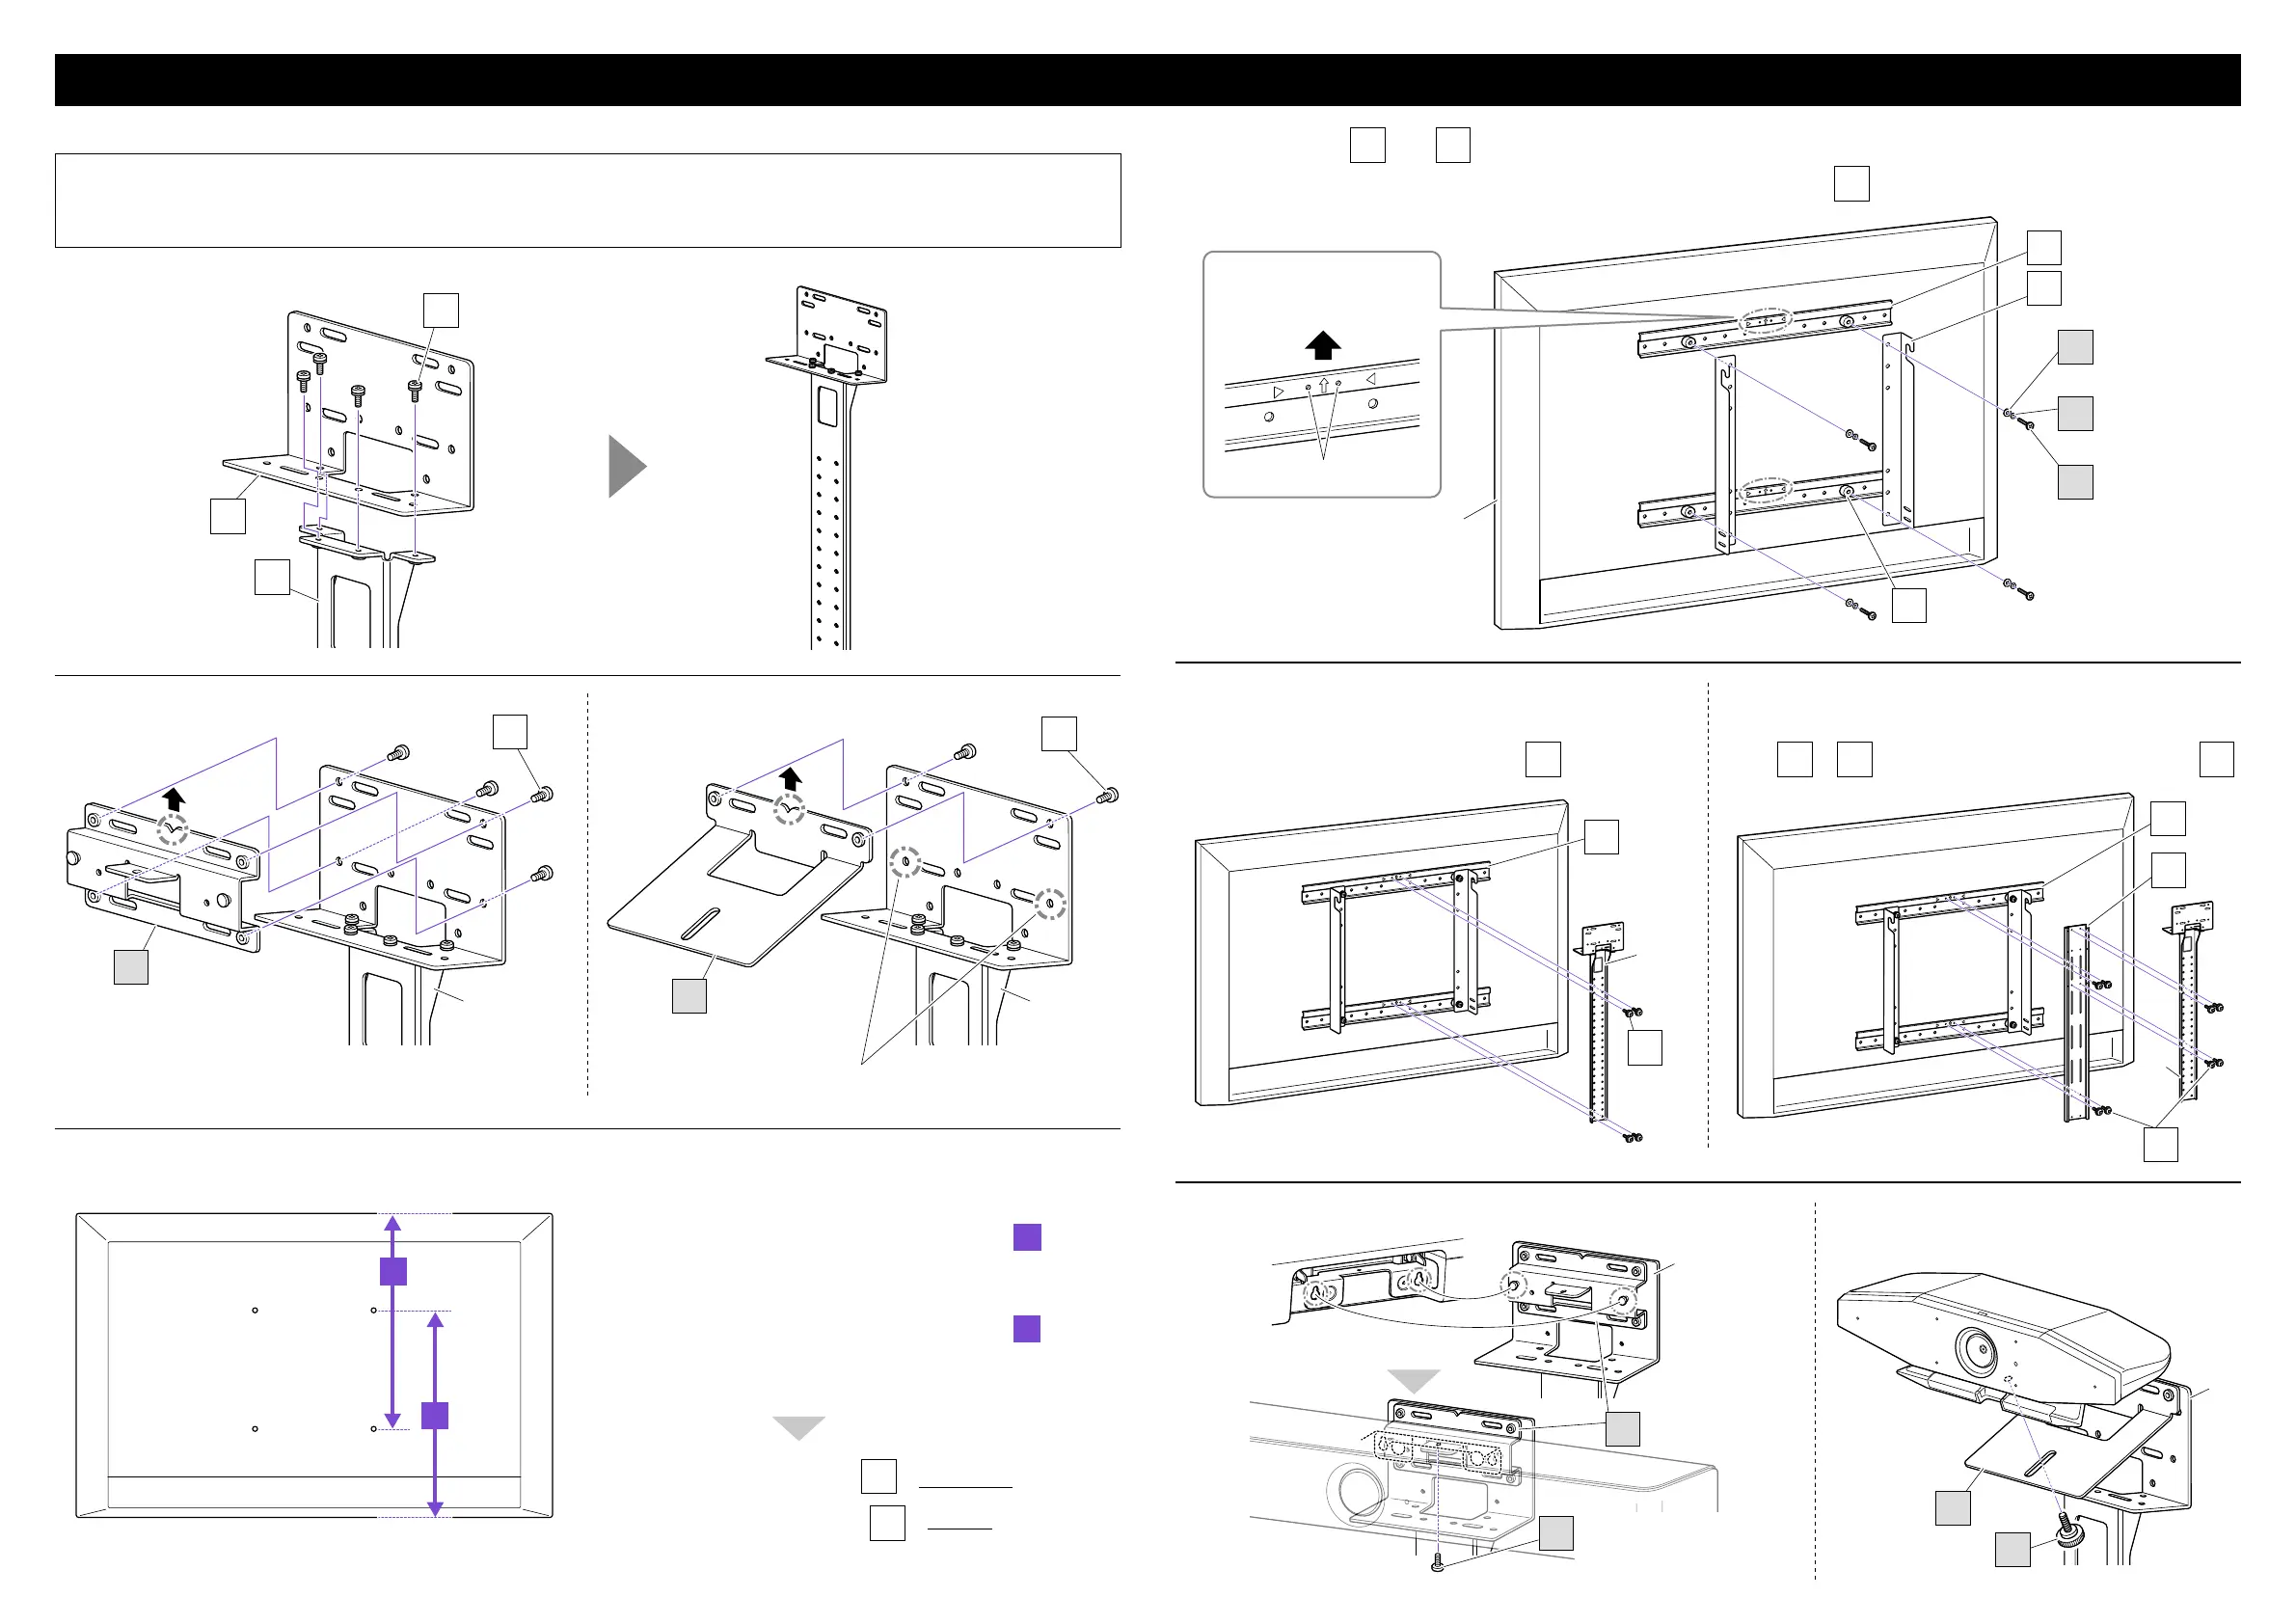
Installation procedure
The illustrations in this “Installation procedure” are for “When installing the device above the TV”.
When installing the device below the TV
Step
2
: Turn the part assembled in step
1
upside down before installing it.
Steps
5
and
6
: Turn the part assembled in step
2
upside down before installing it.
1
F
×
4
A
C
4
Install parts
B
and
K
aligned with the screw holes in the TV.
Depending on the configuration of the TV stand, tighten the parts together with
E
between them to adjust the spacing to the TV.
B
×
2
E
×
4
G
×
4
K
H
×
4
Flat washer
H
×
4
Spring washer
TV
Location where device
is to be installed.
Screw holes
5
When the distance measured in step
3
is
505mm or less
Attach the part from step
2
directly to
B
.
When the distance measured in step
3
is 506mm
or more
Attach
D
to
B
, and then attach the part from step
2
to
D
.
B
×
2
B
×
2
D
F
×
4
F
×
8
2
2
2
CS-800
CS-500
F
×
4
F
×
2
I
I
1
1
* When installing the device below the TV,
use the lower screw holes.
3
Measure the distance from the edge of the TV to the VESA hole. (This measurement will be used in step
5
.)
a
b
When installing the device above the TV:
a
Measure the distance from the top edge of the TV to the lower
VESA hole.
When installing the device below the TV:
b
Measure the distance from the bottom edge of the TV to the upper
VESA hole.
When 505 mm or less: Extension
D
is not required.
When 506 mm or more: Extension
D
is required.
6
CS-800
I
I
J
2
2
CS-800
(back)
CS-500
CS-800
(front)
Tighten with a long
screwdriver.
J
Bekijk gratis de handleiding van Yamaha BRK-TV2, stel vragen en lees de antwoorden op veelvoorkomende problemen, of gebruik onze assistent om sneller informatie in de handleiding te vinden of uitleg te krijgen over specifieke functies.
Productinformatie
| Merk | Yamaha |
| Model | BRK-TV2 |
| Categorie | Niet gecategoriseerd |
| Taal | Nederlands |
| Grootte | 711 MB |


