Whirlwind PL-PM1RJK2 handleiding
Handleiding
Je bekijkt pagina 4 van 4
Available Current Coils
for installation with the
PL-PM1 meters
TRCT600:1
Fixed coil for new construction
TRCT600:1SC
Split core coil for addition to pre-wired systems
WHIRLWIND PL-PM1RJ ETHERNET CONNECTIVITY INFORMATION
The following information applies only to the PL-PM1RJ Power Meter.
The PL-PM1RJ model has Ethernet connectivity for network monitoring of power distribution parameters in real time.
The PL-PM1RJ provides monitoring from any location or multiple locations simultaneously by accessing the Ethernet
LAN that the meter is connected to. The PL-PM1RJ has an assignable IP address that can be set to fit into your current
network. If multiple units are on the same network, each can be assigned its own unique IP address and name. Each
meter is viewed through a separate web browser window. Use Internet Explorer 11 or greater and Apple Safari for best
viewing.
PL-PM1RJ Power Meter Network Setup
To view the PL-PM1RJ Power Meter in a web browser, the browser will need to know the IP address of the Power Meter.
Browser cookies must be enabled to properly view the meter parameters. It is possible that the default address will work,
unchanged, on your existing network. Assuming that the address is not compatible with your existing network, the
following explains how to access the Power Meter and how to change its IP address to be compatible with your network.
Default Address
The PL-PM1RJ is shipped from the factory with a
static IP address of 192.168.1.200 and a subnet
mask of 255.255.255.0. At any time, the IP address
stored in the Power Meter can be viewed by
pressing the mode button in for more than 3
seconds. The IP address will appear in the top row
of LED number displays and the subnet mask will
appear in the lower row of numbers. Press the
mode button again to exit this mode.
If you use the PL-PM1RJ on a small network, and
the network router is set at 192.168.1.1 with a net
mask of 255.255.255.0 (a common default address
for small networks), and as long as the address of
192.168.1.200 is not already in use, no changes to
the IP address will be needed. Simply plug the unit
into your network's router or switch, then with a
computer that is also on the same network, use a
browser and type in the URL for the Power Meter
which will be: http://192.168.1.200/.
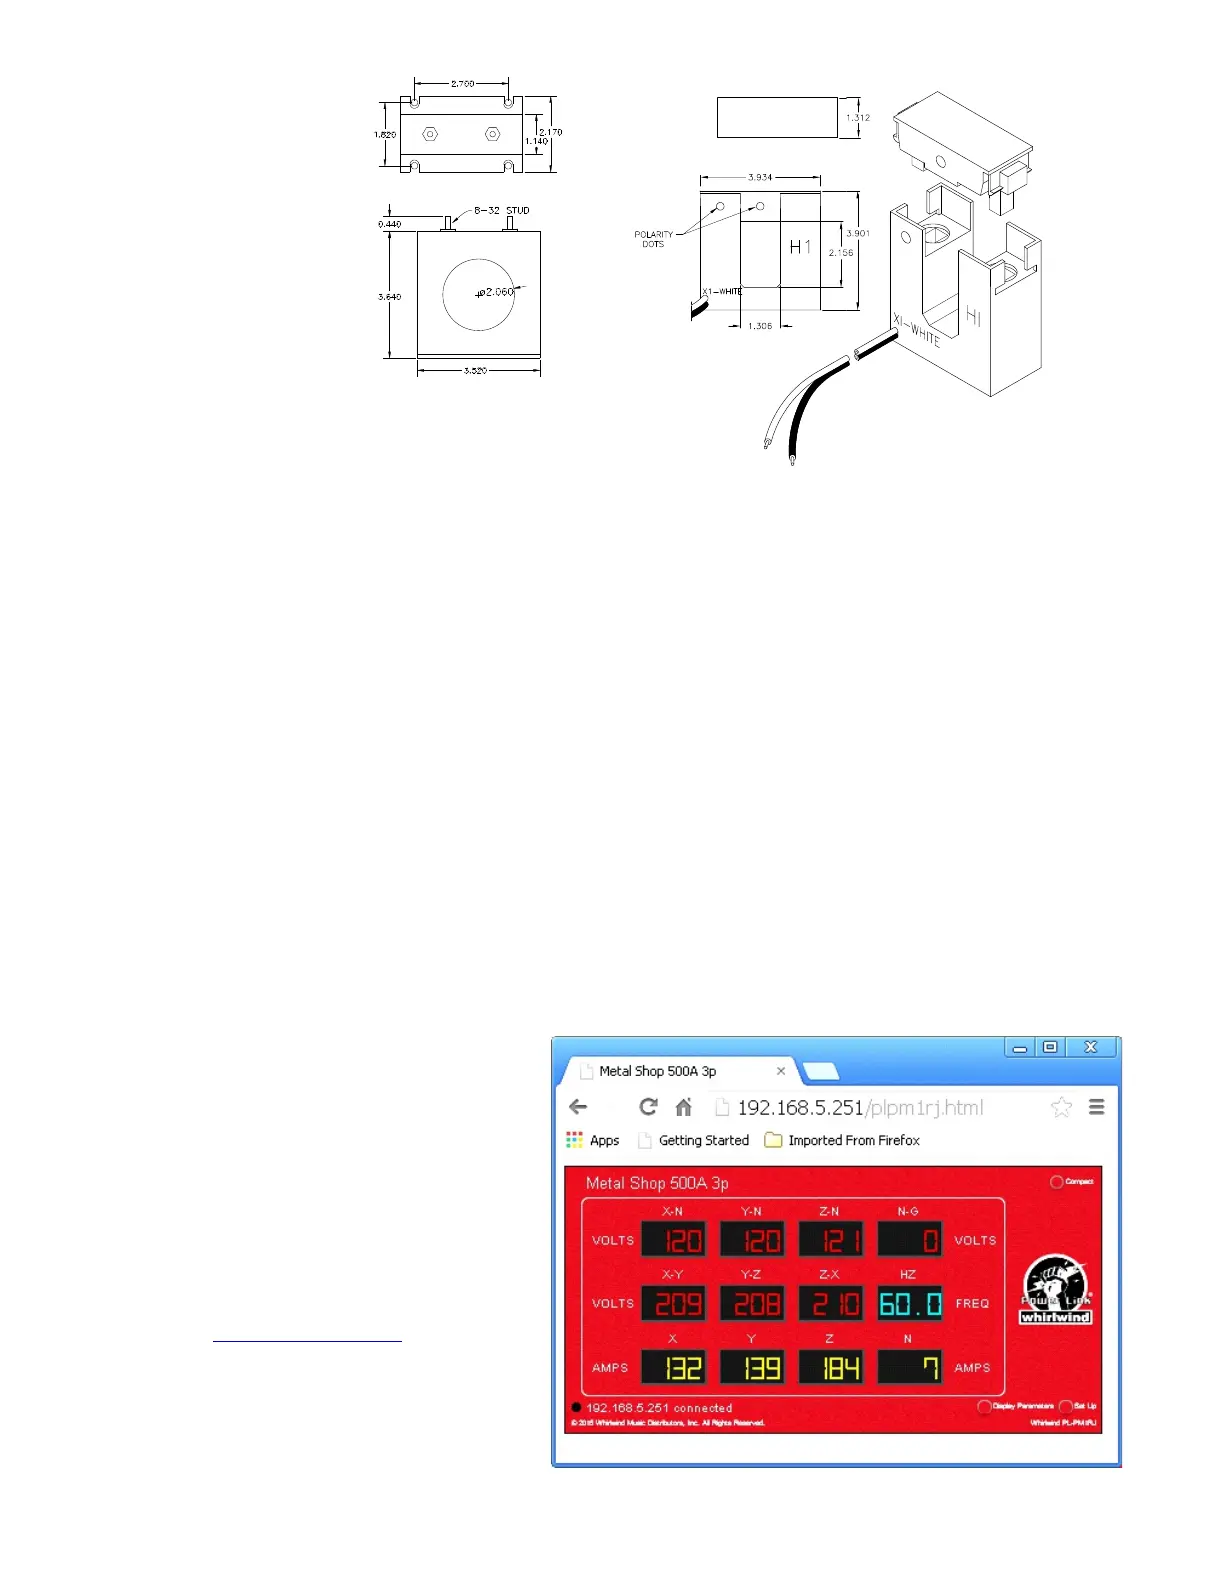
The display you see should look like the following,
however the IP address will be different than shown.
Once your browser finds the Power Meter, it will be
redirected to a sub directory in the meter and you will
see http://192.168.1.200/plpm1rj.html in the
address bar of the browser window. If this address is
acceptable, then no further work is needed.
Bekijk gratis de handleiding van Whirlwind PL-PM1RJK2, stel vragen en lees de antwoorden op veelvoorkomende problemen, of gebruik onze assistent om sneller informatie in de handleiding te vinden of uitleg te krijgen over specifieke functies.
Productinformatie
| Merk | Whirlwind |
| Model | PL-PM1RJK2 |
| Categorie | Niet gecategoriseerd |
| Taal | Nederlands |
| Grootte | 2012 MB |


