Handleiding
Je bekijkt pagina 10 van 40
10
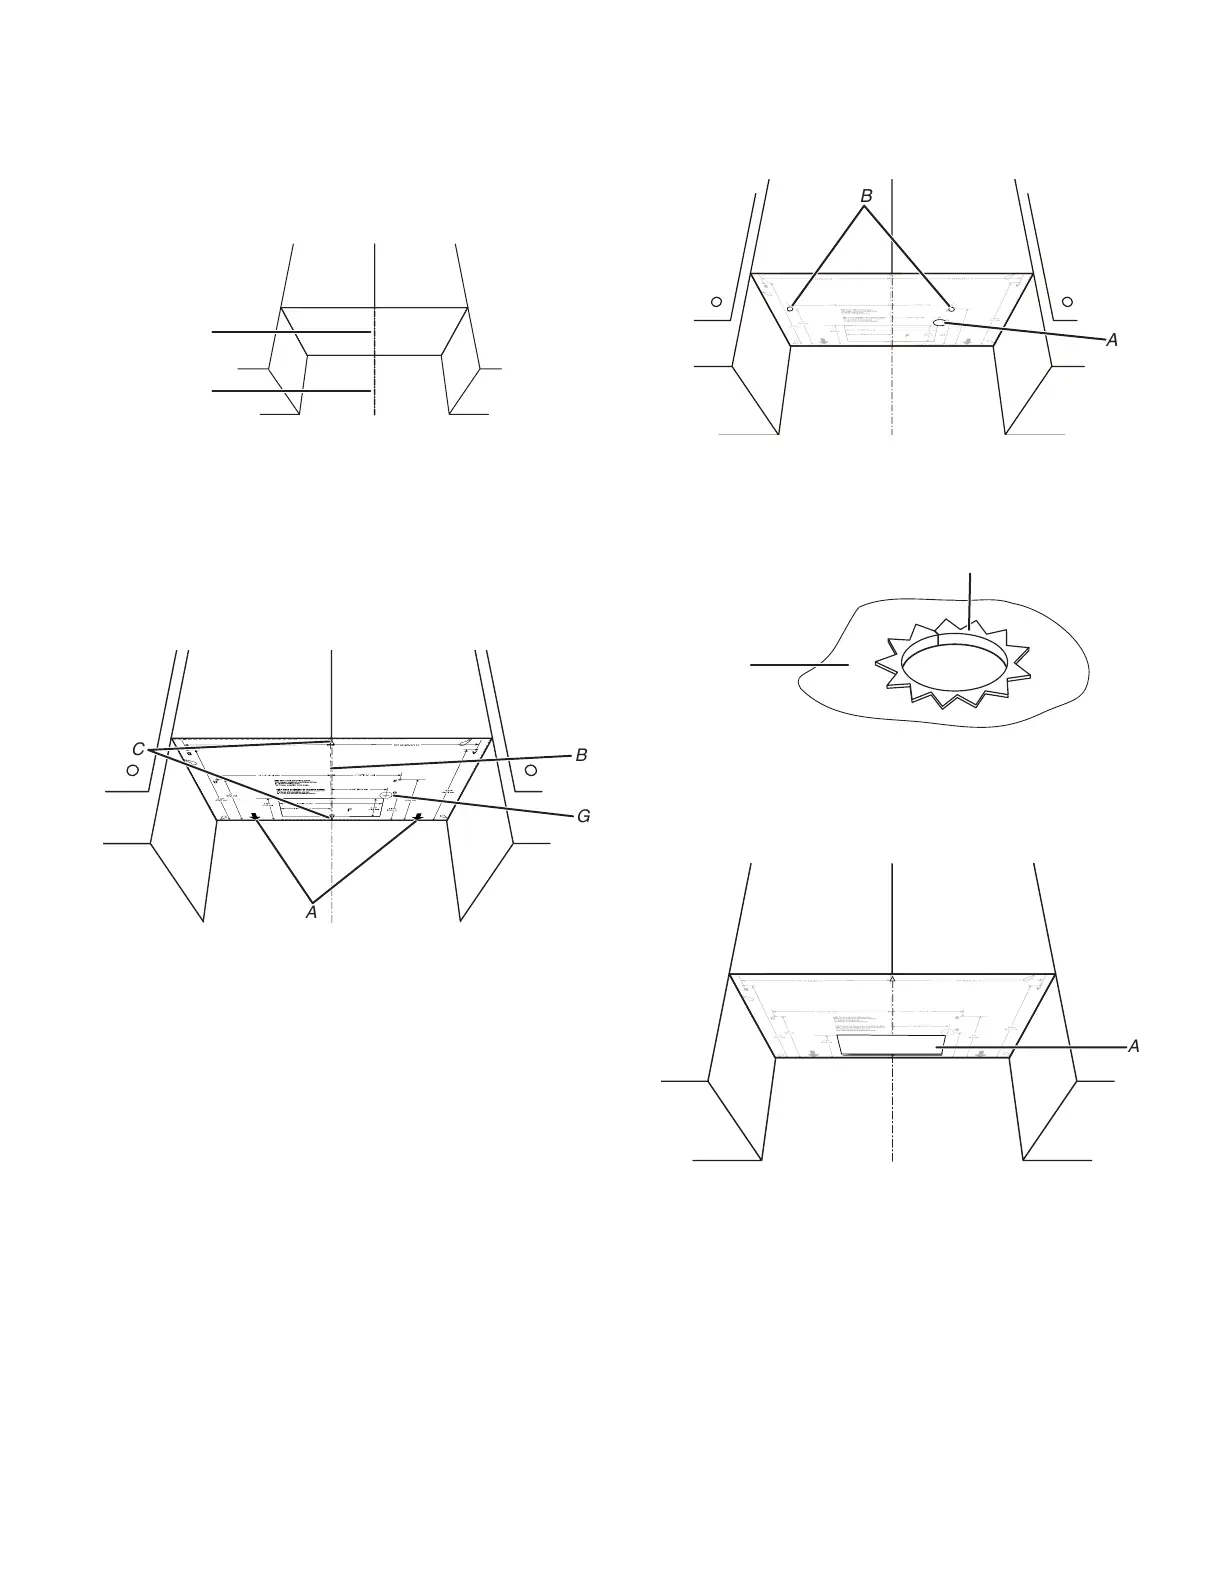
Mark and Drill Upper Cabinet
1. Disconnect power to outlet.
2. Remove all contents from upper cabinet.
3. Using a tape, measure clearly and mark the vertical centerline
of the opening. Make sure it aligns with the vertical wall
centerline. Use a pencil to draw the centerlines on the upper
cabinet and wall.
A
B
A. Upper Cabinet Centerline
B. Wall Centerline
NOTE: The cardboard template or upper cabinet template is
fit for depth of 12" to 14" (30.5 cm to 35.6 cm) cabinet
installation, if cabinets are larger than 14" (35.6 cm), and up to
15" (38.1 cm), using the bump out mounting kit, replacing the
mounting plate supplied with the product. The bump out
mounting kit (part#- W11185746) is not provided. To order, see
the “Online Ordering Information” section of the Quick Start
Guide.
A
B
G
C
A. Arrows to wall
B. Upper cabinet centerline
C. Center marks on cardboard template or upper
cabinet template
4. Placing the cardboard template or upper cabinet template
against the bottom of the upper cabinet. Make sure the
cardboard template or upper cabinet template centerline
aligns with the centerline on the upper cabinet which drew in
step 3. And the Arrows to wall (A) must be against the rear
wall so that the holes cut into the upper cabinet align with the
holes in the top of the microwave oven.
NOTE: If the wall behind the microwave oven (as installed)
has a partial wall covering (for example, tile back splash), be
sure the “Rear Wall” arrows align to the thickest part of the
rear wall (for example, the thickness of the tiles rather than the
drywall).
5. Using a drill and the 3/4" (1.9 cm) hole saw cut out the power
cord hole power supply hole (G on cardboard template or
upper cabinet template).
6. Drill two mounting nut holes (B), which are 3/8" (10 mm) holes
at points “D” and “E” on the cardboard template or upper
cabinet template. These are for two 1/4-20 x 3" bolts and
washers used to secure the microwave oven to the upper
cabinet.
B
A
A. Power cord hole (G)
B. Mounting nut holes (D and E)
NOTE: If upper cabinet is metal, the supply cord bushing
needs to be installed around the supply cord hole as shown.
A
B
A. Metal cabinet
B. Power supply cord bushing
7. Using a keyhole saw, cut out the rectangular roof venting
cutout area. Skip this step if for recirculation venting or wall
venting installation.
A
A. Roof Venting Cutout Area
Bekijk gratis de handleiding van Whirlpool YWMMS3130RW, stel vragen en lees de antwoorden op veelvoorkomende problemen, of gebruik onze assistent om sneller informatie in de handleiding te vinden of uitleg te krijgen over specifieke functies.
Productinformatie
| Merk | Whirlpool |
| Model | YWMMS3130RW |
| Categorie | Oven |
| Taal | Nederlands |
| Grootte | 6153 MB |


