Handleiding
Je bekijkt pagina 11 van 40
11
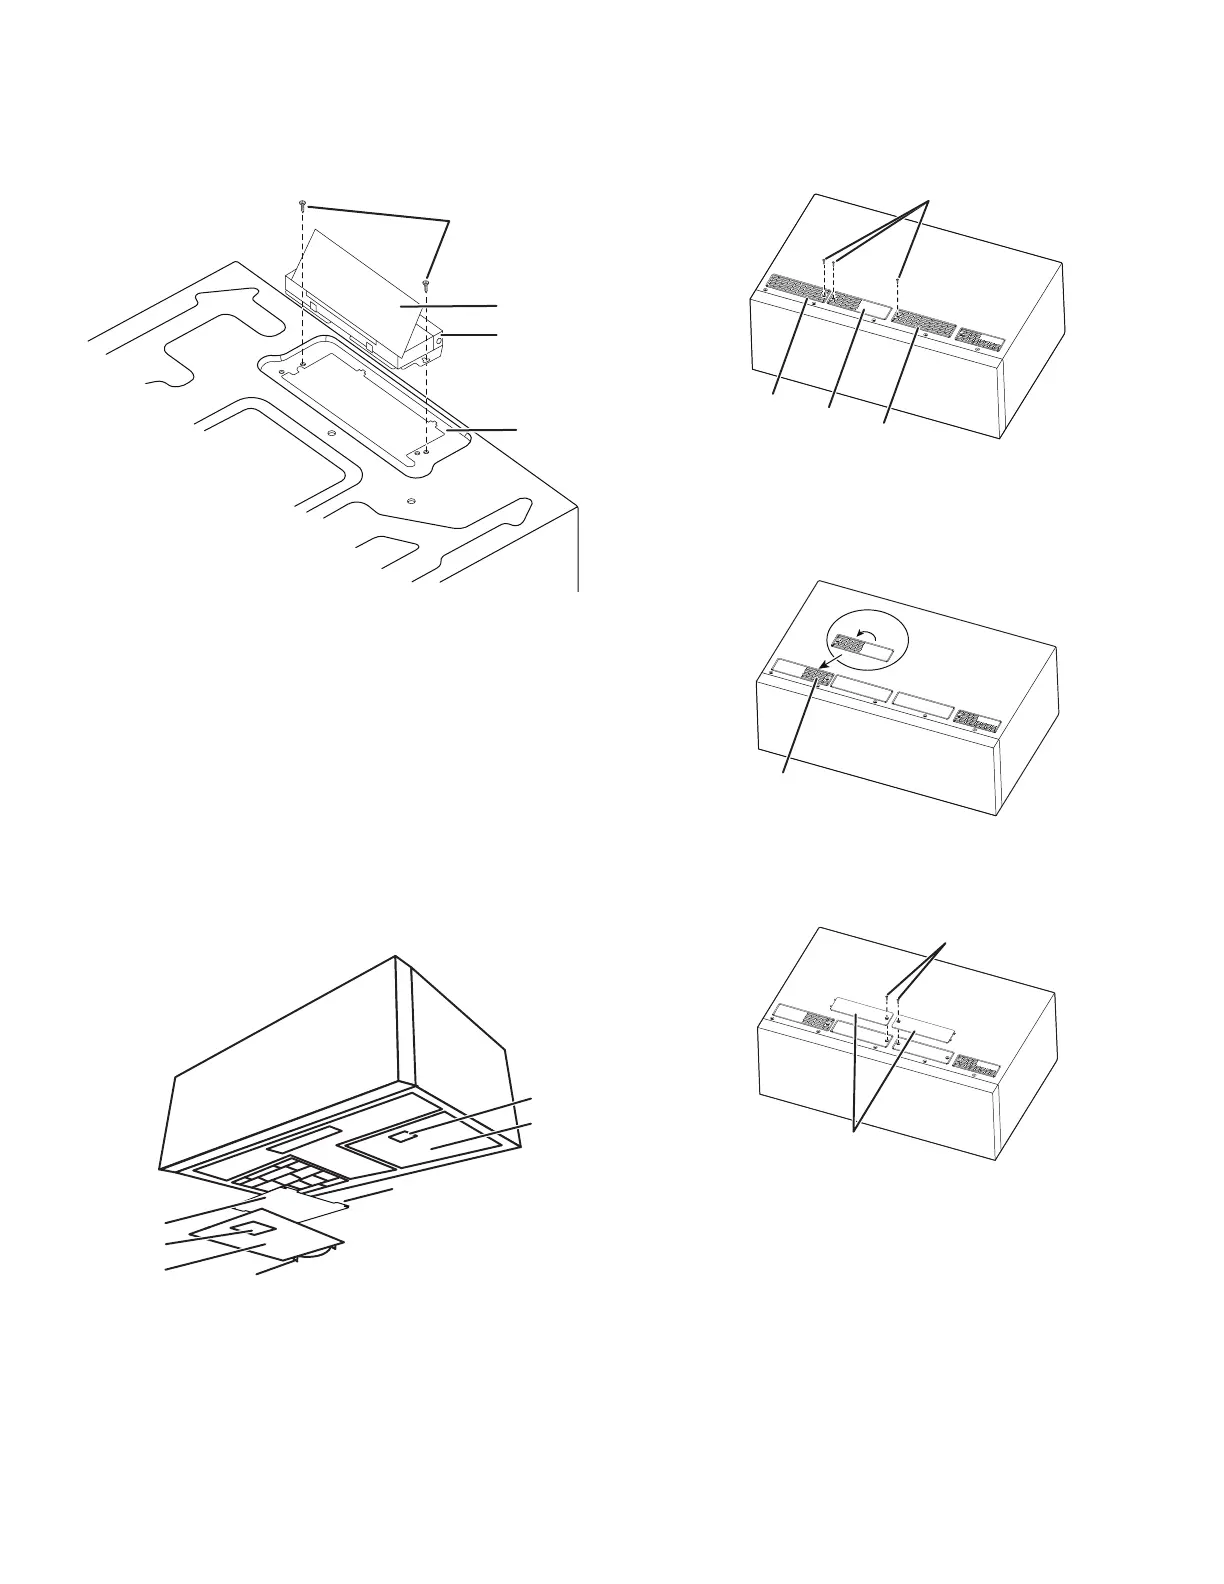
4. Position the damper assembly on the back of the microwave
oven so that the damper blade hinge is at the top, and the
damper blade opens away from the microwave oven.
5. Secure damper assembly with two #6 x 3/8" Sheet metal
screws, see above illustration.
A
C
B
D
A. #6 x 3/8" Sheet metal screws (in the screw pack)
B. Damper blade
C. Damper assembly
D. Top of the microwave oven
NOTE: To ensure good performance of airflow, for Wall and Roof
venting, remove the charcoal(s) filter from the bottom plate before
operating the microwave oven.
To uninstall the charcoal filter:
a. Disconnect power.
b. Remove the grease filter by pushing finger grips back and then
pull down charcoal filters) from the bottom plate and keep for
future use.
c. Put the grease filter back into the bottom plate and the spring
toward the back. Push the finger grips back, until the two
tongues are in position.
B
C
B
D
C
A
E
A. Charcoal filter(s)
B. Grease filter(s)
C. Finger grip(s)
D. Charcoal filter hooks
E. Grease filter spring
Install Vent Cover(For Wall and Roof
Venting)
1. Remove screws attaching B and C cover. Slide them out.
Keep C for step 2 use.
B
B
C
A
A. Screws
B. Recirculation vent covers
C. Recirculation lighting cover
NOTE: Keep B for future recirculation vent installation.
2. Rotate C 180 degrees, place it as shown below.
180°
C
C. Recirculation lighting covers
3. Take J from packaging upper foam (see item J in "Parts
Supplied" section), attach both of them as shown below with
screw removed from step 1.
A
J
A. Screws
J. Exhaust vent covers
Bekijk gratis de handleiding van Whirlpool YWMML5530RZ, stel vragen en lees de antwoorden op veelvoorkomende problemen, of gebruik onze assistent om sneller informatie in de handleiding te vinden of uitleg te krijgen over specifieke functies.
Productinformatie
| Merk | Whirlpool |
| Model | YWMML5530RZ |
| Categorie | Oven |
| Taal | Nederlands |
| Grootte | 6004 MB |


