Handleiding
Je bekijkt pagina 16 van 64
16
DOOR REMOVAL AND LEVELING
STYLE 1
Door Instructions
Gather the required tools and parts and read all instructions
before starting installation. Save these instructions for future
reference.
WARNING
Electrical Shock Hazard
Disconnect power before removing doors.
Failure to do so could result in death or electrical shock.
NOTE: Before moving your refrigerator into your home, measure
the doorway of your home to see whether you need to remove the
refrigerator and freezer doors. If door removal is necessary, see
the instructions below.
TOOLS NEEDED Depending on your model, you may need the
following: Bubble level, flat-blade screwdriver, Phillips screwdriver
tip #2 with 4" long as minimum, 3/16" hex key, 1/4", 3/8", and 5/16"
hex-head socket wrench, 1/4" and 5/16" open-ended wrenches or
adjustable wrench, internal star drive or 3/8" hex-head socket
wrench, TORX
✝
T30 screwdriver.
Install and Remove Door Handles
Refrigerator Door Handle Style 1
PARTS INCLUDED: Door handles (2).
To Install the Handles:
1. Remove the handles, which are packed inside the refrigerator.
NOTE: To avoid scratching the finish, place the handles on a
towel or other soft surface.
2. Open the freezer door. On the refrigerator door, place the
handle on the shoulder screws.
A. Shoulder screws
3. Firmly push the handle toward the door until the handle base
is flush against the door.
4. While holding the handle, push downward until the handle is
released from the shoulder screw.
5. Open the refrigerator door and close the freezer door. Repeat
steps 2 through 4 to install the other handle onto the freezer
door
To Remove the Handles:
1. While holding the handle, push upward until the handle is
released from the shoulder screw.
2. Gently pull the handle away from the door.
3. If necessary, use a Phillips screwdriver to remove the shoulder
screws from the door.
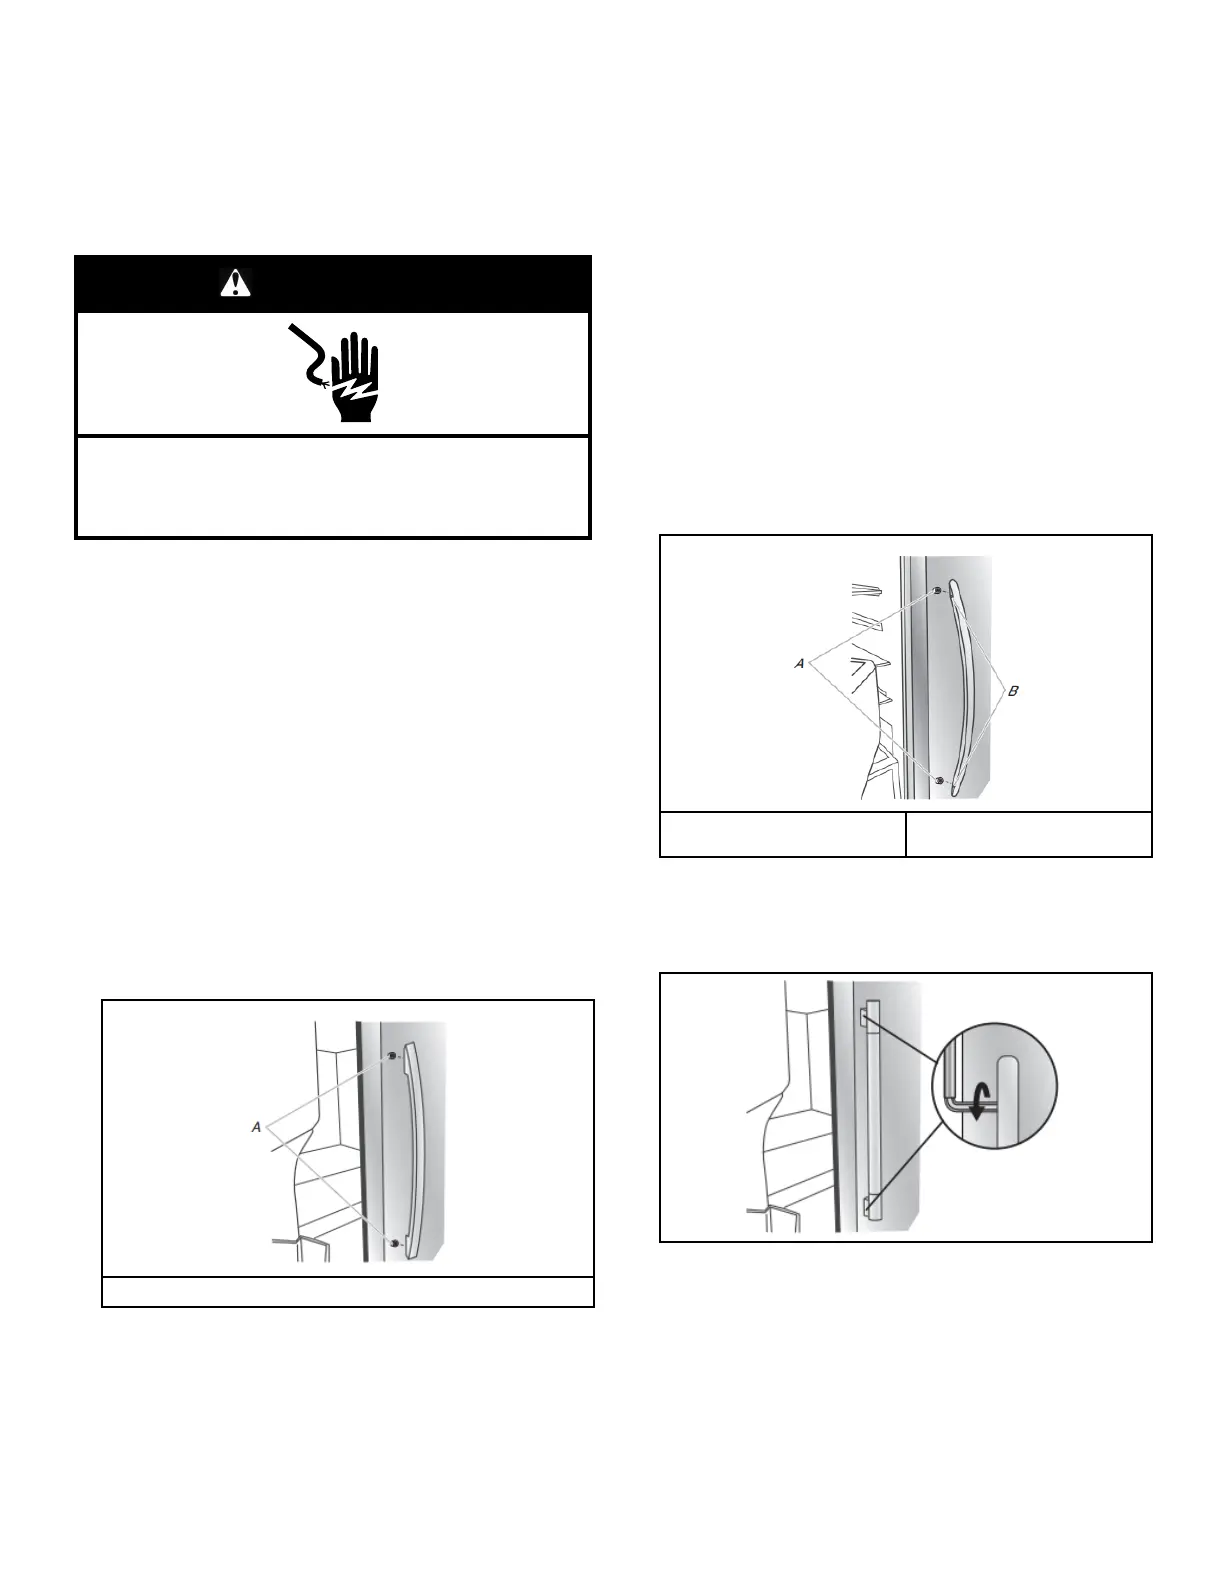
Refrigerator Door Handle Style 2
PARTS INCLUDED: Door handles(2), 1/8" hex key, spare
setscrew(s)
NOTE: The handle mounting setscrews are pre-installed in the
handle.
1. Remove the handles, which are packed inside the refrigerator.
NOTE: To avoid scratching the finish, place the handles on a
towel or other soft surface.
2. Open the freezer door. On the refrigerator door, place the
handle on the shoulder screws with the setscrews facing the
freezer.
A. Shoulder screws B. Setscrews inside the
handle
3. Firmly push the handle toward the door until the handle base
is flush against the door.
4. While holding the handle, insert the short end of the hex key
into the upper hole and slightly rotate the hex key until it is
engaged in the setscrew.
5. Using a clockwise motion, tighten the setscrew until it begins
to contact the shoulder screw.
6. Repeat steps 4 and 5 to begin fastening the lower setscrew.
✝TORX is trademark of Acument Intellectual Properties, LLC.
Bekijk gratis de handleiding van Whirlpool WRSC5536RV, stel vragen en lees de antwoorden op veelvoorkomende problemen, of gebruik onze assistent om sneller informatie in de handleiding te vinden of uitleg te krijgen over specifieke functies.
Productinformatie
| Merk | Whirlpool |
| Model | WRSC5536RV |
| Categorie | Koelkast |
| Taal | Nederlands |
| Grootte | 11402 MB |


