Handleiding
Je bekijkt pagina 2 van 30
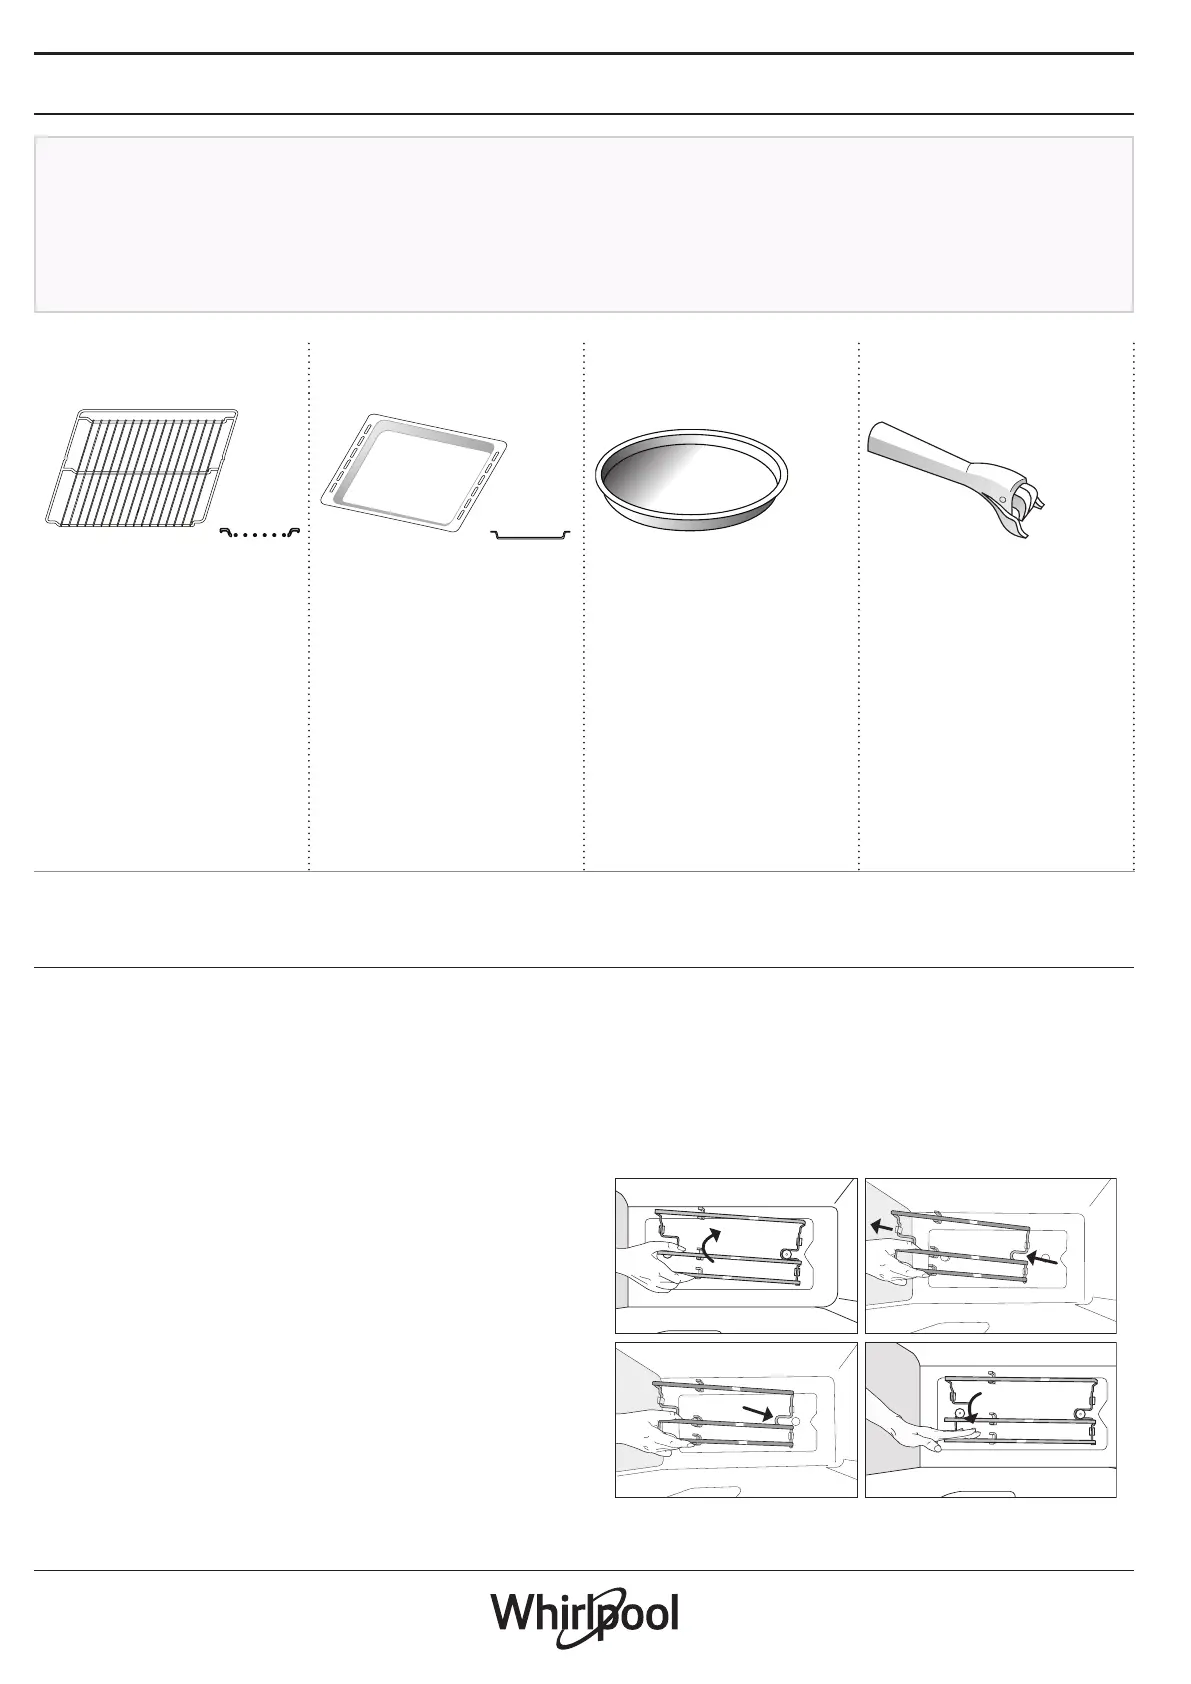
ACCESSORIES
Before purchasing other accessories that are available
on the market, make sure that they are heat-resistant
and suitable for steaming.
Make sure that there is a gap of at least 30 mm
between the top of any container and the walls of the
cooking compartment in order to allow steam to ow
suciently.
Accessories during microwave function may raise in
temperature. It is recommended to use protection to
handle accessories at the end of the cycle.
WIRE SHELF BAKING TRAY CRISP PLATE
HANDLE FOR CRISP
PLATE
The wire shelf is suitable
for all cooking modes, also
in Microwave cooking.
When using microwaves
place the wire shelf always
on level 1 (the lower one).
You can place food directly
on the wire shelf or use it
to support baking trays
and tins or other oven-
ware resistant to heat and
microwaves.
The baking tray is suitable
for all cooking modes
except for “Microwave”
functions. Can be used
to cook all kind of foods
without container. Use it
to collects the cooking
juices, placing it below the
wire shelf.
Only for use with the
designated functions.
The Crisp plate must
always be placed in the
center of the wire shelf and
can be pre-heated when
empty, using the special
function for this purpose
only. Place the food directly
on the Crisp plate. Place
the silicone feet between
the bars of the wire shelf
for added stability.
Useful for removing the
hot Crisp plate from the
oven.
The number of accessories may vary depending on which model is purchased.
*Other accessories can be purchased separately from the After-sales Service.
INSERTING THE WIRE SHELF AND OTHER
ACCESSORIES
Insert the wire shelf onto the level you require by
holding it tilted slightly upwards and resting the
raised rear side (pointing upwards) down first.
Then slide it horizontally along the runners as far as
possible. Other accessories, like the baking tray, are
to be inserted horizontally, letting them slide on the
runners.
Push the accessory all the way in, making sure that it
does not touch the appliance door.
REMOVING AND REFITTING THE LADDER RACKS
There are two ladder racks on both sides of the oven
cavity, anchored on two button-shaped supports. The
ladder racks are removable to make cleaning more
convenient.
1. To remove the ladder racks, firmly grip the
external part of the guide, and pull it upwards to
extract it from the frontal support while rotating on
the rear support, then slide out the whole part from
the cavity.
2. To reposition the ladder racks, slide the back part
onto the rear support. Then, once anchored, push the
assy down until the ladder rack is inserted into the
frontal support.
Bekijk gratis de handleiding van Whirlpool WCW64HUSX, stel vragen en lees de antwoorden op veelvoorkomende problemen, of gebruik onze assistent om sneller informatie in de handleiding te vinden of uitleg te krijgen over specifieke functies.
Productinformatie
| Merk | Whirlpool |
| Model | WCW64HUSX |
| Categorie | Oven |
| Taal | Nederlands |
| Grootte | 4486 MB |


