Handleiding
Je bekijkt pagina 15 van 40
15
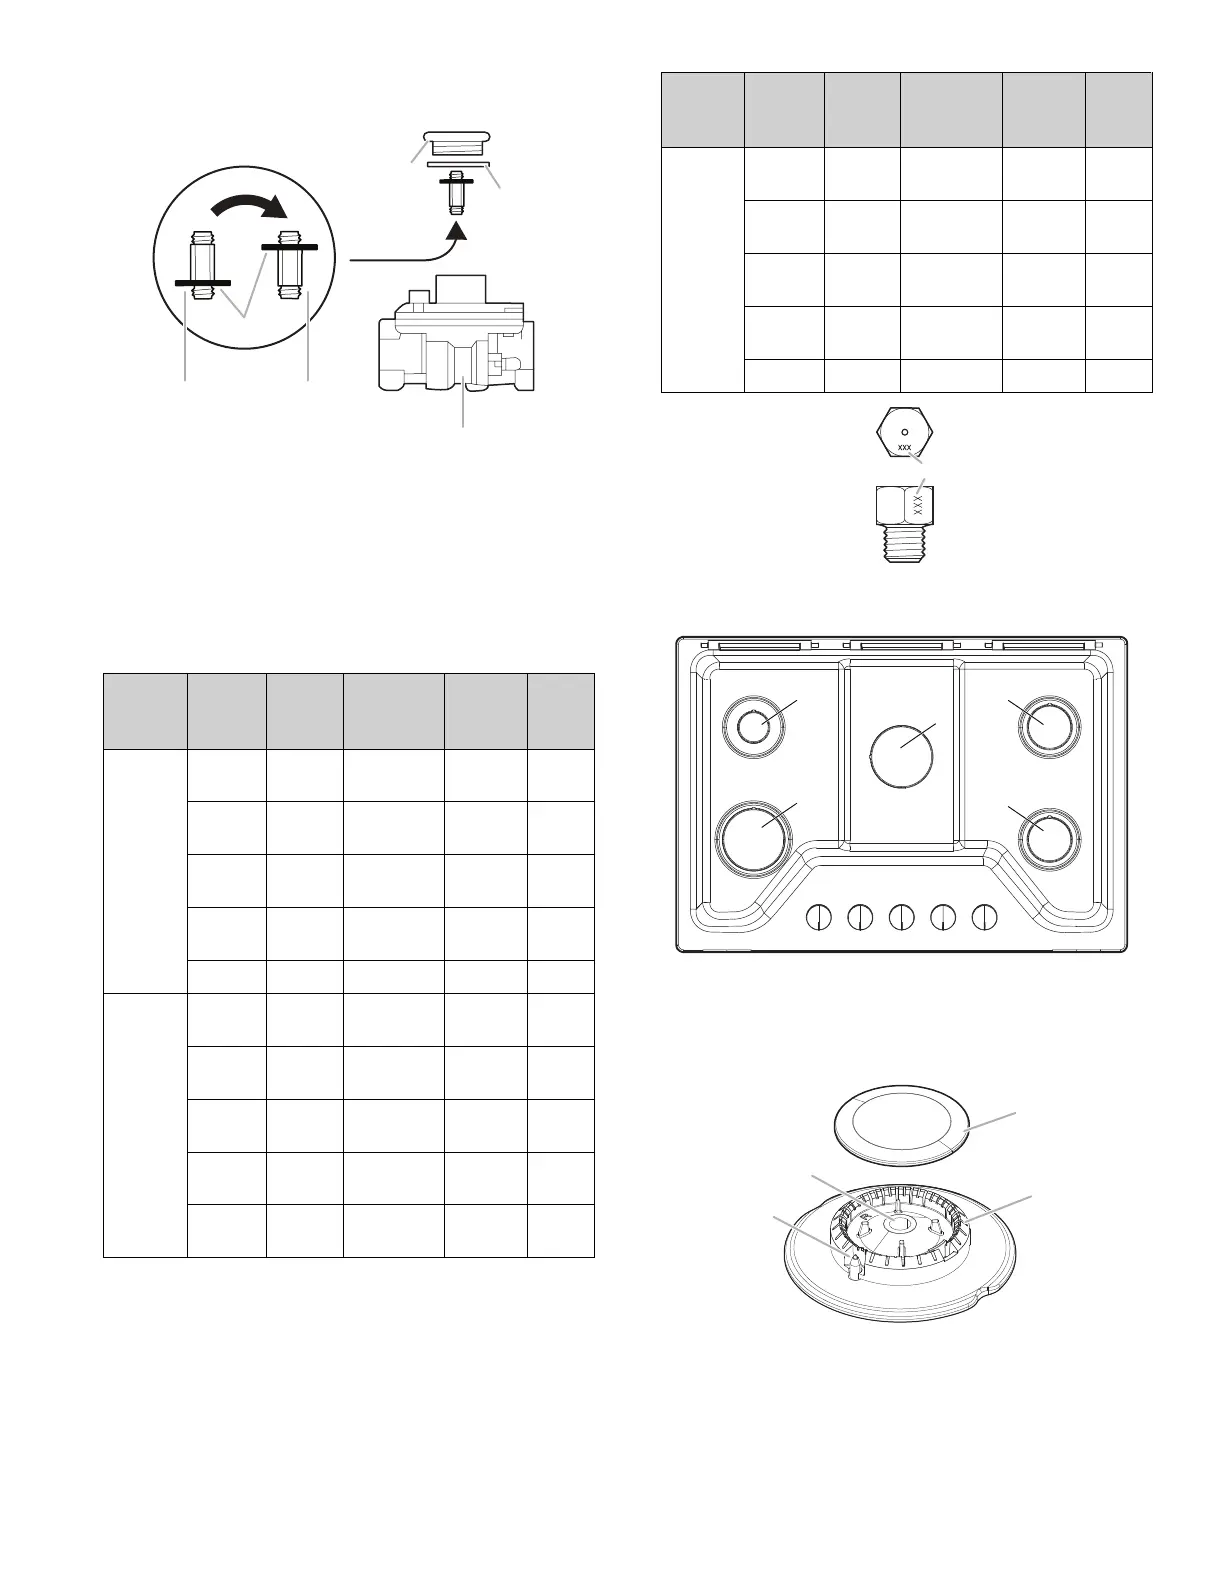
Reinstall the cap and seal onto the regulator by turning
clockwise.
A
B
C
D
E F
A. Access cap
B. Seal
C. Regulator
D. Disk on Spring Retainer
E. Spring Retainer in LP Gas
Position
F. Spring Retainer in Natural
Gas Position
4. If the burner grates are installed, remove them.
5. If they are installed, remove the burner grates.
Use the following chart to match the correct gas orifice spud
with the burner location and model being converted.
Natural Gas Orifice Spud Chart
Model
Family
Burner
Burner
Rating
(BTU)
Color
Stamp
(A)
Size
(mm)
WCG-
K3030P,
WCG-
K5030P
Right
Front
9100 BLUE 130 1.30
Left
Front
12000 RED 150 1.5
Right
Rear
18000 BLACK 188 1.88
Left
Rear
5000 GREEN 96 0.96
Center N/A N/A N/A N/A
WCG-
K5036P,
WCG-
K7030P,
WCG-
K7530P,
WCG-
K7536P
Right
Front
9100 BLUE 130 1.30
Left
Front
12000 RED 150 1.5
Right
Rear
9100 BLUE 130 1.30
Left
Rear
5000 GREEN 96 0.96
Center 18000 BLACK 188
1.88
Model
Family
Burner
Burner
Rating
(BTU)
Color
Stamp
(A)
Size
(mm)
WCG-
K7036P
Right
Front
11000 ORANGE 143 1.43
Left
Front
12000 RED 150 1.5
Right
Rear
11000 ORANGE 143 1.43
Left
Rear
5000 GREEN 96 0.96
Center 18000 BLACK 188 1.88
A
A. Stamp
Burner locations
C
B
D
A
E
A. Left front
B. Left rear
C. Center
D. Right rear
E. Right front
6. Remove all burner caps and burner bases (see the Quick
Start Guide for burner reference).
B
D
C
A
Standard Flame
A.
Igniter electrode
B. Gas tube opening
C. Burner cap
D. Burner base
Bekijk gratis de handleiding van Whirlpool WCGK3030PS, stel vragen en lees de antwoorden op veelvoorkomende problemen, of gebruik onze assistent om sneller informatie in de handleiding te vinden of uitleg te krijgen over specifieke functies.
Productinformatie
| Merk | Whirlpool |
| Model | WCGK3030PS |
| Categorie | Fornuis |
| Taal | Nederlands |
| Grootte | 6740 MB |


