Handleiding
Je bekijkt pagina 5 van 48
CONTROL PANEL
DAILY USE
SWITCHING THE HOB ON/OFF
To switch the hob on, keep button “A“ pressed for approx. 2 seconds. The
4 cooking zone displays show “0“. If within 20 seconds none of the cooking
zones is activated, the hob switches o automatically as a safety precaution.
SWITCHING ON AND ADJUSTING COOKING ZONES
Press one of the buttons “B“ corresponding to the cooking zone you intend to
use. Select the heat setting required with buttons “E“ or “C“. The other selectable
cooking settings go from 1 to 9. Press buttons “+/−“ at the same time to cancel
all settings.
IMPORTANT: the control is deactivated 10 seconds after the heat setting has
been selected.
To change the heat setting, rst press the selection button “B“ again, then
proceed to change the setting, using buttons “E“ or “C“.
TIMER
To set the Timer function, select the desired cooking zone and power setting
then press the cooking zone key again and a luminous dot will appear on the
display of the timer-controlled cooking zone. The indication “00“ blinks on the
2 displays. Press buttons “C“ or “E“ to set the time from 1 to 99.
IMPORTANT: after 10 seconds the timer displays will show the power setting
of the other cooking zones.
To view the remaining cooking time, press the timer-controlled cooking zone
key twice.
A FUNCTION
This function allows to automatically decrease the cooking zone power level
from the highest value (level 9) to the one selected by the user for a later stage
of cooking.
To activate this function rst press the “+“ button when level 9 is reached.
The display shows “A“ and “9“ ashes alternately with low brightness.
At this point, choose the desired power level (less than 9) with the “–“ button.
“A“ and selected level ash alternately with low brightness on the display.
The function is activated once “A“ and the selected level ash alternately with
high brightness on the display.
Once “A“ is no longer visible on the display (the “A“ function switches o
automatically after several minutes, depending on the set power level), the
FIRST TIME USE
Upon rst installation, the control panel performs a functional test for about 1
second, after which it automatically switches to the “Key lock” function.
To deactivate the function, press and hold button “D”; an acoustic signal will
sound and the corresponding led will turn o.
NOTE: If a reset occurs, repeat the procedure described above.
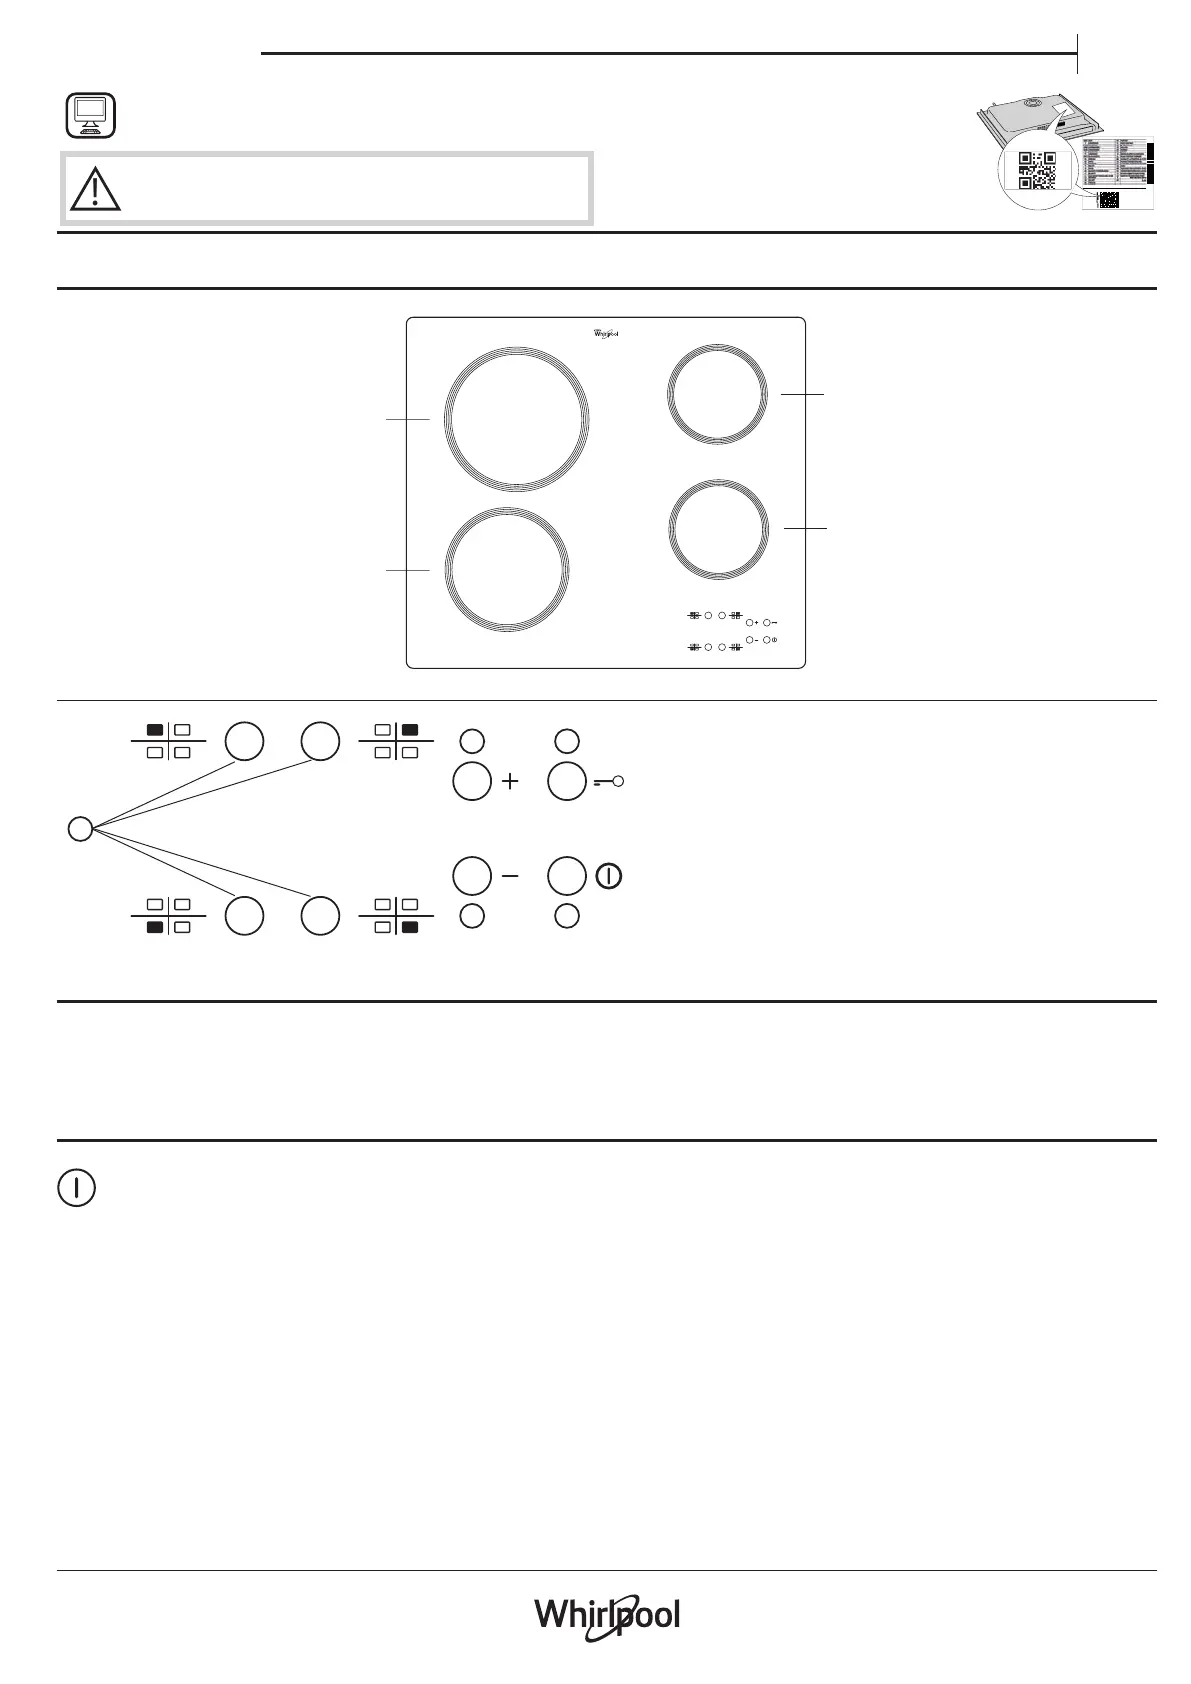
PRODUCT DESCRIPTION
THANK YOU FOR BUYING A WHIRLPOOL PRODUCT
In order to receive a more complete assistance, please
register your product on www.whirlpool.eu/register.
PLEASE SCAN THE QR CODE ON
YOUR APPLIANCE IN ORDER TO
REACH MORE INFORMATION
!
Before using the appliance carefully read the Safety
Instruction.
TIMER
E
C
A
D
B
A On/O
B Cooking zone and timer selection
C-E Heat setting increase and decrease
D Key lock
145 mm
145 mm
TIMER
210 mm
180 mm
EN
Owner's manual
Bekijk gratis de handleiding van Whirlpool AKT 801/NE, stel vragen en lees de antwoorden op veelvoorkomende problemen, of gebruik onze assistent om sneller informatie in de handleiding te vinden of uitleg te krijgen over specifieke functies.
Productinformatie
| Merk | Whirlpool |
| Model | AKT 801/NE |
| Categorie | Fornuis |
| Taal | Nederlands |
| Grootte | 7571 MB |
Caratteristiche Prodotto
| Apparaatplaatsing | Ingebouwd |
| Soort bediening | Touch |
| Kleur van het product | Zwart |
| Ingebouwd display | Nee |
| Breedte | 580 mm |


