Westinghouse W16ADAC handleiding
Handleiding
Je bekijkt pagina 9 van 41
English
|
9
ASSEMBLY
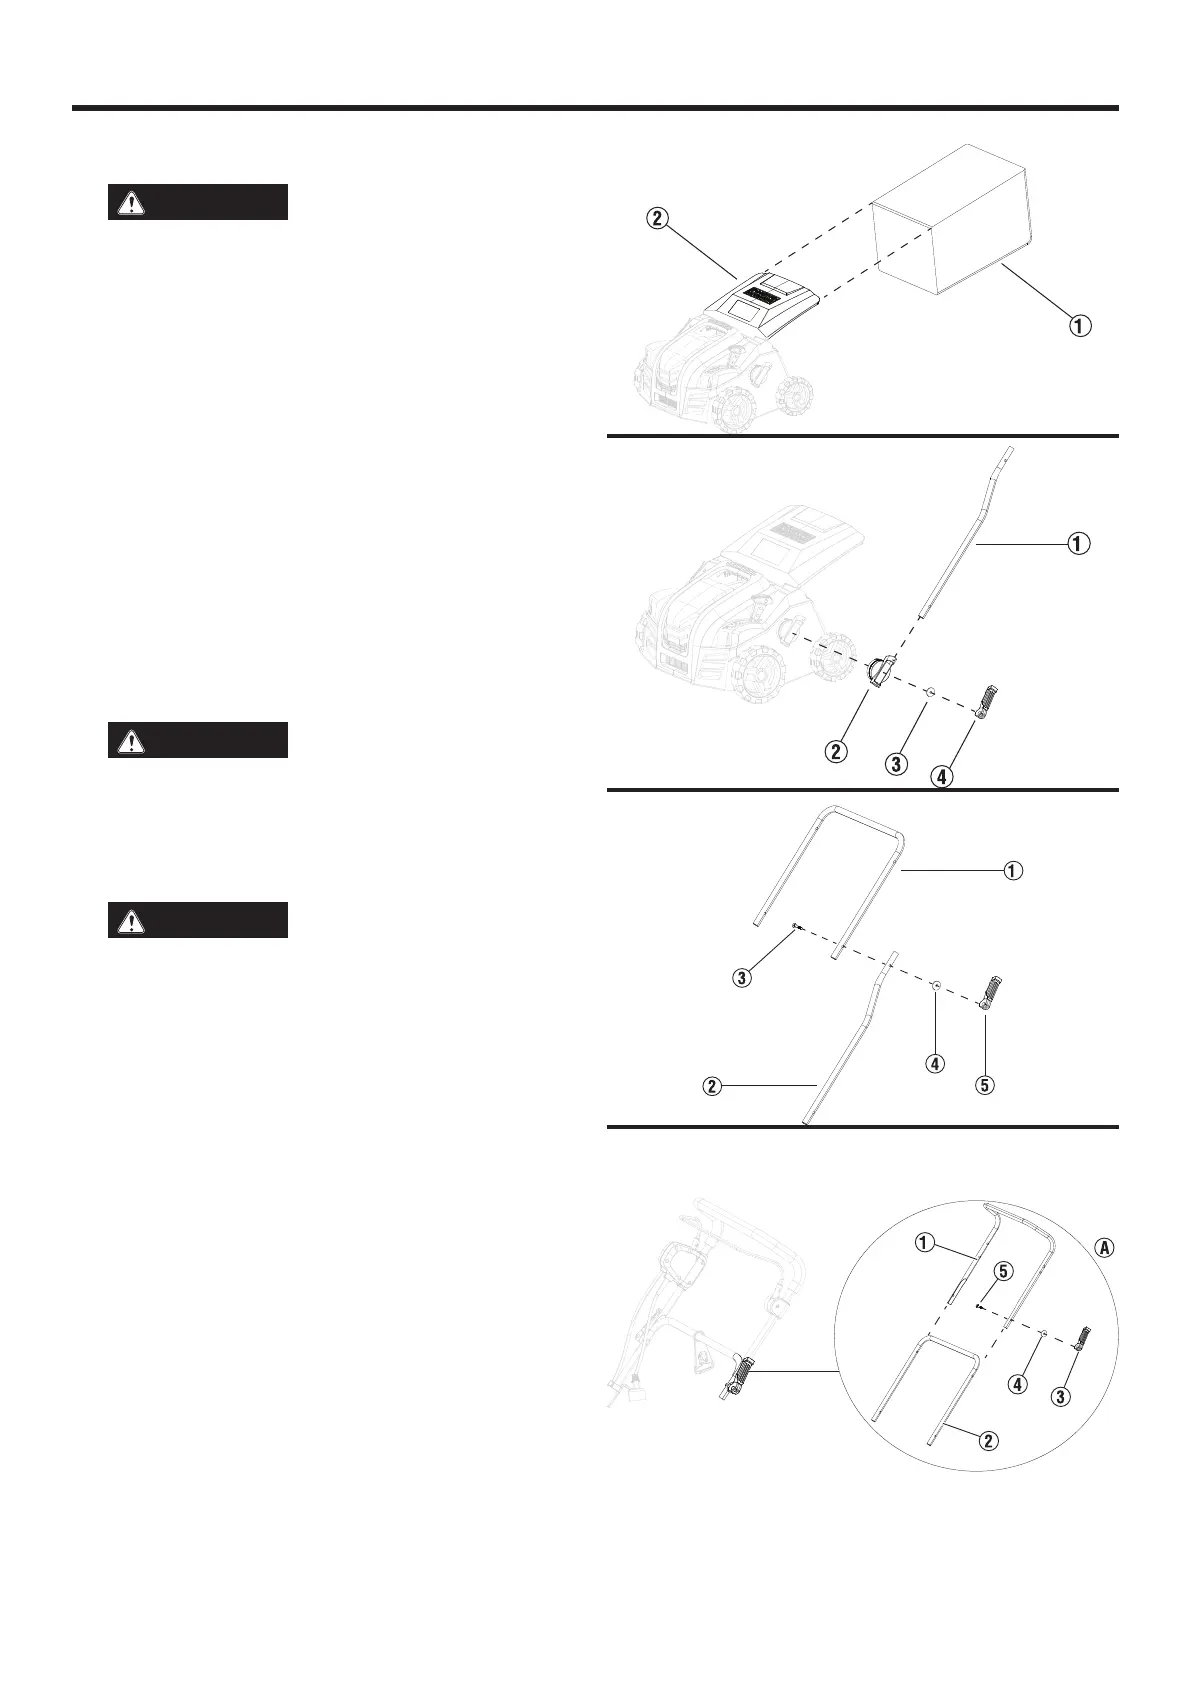
FIG. 4
REMOVING CARTON CONTENTS
WARNING
This product requires assembly. Do
not attempt to operate this product if any items in the IN-
CLUDED LIST are already assembled when removing the
carton contents. These items are not assembled by the man-
ufacturer and should require customer assembly. Using an
improperly assembled product can be hazardous and could
result in serious personal injury.
z Open the carton.
z Remove and inspect the carton contents. Confirm that all the
items in the INCLUDED LIST are present and undamaged.
z Recycle or dispose of the packaging materials.
INCLUDED LIST
Motor housing, lower handle (2), upper handle, middle handle,
cord clamp (2), handle knob (4), screws (4), scarifier blade
(1)
, rake
blade, flat washers (6) thatch bag, extension cord holder, quick knob
(4), angle adjustment knob, bracket (2), wrench and user manual.
(1)
Pre-installed on the motor housing
If any parts are missing, contact customer service at service@
wpowereq.com or call 1-855-944-3571.
WARNING
Do not alter or modify this product
unless instructed otherwise in this manual or by the manu-
facturer. Do not use attachments or accessories that are not
recommended for use with this product. Making unautho-
rized modifications and using incompatible accessories can
damage the unit and may void the warranty.
WARNING
Do not connect to power supply until
assembly is complete. Failure to comply could result in acci-
dental starting and possible serious personal injury.
ASSEMBLING THE TOOL
1. See Figure 4. Lift the thatch cover (2) and attach the thatch bag
(1) to the motor housing.
2. See Figure 5. Insert the lower handle (1) into the bracket (2).
3. Put the flat washer (3) on the angle adjustment knob (4) and
attach it to the bracket.
4. Secure the assembly to the motor housing.
5. See Figure 6. Attach the middle handle (1) to the lower handle (2).
6. Secure the middle handle to the lower handle with the adjustment
knob, screw (3) and flat washer (4).
7. See Figure 7. Slide the upper handle (1) over the middle handle (2).
8. Insert the screw (5) through the handles and secure with the flat
washer (4) and adjustment knob (3).
FIG. 5
FIG. 6
FIG. 7
A - Securing the upper handle to the middle handle
Bekijk gratis de handleiding van Westinghouse W16ADAC, stel vragen en lees de antwoorden op veelvoorkomende problemen, of gebruik onze assistent om sneller informatie in de handleiding te vinden of uitleg te krijgen over specifieke functies.
Productinformatie
| Merk | Westinghouse |
| Model | W16ADAC |
| Categorie | Niet gecategoriseerd |
| Taal | Nederlands |
| Grootte | 4198 MB |


